
Finding the right replacement motorbike battery requires matching four critical specifications: voltage, capacity (measured in Amp-hours), physical dimensions, and terminal layout. If any of these parameters do not align with your motorcycle’s original equipment manufacturer (OEM) specifications, the battery may fail to fit, damage your electrical system, or fail to start the engine. Before purchasing, locate your current battery’s model code or consult your owner’s manual to verify these exact details.
In tropical climates like Singapore, high ambient temperatures and frequent stop-and-go city riding can accelerate battery degradation. This makes selecting the correct specification and maintaining your electrical system even more critical to prevent unexpected breakdowns on the road.
Quick Answer: 4 Specs to Check Before Buying
To ensure a seamless replacement, always verify these four essential specifications before making a purchase:
Products mentioned in this guide
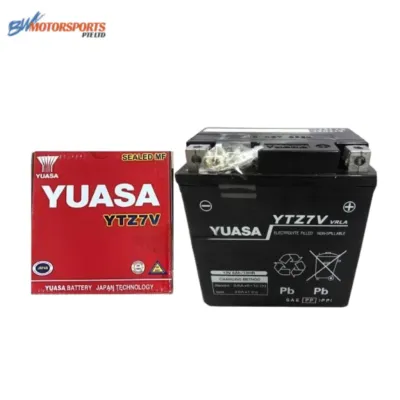
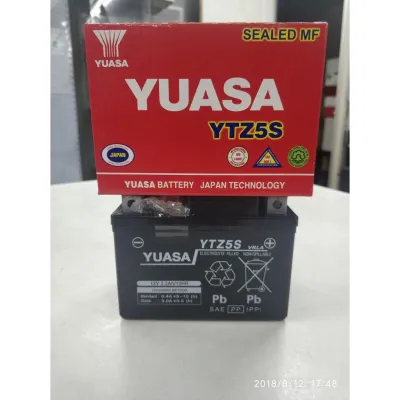
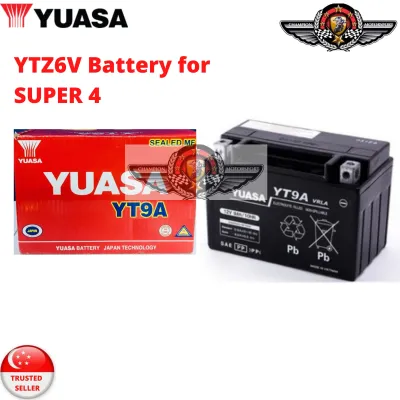
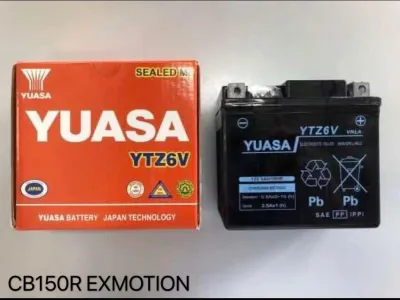
Prices are valid at publication and may change. Please refer to the product page for the latest price.
- Voltage: Most modern motorcycles use a 12-volt system, though some vintage models or small scooters require a 6-volt battery.
- Capacity (Ah): This measures the battery's energy storage. It must match or slightly exceed the original specification to support your bike's electrical load.
- Physical Dimensions: Measure the length, width, and height of your current battery or the battery tray to ensure a secure fit.
- Terminal Layout: Confirm whether the positive (+) and negative (-) terminals are on the left or right side, as motorcycle battery cables are typically too short to stretch to reversed positions.
Step 1: Match the Voltage and Capacity (Ah)
The first step in selecting a motorbike battery is identifying its electrical requirements. You can find these specifications printed directly on the label of your existing battery or listed in your motorcycle’s owner’s manual. If the label is worn or missing, refer to the manufacturer’s official technical documentation for your specific model and year.

Matching the voltage is non-negotiable. Installing a 12-volt battery into a 6-volt system will instantly destroy sensitive electrical components, including the ignition coils and lights. Conversely, a 6-volt battery will not provide enough power to operate a 12-volt starter motor. Always verify the voltage rating before proceeding.
The Amp-hour (Ah) rating indicates how much current the battery can deliver over a specific period. While you should aim to match the OEM rating exactly, a slightly higher Ah rating is generally acceptable if the battery physically fits. However, installing a battery with a lower Ah rating than recommended can lead to rapid discharge, starting difficulties, and premature battery failure under heavy electrical loads.
For riders with high-displacement or high-compression engines, Cold Cranking Amps (CCA) serve as a vital secondary check. CCA measures the battery’s ability to start the engine in cold temperatures or under high resistance. If your motorcycle requires high starting torque, ensure the replacement battery meets or exceeds the OEM CCA recommendation to avoid sluggish starting performance.
Step 2: Measure the Battery Box and Case Dimensions
Even if a battery matches your electrical specifications, it is useless if it does not physically fit into your motorcycle’s battery compartment. Motorcycle manufacturers design battery trays with tight tolerances to prevent movement during rides. Therefore, precise physical measurements are essential.
Use a ruler or caliper to measure the length, width, and height of your current battery. If you do not have the original battery, measure the internal dimensions of the battery tray itself. Be sure to account for any hold-down brackets, rubber straps, or protective foam spacers that secure the battery in place, as these accessories require dedicated clearance.
Many manufacturers use standardized case size codes, such as YTX9-BS or YTZ10S, which indicate specific physical dimensions and terminal configurations. While these codes are helpful indicators, physical dimensions can still vary slightly between different brands. Always cross-reference the physical millimeter measurements of the new battery against your tray dimensions before finalizing your purchase.
An improperly sized battery poses a significant safety risk. A battery that is too small may slide around, causing the terminals to rub against the frame and potentially spark a short circuit. A battery that is too large can pinch electrical wires or prevent the seat and body panels from mounting correctly, leading to structural damage.
Understanding Case Style Standards
Many motorcycle batteries follow standardized naming conventions established by major manufacturers. These alphanumeric codes often reveal the battery’s physical size, terminal layout, and performance characteristics. However, because aftermarket brands may use slightly different naming variations, physical measurement remains the most reliable verification method.
Step 3: Verify Terminal Orientation and Connector Type
Terminal orientation is a critical factor that is easily overlooked. Motorcycle battery cables are engineered to be as short as possible to minimize electrical resistance and save space. Consequently, there is rarely any slack in the wiring harness to accommodate a battery with reversed terminals.
Look at your existing battery from the front (the side with the terminals closest to you) and note which side is positive (+) and which is negative (-). A left-positive layout cannot be easily swapped for a right-positive layout. Forcing cables to stretch across the battery to reach reversed terminals can strain the wiring, damage the terminal posts, or cause an accidental short circuit if the positive cable touches the metal frame.
Additionally, examine the shape and design of the terminal connectors. Some batteries use flush-mount terminals, while others feature upright brass posts or threaded female terminals. Ensure the replacement battery’s terminal style matches your motorcycle’s cable connectors to guarantee a flush, secure, and vibration-resistant connection.
If you find that the cables do not reach the new battery’s terminals safely, do not attempt to splice or stretch the wires yourself. Consult your vehicle’s manual or seek assistance from a qualified motorcycle technician to ensure any wiring modifications comply with safety standards.
Step 4: Choose the Right Battery Chemistry for Your Riding Style
Motorcycle batteries are available in several distinct chemistries, each offering unique maintenance requirements, weight profiles, and performance characteristics. Choosing the right chemistry depends on your riding habits, budget, and willingness to perform regular maintenance.
- Conventional Flooded Lead-Acid: These are the traditional choice. They are typically the most affordable option but require regular maintenance, including checking and replenishing the electrolyte levels with distilled water. Because they contain liquid acid, they must remain upright to prevent leaks and are highly susceptible to damage from severe vibrations.
- Absorbent Glass Mat (AGM) and Gel: These are popular maintenance-free alternatives. These batteries feature immobilized electrolytes, meaning they are spill-proof, highly resistant to vibration, and can be mounted at various angles. They require no water top-ups and generally offer better charge retention during periods of inactivity, making them ideal for casual riders.
- Lithium-ion (LiFePO4): These represent the premium tier. They are exceptionally lightweight, offer high cranking power, and discharge very slowly when stored. However, they require strict charging system compatibility. Lithium batteries are highly sensitive to overcharging and require a specialized charger; using a standard lead-acid charger can permanently damage the battery or create a safety hazard.
Before upgrading your battery chemistry—such as switching from a conventional lead-acid battery to a lithium-ion battery—verify that your motorcycle’s charging system is compatible. Older motorcycles with unregulated charging systems can easily overcharge and destroy lithium batteries. If you are unsure about your charging system’s output, consult a professional mechanic before upgrading.
Step 5: Test the Charging System Before Installation
Installing a brand-new battery into a motorcycle with a faulty charging system is a recipe for rapid battery failure. If your alternator, stator, or regulator/rectifier is malfunctioning, your new battery will quickly drain and may suffer permanent internal damage.
Before installing the new battery, use a digital multimeter to check your motorcycle’s electrical health. With the engine running at a moderate idle, measure the voltage across the battery terminals. A healthy charging system typically registers between 13.5 and 14.5 volts. If the reading is below 13 volts or exceeds 15 volts, your regulator/rectifier or stator may be failing.
You should also check for parasitic drains, which occur when electrical components draw power even when the ignition is turned off. To do this, set your multimeter to measure milliamps, disconnect the negative battery cable, and connect the meter in series between the cable and the terminal. A high reading indicates an electrical short or an aftermarket accessory that is continuously draining the battery.
If your diagnostic tests reveal any charging system irregularities, stop the installation immediately. Do not connect the new battery until the underlying electrical issues are resolved. If you are uncomfortable performing these electrical tests, take your motorcycle to a qualified professional mechanic for a comprehensive diagnostic evaluation.
Frequently Asked Questions (FAQ)
Can I use a standard car battery charger on my motorbike battery?
No, using a standard automotive battery charger on a motorcycle battery is highly risky. Car chargers typically deliver a high amperage (often 10 amps or more) designed for much larger batteries. Applying this high current to a smaller motorcycle battery can cause rapid overheating, boiling of the electrolyte, and permanent internal damage. Instead, use a dedicated motorcycle smart charger or trickle charger rated at 1 to 2 amps. Ensure the charger features an automatic shut-off or float mode to prevent overcharging, and never use a charger’s high-amp boost or jump-start mode on a motorcycle battery.
How do I know if my current battery just needs a recharge?
To determine if your battery is simply discharged or completely failed, start by measuring its resting voltage with a multimeter after it has sat idle for several hours. A fully charged 12-volt battery should read approximately 12.6 volts or higher. If the reading is between 12.0 and 12.4 volts, the battery is discharged and needs to be connected to a smart charger. If the voltage drops below 10.5 volts during a starting attempt, or if the battery fails to hold a charge above 12.4 volts after a full charging cycle, the internal cells are likely damaged, and the battery must be replaced. Visually inspect the battery casing as well; any signs of bulging, cracking, or leaking indicate permanent physical failure.
Community discussion
Share your experience or ask a question. Comments are reviewed before publication.