
Selecting the right handle switch for your Honda CB400 is a critical decision that directly impacts your riding safety, comfort, and the electrical integrity of your motorcycle. The Honda CB400 Super Four has enjoyed a long production run spanning several decades, evolving from the early carbureted Project Big One models of the 1990s to the highly sophisticated, fuel-injected Hyper VTEC Revo generations. Because of this extensive history, there is no single universal switch that fits every CB400. Choosing the correct replacement requires a systematic approach to verify physical dimensions, electrical compatibility, and build quality.
A malfunctioning handle switch can lead to dangerous situations on the road, such as unresponsive turn signals, a failing horn, or an engine that suddenly cuts out. Whether you are replacing a worn-out original component, restoring a classic model, or upgrading your controls, understanding the specific requirements of your motorcycle is essential. This guide will walk you through the technical details of identifying your bike’s specifications, evaluating switch quality, deciding between full assemblies and internal modules, and planning a safe installation.
Identify Your CB400's Handlebar and Electrical Requirements
Before you begin browsing online marketplaces or visiting local spare parts shops, you must determine the exact physical and electrical specifications of your Honda CB400. The first step is to measure the handlebar diameter at the precise points where the left and right switch assemblies clamp onto the bar. While the vast majority of Honda motorcycles, including the CB400, use standard 22.2mm (7/8 inch) handlebars, aftermarket modifications by previous owners can sometimes introduce non-standard bars. Using a digital caliper to verify this measurement ensures that the replacement switch housing will clamp securely without slipping or requiring makeshift shims.
Products mentioned in this guide
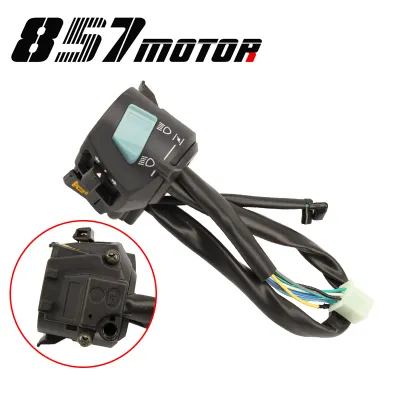
![[Best Price Guaranteed] Double hole Headlight Left Right Turn Horn Lgnition Start Switch handle Button Assembly For HONDA CB400 1992-1998 CB 400](https://img.lazcdn.com/g/p/2a5aa32bcc75b6453cb76ed9cd4c8716.png_400x400q80.png_.webp)
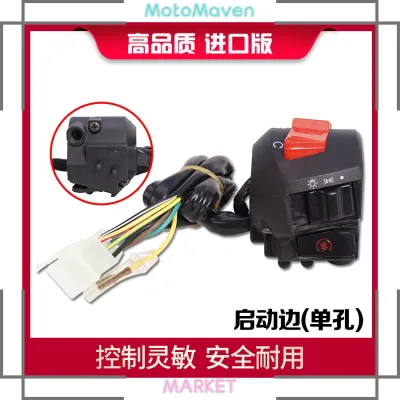
![[Zerali] MotoMaven Suitable for Honda CB400 Accessories 92-94 95-98vtec Sapphire Hornet Left and Right Handle Switch Assembly](https://img.lazcdn.com/g/p/cb88c56901126920949a3ef4317a7eac.jpg_400x400q80.jpg_.webp)
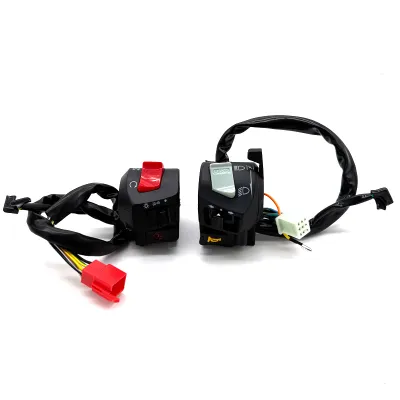
Prices are valid at publication and may change. Please refer to the product page for the latest price.
Next, you must inspect the existing wiring harness connectors and pin configurations, which are typically tucked away inside the headlight bucket. The left and right handle switches serve entirely different functions, meaning they use separate wiring bundles with distinct connector blocks. For example, the left switch assembly, which controls the turn signals, horn, and high/low beams, often features a multi-pin connector (such as a 9-pin or 12-pin block) along with individual bullet connectors for specific auxiliary lines. The right switch assembly, managing the starter motor and engine kill switch, will have its own dedicated connector configuration. You should carefully document the number of pins, the gender of the connectors, and the color-coding of the wires before purchasing any replacement.
It is also vital to list the mandatory control functions required for your specific CB400 model year and regional regulations. Older CB400 models often feature a physical three-position headlight switch (Off, Position, On) on the right handlebar, whereas newer models designed for markets with mandatory daytime running lights have the headlight hardwired to remain on constantly. Additionally, some generations include a hazard light switch, a passing light trigger (the “pass” button on the front of the left housing), or a choke lever integrated directly into the left switch assembly. Purchasing a switch designed for a different generation can leave you with redundant buttons or, worse, missing essential controls required for road legality and safety inspections.
Evaluate Handle Switch Quality and Functional Requirements
When sourcing a replacement cb400 handle switch, you will generally choose between Original Equipment Manufacturer (OEM) parts and aftermarket alternatives. OEM Honda parts offer the highest level of fitment precision, matching wire colors, and material longevity, but they carry a higher price tag. High-quality aftermarket options can be a viable, cost-effective alternative, provided you carefully evaluate their construction. Avoid ultra-cheap, unbranded universal switches, as they often use thin plastic housings, brittle wiring, and low-grade internal contacts that degrade rapidly under operational stress.

Weather resistance and UV stability are critical considerations, especially if you ride in tropical climates like Singapore’s, where motorcycles are regularly exposed to intense sunlight, high humidity, and sudden, torrential downpours. Water entering the switch housing can cause immediate electrical short circuits, leading to phantom horn activation, corroded contacts, or starter motor failure. Look for switch assemblies that feature robust rubber boots around the button shafts, internal silicone seals, and dedicated drain holes at the bottom of the housing to allow any trapped moisture to escape. The plastic housing itself must be made of high-density, UV-stabilized ABS or polycarbonate to prevent it from becoming brittle, fading, or cracking after prolonged sun exposure.
Ergonomics and tactile feedback play a direct role in rider safety. When navigating busy traffic, you must be able to operate the turn signals, horn, and high beams instinctively without taking your eyes off the road. The buttons and toggles should have a distinct, positive “click” or detent that can be felt clearly even through thick riding gloves. A mushy or overly stiff switch can lead to delayed responses or accidental activation of the wrong control, compromising your control over the motorcycle.
Choose Between Full Assemblies and Internal Modules
When faced with a faulty handle switch, you must decide whether to replace the entire housing assembly or attempt to repair the unit by replacing individual internal modules. A full housing assembly includes the outer plastic shells, all pre-installed switches, the complete wiring harness, and the correct terminal connectors. This option is highly recommended if your current switch housing is physically cracked, faded, or if the internal wiring harness has suffered extensive corrosion or heat damage from a previous electrical short.
Conversely, if the outer housing is in excellent condition and only a single component—such as the starter button or the turn signal toggle—is malfunctioning, you may choose to replace only the internal switch module. Some manufacturers and specialized parts suppliers offer individual contact blocks or switch mechanisms. While this approach is significantly more economical and preserves the original OEM housing, it requires a high level of patience and technical skill. You will need to carefully disassemble the housing, desolder the old switch contacts, solder the new module in place, and ensure the delicate internal springs and detents are correctly aligned.
The trade-offs between these two configurations center on installation effort, cost, and future maintenance. Opting for a full assembly is a plug-and-play solution that minimizes down-time and reduces the risk of wiring errors, making it the preferred choice for most riders. However, if you enjoy detailed electrical work and possess the necessary soldering tools, replacing internal modules allows you to maintain the authentic look of your original controls while saving on parts costs. Keep in mind that finding individual internal modules for older CB400 generations can sometimes be challenging, whereas complete aftermarket assemblies are more widely available.
Verify Compatibility and Plan for Safe Installation
Before finalizing your purchase, you must cross-reference the replacement part number or physical dimensions with your motorcycle’s official documentation. Never assume compatibility based solely on a generic product title or category listing. Honda CB400 models are often classified by their frame codes (such as NC31, NC39, or NC42), and parts can vary significantly between these designations. Checking the official Honda parts catalog using your bike’s Vehicle Identification Number (VIN) is the most reliable way to guarantee a perfect match.
Proper wire routing is a critical safety factor during the installation process. The wiring harness from the handle switches must be routed carefully along the handlebars, down through the triple clamps, and into the headlight bucket or main frame harness. You must ensure there is sufficient slack in the wiring bundle so that when the handlebars are turned fully from lock to lock, the wires are not stretched tight, pinched against the steering stops, or rubbed against sharp metal edges. A pinched wire can quickly wear through its insulation, causing a short circuit that could disable your motorcycle mid-ride.
Before commencing any electrical work on your motorcycle, you must disconnect the negative terminal of the battery. This simple safety step eliminates the risk of accidental short circuits, sparks, or damage to sensitive electronic components like the ignition control unit (CDI) or engine control unit (ECU). Once the new switches are installed and the battery is reconnected, perform a comprehensive post-installation function test. Verify that the horn, turn signals, high/low beams, passing light, engine kill switch, and starter button all function correctly and do not interfere with one another.
Finally, recognize your limits when dealing with motorcycle electronics. If you discover that the wire colors on your new switch do not match your motorcycle’s harness, if you encounter previous custom wiring modifications that you do not understand, or if you are uncomfortable with soldering and terminal crimping, stop the installation immediately. Operating a motorcycle with faulty or improperly wired controls poses a severe safety hazard. In such cases, consult a qualified motorcycle electrician or a professional workshop to complete the installation safely and ensure your bike remains fully road-worthy.
Frequently Asked Questions (FAQ)
Can I use universal motorcycle handle switches on a Honda CB400?
While universal motorcycle handle switches are widely available, using them on a Honda CB400 presents several physical and electrical challenges. Physically, OEM Honda handlebars feature pre-drilled locating holes that align with small pins inside the original switch housings to prevent them from rotating when buttons are pressed. Universal switches often lack these pins or have them in different positions, requiring you to either drill new holes in your handlebars or grind down the pins, which can lead to a loose, spinning switch assembly. Electrically, universal switches rarely feature plug-and-play connectors that match the CB400’s wiring harness, forcing you to cut, splice, and solder individual wires, which increases the risk of electrical faults and water ingress.
How do I know if my handle switch housing is cracked or just loose?
To determine if your handle switch housing is damaged or simply loose, start with a thorough visual inspection. Look closely for hairline stress fractures around the mounting screw holes and along the seams where the two halves of the housing meet. If the housing rotates on the handlebar but shows no visible cracks, the internal locating pin may have sheared off, or the mounting screws may have vibrated loose. You can attempt to tighten the mounting screws gently; however, you must avoid over-tightening them, as excessive torque will easily crack the plastic housing. If the locating pin is broken or the screw threads inside the plastic are stripped, the housing will need to be replaced to ensure safe operation.
Do I need to disconnect the battery before replacing the handle switches?
Yes, it is absolutely essential to disconnect the negative battery terminal before starting any work on your motorcycle’s handle switches. The wiring harness running to the switches carries live electrical current directly from the battery to power the lights, horn, and ignition circuits. Working on these live wires with metal tools or exposing open terminals increases the risk of accidental short circuits, which can instantly blow fuses, melt wiring insulation, or permanently damage expensive electronic components such as the CDI or ECU. Disconnecting the battery ensures a safe working environment and protects your motorcycle’s electrical system from costly damage.
Community discussion
Share your experience or ask a question. Comments are reviewed before publication.