
Selecting the ideal Rockbros bike light for night commuting in Singapore depends on your specific route, balancing the bright streetlights of urban roads with the darker stretches of the Park Connector Network (PCN). While high-power headlights are essential for unlit paths, well-lit city streets require lights that prioritize side visibility and anti-glare beam shapes to avoid blinding oncoming traffic. By evaluating your daily route, understanding battery runtimes, and checking weatherproofing standards, you can choose a reliable lighting setup that keeps you visible and safe throughout your commute.
When navigating Singapore’s diverse cycling infrastructure, your lighting needs will shift constantly between active illumination and passive visibility. A rider traversing the well-lit roads of the Central Business District requires a different setup than someone riding home along the unlit, tree-covered paths of the Green Corridor. Understanding how to evaluate light output, beam patterns, and mounting systems ensures you invest in a setup that matches your daily journey.
Core Selection Criteria for Urban Night Commuting
To choose the right bike light, you must first understand the difference between seeing the road and being seen by others. On well-lit urban roads, your primary goal is to alert motorists, pedestrians, and other cyclists to your presence. For these environments, a light with a wide, dispersed beam pattern and high side visibility is far more valuable than a narrow, ultra-bright spotlight that only illuminates a small patch of asphalt directly ahead.
Products mentioned in this guide
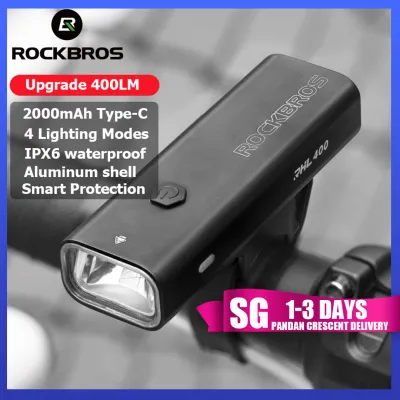
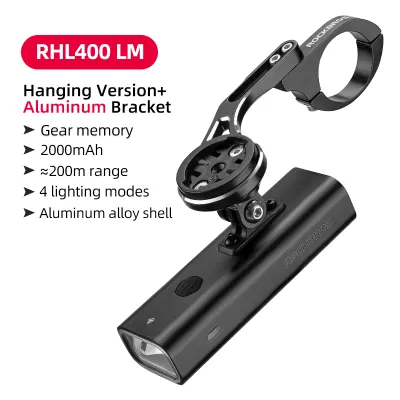
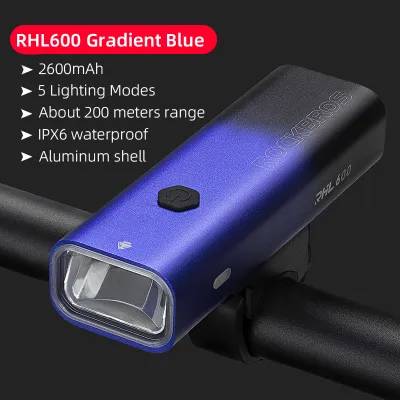
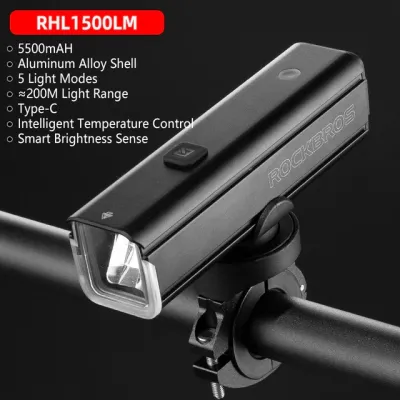
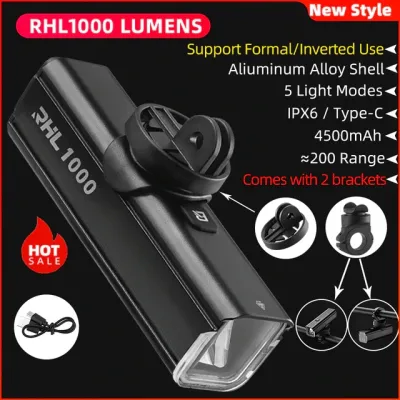
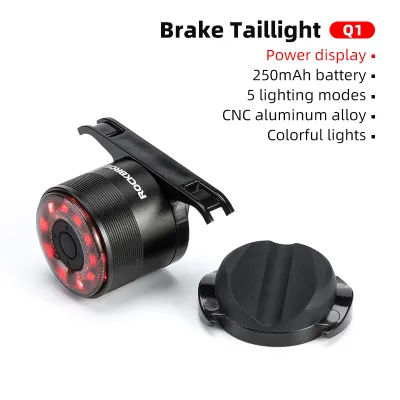
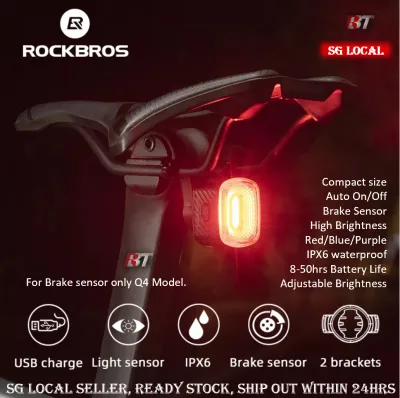
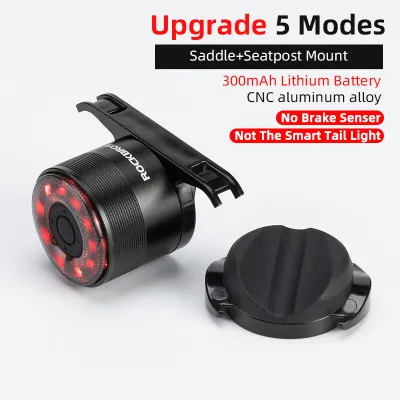
Prices are valid at publication and may change. Please refer to the product page for the latest price.
Lumen output is the standard measure of brightness, but higher is not always better for city riding. For typical street commuting, a front light operating between 200 and 400 lumens is generally sufficient to make you highly visible without causing discomfort to oncoming traffic. If your route includes unlit park connectors or coastal paths, you will need a light capable of producing 800 to 1,000 lumens to safely spot obstacles, debris, or pedestrians in the dark.
Beam shape plays a critical role in road safety and etiquette. Look for lights designed with a cut-off beam pattern, often referred to as anti-glare or StVZO-compliant designs. These lights direct the beam downward onto the ground rather than upward into the eyes of oncoming path users. Additionally, check the light housing for side cutouts or transparent windows that allow light to escape laterally, significantly improving your visibility at junctions and roundabouts.
Mounting stability is another essential factor, especially when riding over road seams, speed tables, or uneven pavement. A high-quality bracket should secure the light firmly to your handlebars without slipping or vibrating. Consider whether you prefer a tool-free silicone strap mount for easy removal or a bolted out-front bracket that positions the light inline with your stem. Helmet mounts can serve as an excellent secondary light source, allowing you to direct light simply by turning your head, but they should always be paired with a fixed handlebar light.
Smart sensors and automated features add a layer of convenience and safety to daily commutes. Some modern bike lights feature ambient light sensors that automatically adjust the brightness level based on surrounding conditions, dimming under bright streetlights and brightening in dark underpasses. Auto-on/off features detect when the bicycle is stationary, putting the light into a standby mode during long waits at traffic lights to conserve battery power, and instantly waking it when you resume riding.
Matching Rockbros Light Categories to Your Route
Rockbros offers several categories of bike lights, each tailored to specific riding environments and commuting distances. High-output front lights, typically housed in durable aluminum alloy casings, are designed for maximum light projection and heat dissipation. These robust units are ideal for long-distance commuters who travel along unlit suburban roads or extensive park connector routes where high-speed riding requires a long, clear view of the path ahead.

For shorter, well-lit neighborhood rides or last-mile commutes to MRT stations, compact and lightweight safety lights are often the most practical choice. These lights usually feature integrated silicone straps, making them incredibly easy to mount and remove in seconds. While they offer lower lumen outputs, their compact size and lightweight design make them perfect for slipping into a pocket or backpack when parking your bike in public areas.
Rear safety lights are non-negotiable for any night commute, serving as your primary defense against rear-end collisions. When selecting a rear light, look for models that offer versatile mounting options, such as seatpost brackets or saddle rail mounts. If you ride a bicycle with an aerodynamic seatpost, verify that the light includes a rubber adapter shaped to fit aero profiles securely without twisting.
Smart rear lights equipped with built-in accelerometers offer a significant safety advantage in heavy urban traffic. These lights function similarly to automotive brake lights, detecting sudden deceleration and temporarily switching to a solid, ultra-bright mode to warn vehicles behind you. Pairing a smart rear light with a highly visible flashing mode ensures you remain noticeable to distracted drivers, even amidst the visual clutter of city streetlights and neon signs.
Evaluating Battery Runtime and Charging Convenience
To ensure your lights never fail mid-commute, you must accurately estimate your weekly runtime requirements. Calculate the total duration of your daily round-trip commute and multiply it by the number of days you plan to ride between charges. Always select a light with a rated battery life that exceeds this calculated duration by at least fifty percent to account for unexpected delays, detours, or natural battery degradation over time.
Understanding the difference in power consumption between steady and flashing modes is key to managing battery life. Steady modes provide a constant beam of light, which is necessary for seeing the road ahead but drains the battery rapidly. Flashing or pulsing modes consume significantly less energy while making you highly visible to others. For optimal safety and battery efficiency, use a steady low-to-medium beam on your front light to see the path, paired with a flashing rear light to attract attention.
Modern bike lights almost universally utilize USB-C charging ports, which offer faster charging speeds and greater convenience than older micro-USB standards. This allows you to use the same charging cable for your phone, laptop, and bike lights, simplifying your desk setup at the office. If you undertake exceptionally long rides, check if the light supports charging while in use, allowing you to connect a portable power bank to extend the runtime indefinitely.
Battery health indicators are crucial for preventing unexpected power loss during a ride. Look for lights that feature multi-stage LED indicators on the power button or a digital display showing the remaining battery percentage. To maximize the lifespan of the internal lithium-ion battery, avoid leaving the light completely discharged for extended periods, and try to charge it before the battery level drops below twenty percent.
Weatherproofing and Durability for Tropical Climates
Singapore’s tropical climate presents unique challenges for electronic accessories, characterized by sudden, torrential downpours and persistent high humidity. A bike light must possess robust weatherproofing to prevent moisture from penetrating the housing and causing short circuits or corrosion. When browsing product specifications, pay close attention to the Ingress Protection (IP) rating, which indicates the level of water resistance.
For daily commuting in all weather conditions, look for a light with a minimum rating of IPX6, which certifies protection against high-pressure water streams from any angle. An IPX4 rating only protects against light splashes and may fail during a sudden tropical thunderstorm. Lights with an IPX7 rating can withstand complete submersion in water for short periods, providing the ultimate peace of mind during heavy monsoon seasons.
Before purchasing, physically inspect the design of the charging port cover and physical buttons. The rubber USB port cover should fit tightly, flush against the body of the light, with a deep lip to prevent water from seeping in around the edges. Examine the seals around the lens and the seams of the housing; high-quality lights often feature seamless aluminum bodies or tightly sealed composite shells that minimize potential entry points for moisture.
Proper post-ride maintenance is essential to preserve the weatherproofing seals of your bike lights over years of use. After riding through a heavy downpour, wipe the exterior of the light dry with a clean microfiber cloth before opening the charging port cover. Never charge a wet light, as moisture around the charging contacts can cause permanent damage. Store your lights in a cool, dry, well-ventilated indoor space, avoiding damp riser cupboards or outdoor bike racks where humidity can slowly degrade the internal electronics.
Installation, Visibility, and Road Safety Checks
Correct installation is just as important as choosing the right light, directly impacting both your safety and the comfort of other road users. When mounting your front light, ensure it is positioned parallel to the ground or angled slightly downward. The center of the beam should illuminate the road approximately five to ten meters ahead of your front wheel, providing ample reaction time for hazards without shining directly into the eyes of oncoming pedestrians or cyclists.
Regularly check the tightness of your mounting brackets to prevent the light from shifting during a ride. Vibrations from riding over tactile paving, speed bumps, or rough asphalt can slowly loosen mounting screws or stretch silicone straps. A loose front light can suddenly slip downward, leaving you in complete darkness, or tilt upward, blinding oncoming traffic and creating a hazardous situation.
Before setting off on any night commute, perform a quick pre-ride visibility check to ensure your lighting system is fully functional and unobstructed. Turn on both lights and walk a few meters away from your bicycle, viewing it from the front, sides, and rear. Verify that your clothing, backpack, saddlebag, or mudguards do not block the light beams or obscure any integrated side reflectors.
Finally, remember that bike lights are active safety devices that complement, rather than replace, passive safety gear. Ensure your bicycle is equipped with the legally required reflectors, including a white front reflector, a red rear reflector, and amber wheel reflectors. Wearing high-visibility or reflective clothing further enhances your safety, making it easier for motorists to recognize your silhouette and anticipate your movements on the road.
Frequently Asked Questions (FAQ)
Do I need a high-lumen front light for well-lit city streets?
No, you do not need an extremely high-lumen light for well-lit urban roads. On bright city streets, your primary goal is to be seen by other road users rather than to illuminate a dark path. A front light operating between 200 and 400 lumens with a wide, dispersed beam pattern is highly effective for urban commuting, as it provides excellent visibility without blinding oncoming traffic or draining your battery unnecessarily.
How do I maintain the waterproof seals on my bike light?
To maintain the waterproof seals, always ensure the rubber charging port cover is pressed firmly and completely flush against the light housing before every ride. After riding in wet weather, wipe the exterior of the light dry with a clean cloth before opening the port cover to charge. Periodically inspect the rubber seals for cracks, dirt, or debris, and clean them gently with a dry cotton swab to ensure a tight, moisture-resistant seal.
Community discussion
Share your experience or ask a question. Comments are reviewed before publication.