
Assembling a functional motorcycle wash kit requires more than just a bucket and a sponge. Motorcycles feature a complex mix of painted surfaces, exposed metals, sensitive electronics, and rubber components that demand specific care. To build a highly functional kit from scratch, you need a dedicated pH-neutral motorcycle wash, specialized degreasers, a set of scratch-free microfiber mitts, dedicated detail brushes for tight engine fins, a separate wheel brush, high-pile drying towels, and post-wash protectants like chain lubricant. Having these specialized tools organized in a dedicated wash bucket ensures you can clean your bike thoroughly without scratching the paint or damaging sensitive seals.
Choosing the Right Cleaning Chemicals for Your Bike
The foundation of any motorcycle wash kit is the selection of liquid cleaners. Unlike cars, motorcycles have exposed engines, wiring, and suspension components that are highly vulnerable to harsh chemicals. A dedicated motorcycle wash or a high-quality, pH-neutral, wax-free automotive soap is essential. Always read the product label to verify that the formula is safe for anodized aluminum, matte finishes, and clear plastics.
Specialized spot treatments are also necessary to handle the unique grime a motorcycle accumulates. A dedicated chain degreaser is required to break down old, sticky chain fling and road grit on the drive chain. Additionally, a gentle bug and tar remover helps dissolve baked-on organic matter from the front fairings and headlight lenses without aggressive scrubbing.
Products mentioned in this guide
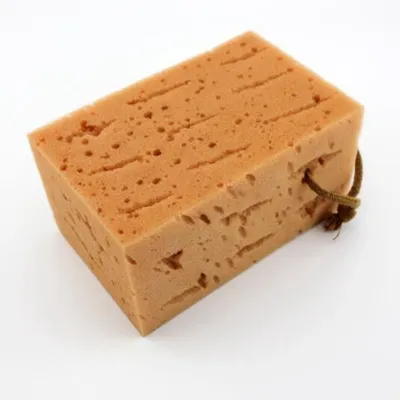
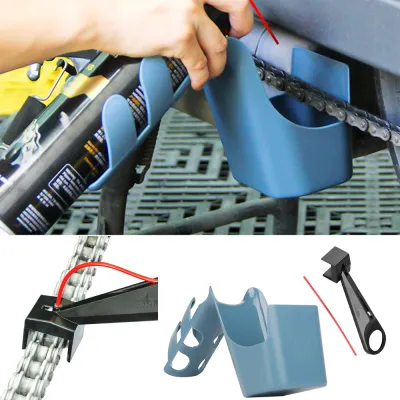
Prices are valid at publication and may change. Please refer to the product page for the latest price.
Never use household dish detergents or general-purpose household cleaners on your motorcycle. These detergents are formulated to strip grease from dishes and will quickly strip away protective waxes, dry out rubber seals, and dull plastic trim. Before applying any chemical, cross-reference the product label with your motorcycle owner’s manual to ensure compatibility with your bike’s specific finishes, coatings, and sensitive metal alloys.
Selecting Brushes and Mitts to Prevent Surface Damage
Physical washing tools must lift dirt away from surfaces rather than dragging it across them. For broad, painted surfaces like the fuel tank and fairings, include a high-quality microfiber or lambswool wash mitt in your kit. These materials feature a deep pile that traps abrasive dirt particles safely away from the clear coat, minimizing the risk of swirl marks and fine scratches.

Because motorcycles feature complex geometries, a single mitt cannot reach every area. Dedicated detail brushes with soft, natural, or synthetic bristles are necessary for cleaning tight crevices, engine cooling fins, and around the dashboard switches. These brushes allow you to agitate dirt in hard-to-reach spots without applying excessive pressure.
You must maintain a strict separation of tools to prevent cross-contamination. Keep separate, dedicated brushes specifically for the wheels, brakes, and drive chain. Using the same mitt or brush on your painted tank that you just used to scrub greasy chain grime or abrasive brake dust will ruin your paintwork. Always verify the bristle stiffness and tool materials against your bike’s specific finishes before use, opting for softer bristles on delicate plastics and stiffer nylon brushes only for heavy-duty metal components like the chain.
Drying and Protection Tools for a Spotless Finish
Drying your motorcycle quickly is crucial to prevent water spots and stop corrosion from forming in hidden recesses. Your kit should feature large, high-pile microfiber drying towels. These towels absorb water efficiently and safely cushion any remaining microscopic debris. Avoid using old cotton t-shirts or household towels, which can easily scratch delicate clear coats.
To clear water from hard-to-reach areas, consider adding a forced-air drying tool to your kit. A dedicated electric motorcycle dryer or a clean, moisture-filtered compressed air line is highly effective at blowing water out of mirrors, handlebar switches, spark plug wells, and engine crevices where towels cannot reach. This step is vital for preventing electrical issues and rust in hidden fasteners.
Once dry, the motorcycle requires targeted protection. Include basic post-wash protectants in your kit, such as a high-quality chain lubricant, cable lubricants, and a plastic trim restorer. Always check the product instructions for these protectants to ensure they are safe for your specific components. Most importantly, ensure that no lubricants, silicone sprays, or protectants ever contact your brake rotors, calipers, pads, or tire treads, as this can catastrophically reduce braking performance and traction.
How to Use Your Motorcycle Wash Kit: A Step-by-Step Process
Using your motorcycle wash kit effectively requires a systematic approach to protect both the cosmetic finish and the mechanical components of your bike.
Preparation and Pre-Wash: Before wetting the bike, ensure the engine, exhaust pipes, and brake rotors are completely cool to the touch. Spraying cold water on hot metal components can cause thermal shock, potentially cracking or warping parts. Once cool, perform an initial gentle rinse with a low-pressure hose to loosen and wash away large, abrasive surface dirt. This step prevents you from grinding grit into the paint during the hand-wash phase.
Main Wash and Detailing: Work from top to bottom to ensure dirt is washed downward. Use your designated microfiber wash mitt and pH-neutral soap for the upper painted surfaces, fairings, and seat. Next, use your soft detail brushes to clean the engine area, dashboard, and controls. Frequently rinse your mitt and brushes in a clean bucket of water to flush out trapped dirt. Save the lower, dirtier sections—like the wheels, swingarm, and drive chain—for last, using your dedicated wheel and chain brushes.
Rinsing and Drying: Rinse the motorcycle thoroughly with a gentle stream of clean water, working from the top down to wash away all soap residue. Immediately begin the drying process to prevent water spots, especially if washing in warm weather. Use your forced-air tool to blow water out of electrical switches, bolt heads, and the radiator core, then follow up with your high-pile microfiber drying towels to gently dry the painted bodywork.
Final Protection: Once the bike is completely dry, apply your post-wash protectants. Apply chain lubricant to the inner run of the drive chain while slowly rotating the rear wheel. If applying plastic trim restorers or metal polishes, apply them directly to a microfiber applicator pad rather than spraying them onto the bike. This controlled application ensures that no overspray lands on your brake rotors, brake pads, or tire contact patches, preserving your stopping power and riding safety.
Safety Boundaries and Kit Maintenance
Washing a motorcycle carries specific mechanical risks that require careful attention. Avoid directing high-pressure water streams directly at wheel bearings, suspension seals, steering heads, electrical connectors, or the exhaust outlet. High pressure can force water past protective rubber seals, washing away essential grease and leading to premature bearing failure or electrical short circuits.
Personal safety is equally important when handling chemical cleaners. Always wear appropriate personal protective equipment, such as nitrile gloves and eye protection, when using concentrated degreasers, wheel cleaners, or aerosolized chain lubricants. Work in a well-ventilated area to avoid inhaling chemical mists.
To keep your wash kit in top condition, establish a strict maintenance routine for your tools. Wash your microfiber mitts and towels separately from household laundry, using a dedicated microfiber detergent without fabric softeners, which can clog the fibers. Thoroughly rinse all brushes to remove grease and grit, and allow all tools to dry completely in a clean, dust-free environment before storing them in your wash bucket to prevent mold growth.
Always observe a clear stop condition: if any cleaning chemical or protectant causes unexpected discoloration, swelling of rubber parts, or a sticky residue that does not rinse away easily, stop using the product immediately. Do not attempt to scrub the residue off aggressively; instead, consult the product manufacturer or your motorcycle’s documentation to identify a safe neutralizer.
Frequently Asked Questions (FAQ)
Can I use regular car wash soap on my motorcycle?
While some basic, pH-neutral car soaps are safe to use, many automotive washes are formulated with heavy gloss enhancers, liquid waxes, or silicones. These additives can leave a slippery residue on critical motorcycle touchpoints, such as your handlebar grips, footpegs, seat, and tire sidewalls, creating a safety hazard. If you choose to use an automotive soap, verify that the label explicitly states it is wax-free and safe for exposed plastics, rubber seals, and matte finishes.
How do I know if my cleaning tools are contaminating my bike's paint?
You can identify contamination by performing a visual and tactile inspection of your tools before and during the wash. Look for embedded grit, metal shavings, or a dark, greasy film on your wash mitts and brushes. If a tool feels rough to the touch or leaves a cloudy, oily streak on a clean surface, it is contaminated. To prevent this, never use the same brush or towel on your drive chain or wheels as you do on your painted bodywork, and always rinse your tools thoroughly in clean water during the washing process.
Community discussion
Share your experience or ask a question. Comments are reviewed before publication.