
Applying vinyl car decals is an excellent way to personalise your vehicle without the permanent commitment of custom paint. However, achieving a professional, paint-like finish requires precise technique to prevent air bubbles and creases. The secret to a flawless installation lies in meticulous surface preparation, choosing the correct application method, and mastering squeegee pressure.
Before beginning, establish a clear safety boundary. Decals must never obstruct the driver’s line of sight, cover side mirrors, or obscure headlamps, taillights, and registration plates. Modern vehicles also feature advanced driver assistance systems (ADAS) with cameras and radar sensors embedded in the windscreen and bumpers. Always consult your vehicle’s owner manual to locate these sensors, as placing vinyl over them can interfere with safety features. Additionally, ensure your graphics comply with local road transport regulations regarding vehicle modifications.
Tools and Materials Needed for Decal Application
Having the correct tools on hand before you peel the backing paper is critical to a smooth installation. A standard plastic card can easily scratch or tear vinyl, so you should use a dedicated felt-edged squeegee. The soft felt edge glides smoothly over the vinyl surface, distributing pressure evenly without leaving micro-scratches on the graphic.
Products mentioned in this guide
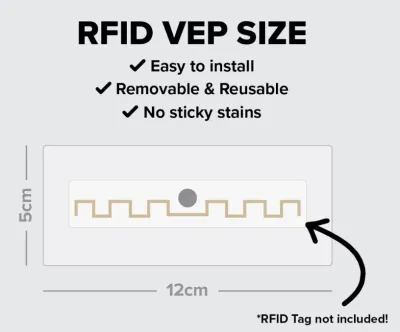
36 Lazada user ratings
Easy to install on vehicles, Waterproof and UV resistant, We are happy with this purchase. Necessary item to have as its good. Highly recomm…Read full reviewShow less
Easy to install on vehicles, Waterproof and UV resistant, We are happy with this purchase. Necessary item to have as its good. Highly recommended. Great seller and fast delivery service. Easy transaction.
We are happy with this purchase. Repeated order for this brand. Delivery is well packed and is timely. No issues. Fresh new products. Recomm…Read full reviewShow less
We are happy with this purchase. Repeated order for this brand. Delivery is well packed and is timely. No issues. Fresh new products. Recommended seller A++++++
delivery was very fast, a little bit expensive for a sheet of plastic though. yet to install hope it sticks well.
Just a simple piece of decal.
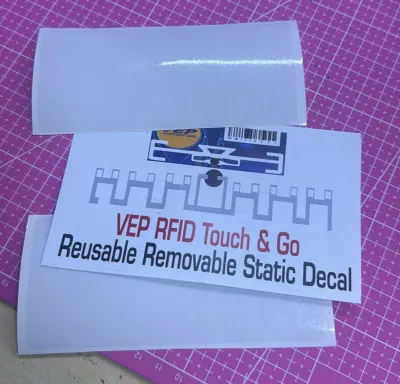
44 Lazada user ratings
received a good condition and fast delivery from the seller. thanks ☺️ very easy and seller service good.
Easy to apply and clean, Touch & Go convenience, Easy to apply and clean,
Looks good. Work as expected..
17 Lazada user ratings
Ok arrived in good condition. Looks good
Prices are valid at publication and may change. Please refer to the product page for the latest price.
For trimming excess material around door gaps or panel edges, a sharp craft knife or precision blade is indispensable. For surface preparation, gather high-quality microfiber cloths and a cleaning agent such as a 50/50 mixture of isopropyl alcohol (IPA) and distilled water, or a dedicated automotive grease remover.
If you opt for the wet application method, prepare a spray bottle filled with a slip solution of clean water and a single drop of baby shampoo. You will also need a heat gun or a high-powered hair dryer to help the vinyl conform to curves and to seal the edges. Finally, keep low-tack masking tape nearby to temporarily position your graphics.
Preparing the Car Surface for Vinyl Decals
The longevity of your vinyl decal depends almost entirely on how thoroughly you clean the vehicle’s paintwork beforehand. Even microscopic dust particles or wax residues will act as tiny “tents,” trapping air and creating permanent bubbles under the vinyl. Begin by washing the target area thoroughly with a wax-free car shampoo to remove loose dirt and road film.

Once dry, wipe the surface with your isopropyl alcohol solution or an automotive grease remover using a clean microfiber cloth. This step is vital because standard car waxes and road oils repel foreign substances, which will prevent the vinyl adhesive from bonding securely. Always test your cleaning solution on an inconspicuous painted area first to ensure it does not haze or damage your vehicle’s clear coat.
After wiping, allow the surface to dry completely, ensuring no moisture remains trapped in panel gaps or rubber seals. Inspect the paintwork closely under good lighting. If the paint is peeling, deeply scratched, rusted, or chipped, the vinyl will not adhere properly. Thin vinyl films conform tightly to the surface, meaning any underlying paint imperfections or rust bubbles will be highly visible once the decal is applied.
Choosing Between the Wet and Dry Application Methods
Selecting the right application technique depends on the size of the decal, the type of vinyl material, and your level of experience. The dry method involves applying the vinyl directly to the dry paintwork. This technique is highly effective for small decals, individual lettering, or premium vinyl wraps that feature built-in air-release technology. Air-release vinyls have microscopic channels embossed into the adhesive backing, allowing trapped air to escape easily when squeegeed.
The wet method is highly recommended for large, continuous graphics, sun strips, or vinyl films that do not have air-release channels. By spraying a fine mist of slip solution onto both the vehicle’s paint and the exposed adhesive side of the decal, you temporarily deactivate the adhesive’s immediate grip. This allows you to slide, reposition, and perfectly align the graphic without the risk of it sticking prematurely or tearing.
While the wet method is highly forgiving for beginners handling large graphics, you must verify that your specific vinyl is compatible with wet application. Some water-based adhesives can break down, lose their bonding strength, or turn cloudy when exposed to moisture. Always check the manufacturer’s instructions on the decal packaging before wetting the adhesive.
Step-by-Step Guide to Applying the Decal
Positioning and Tacking the Decal
Accurate alignment is crucial, as repositioning a dry adhesive once it touches the paint can stretch or ruin the vinyl. Start by placing the decal—with its backing paper and transfer tape still fully intact—against the vehicle. Use a measuring tape to ensure it is perfectly level and aligned with the body lines, then secure it temporarily using low-tack masking tape.
For larger decals, apply a strip of masking tape vertically down the center of the graphic to create a “hinge.” This allows you to peel back one half of the backing paper, cut it away with your precision blade, and prepare that side for application while the other half remains perfectly anchored. If you are using the wet method, mist the exposed paint and the adhesive side of the vinyl lightly with your slip solution before bringing the two surfaces together. Tack the starting edge or the center hinge firmly to the paint to establish your anchor point.
Squeegee Technique for Removing Air and Liquid
The motion and angle of your squeegee determine whether air or moisture becomes trapped under the film. Hold your felt-edged squeegee at a 45-degree angle relative to the surface. Starting from your established anchor point or center hinge, work outward toward the edges using firm, overlapping strokes.
By overlapping each stroke by about fifty percent, you ensure that no pockets of air or slip solution are bypassed. If you are using the dry method, slowly peel away the remaining backing paper with one hand while following closely behind with the squeegee in the other. For the wet method, use steady, firm pressure to push the trapped slip solution out from under the vinyl, working from the center of the graphic toward the nearest outer edge. Keep a clean microfiber cloth handy to wipe away the expelled liquid immediately so it does not seep back under the edges.
Trimming and Securing the Edges
Once the main body of the decal is flat and secure, you must finish the edges to prevent wind and water from lifting the vinyl over time. Use a fresh, sharp precision blade to trim any excess vinyl extending into door shuts, panel gaps, or rubber seals. Always cut away from the body panels, or use specialized knifeless tape, to eliminate the risk of scoring your vehicle’s paintwork or cutting into rubber weatherstripping.
After trimming, use a heat gun or a hair dryer set to a low-to-medium heat setting to gently warm the edges and any areas where the vinyl must conform to curves. Heating relaxes the vinyl’s physical tension and activates the pressure-sensitive adhesive, ensuring a permanent bond. While the vinyl is still warm, use your felt-edged squeegee or a gloved finger to press the edges firmly down into the recesses and flat against the paintwork. This post-heating step is essential to seal the edges against moisture intrusion.
Troubleshooting Common Application Mistakes
Even with careful preparation, minor errors can occur. If you discover a small air bubble after application, do not force it flat with heavy squeegee pressure, as this can stretch the vinyl and cause a permanent crease. Instead, use a fine needle to make a tiny puncture at the edge of the bubble, then gently use your squeegee to push the trapped air out.
If you encounter a wrinkle or a raised fold while applying the vinyl, stop immediately. Carefully peel the vinyl back past the affected area, taking care not to stretch the material. Apply a brief, gentle burst of heat from your heat gun to relax the vinyl back to its original flat shape, let it cool, and then re-squeegee the section slowly with firm, even strokes.
Trapped dust is more challenging to resolve once the adhesive has bonded. If you notice a speck of dust immediately, gently lift the vinyl section, use a piece of low-tack masking tape to lift the particle off the adhesive, and reapply. If the adhesive is already fully bonded or contaminated, attempting to pull it up may tear the vinyl, requiring a replacement decal.
Post-Application Care and Maintenance
To ensure your newly applied vinyl decal lasts, you must allow the adhesive to cure completely. In warm, humid climates, the high ambient humidity can slow down the evaporation of remaining moisture from a wet application. Avoid washing your car or exposing it to heavy rain for at least 24 to 48 hours after installation.
When washing, modify your routine to protect the graphic. If you use a high-pressure washer, keep the spray nozzle at least 30 cm away and avoid directing the jet directly at the edges of the decal, as high pressure can lift the vinyl. Always wash the vehicle by hand using a soft microfiber wash mitt and a mild, non-abrasive car wash soap.
Avoid using harsh chemical solvents, abrasive polishes, or cutting compounds over the decal, as these can degrade the vinyl and strip the adhesive. If your decal has a matte or textured finish, do not apply standard automotive waxes or gloss-enhancing sealants, as these products can cause uneven staining. Instead, use dedicated matte-safe detailing sprays to keep the graphic clean.
Frequently Asked Questions (FAQ)
Can I apply vinyl car decals over scratched or chipped paint?
It is highly recommended to avoid applying vinyl decals over chipped, peeling, or deeply scratched paintwork. Because vinyl films are incredibly thin and flexible, they conform perfectly to the contours of the surface beneath them. Any chips or scratches will remain highly visible as depressions under the vinyl, and rust bubbles will show through as bumps. Furthermore, the vinyl adhesive requires a solid, stable surface to bond effectively; if applied over loose or peeling paint flakes, the adhesive will pull the loose paint away from the body panel, leading to premature lifting and failure of the decal.
How long should I wait before washing my car after applying a decal?
You should wait a minimum of 48 hours before washing your vehicle after applying a vinyl decal. This waiting period is crucial to allow the pressure-sensitive adhesive to establish a complete, permanent bond with the clear coat. If you used the wet application method, this curing window is even more critical, as all trapped moisture from the slip solution must evaporate entirely before the adhesive can cure. Exposing the vehicle to water, car shampoos, or high-pressure sprays too early can re-lubricate the adhesive or force water under the edges, causing the decal to slide or peel off.

Community discussion
Share your experience or ask a question. Comments are reviewed before publication.