
To achieve a flawless, high-gloss finish on your vehicle using Autoglym products, you must follow a precise, logical sequence: pre-wash, main contact wash, decontamination, drying, polishing, and finally, waxing or sealing. This systematic approach ensures that you safely remove abrasive dirt before touching the paint, clear away bonded contaminants that hinder polish performance, restore the paint’s clarity, and lock in the results with a durable protective barrier. Skipping steps or applying products out of order can trap grit beneath your wax, leading to swirl marks, poor product bonding, and a dull finish. Always consult the specific instructions on each Autoglym bottle to verify dwell times, dilution ratios, and material compatibility before beginning.
Preparation and Safety Checks
Before applying any chemical to your vehicle, you must thoroughly assess the condition of the paintwork and prepare your working environment. Inspect the clear coat under direct light to identify deep scratches that penetrate the primer, areas of clear coat peeling, or signs of thin, oxidized paint. If you encounter severe clear coat failure or suspect an unstable aftermarket paint job, stop immediately and consult a professional detailer, as machine polishing or aggressive chemical cleaning can worsen these issues.
Gather all necessary tools before starting to prevent cross-contamination and ensure a smooth workflow. You will need separate wash mitts for the wheels and the bodywork, multiple clean microfiber towels categorized by task, applicator pads, and at least two wash buckets. Using the same towel for removing polish and buffing wax can introduce residues that ruin the final finish, so color-coding or separating your microfibers is highly recommended.
Products mentioned in this guide
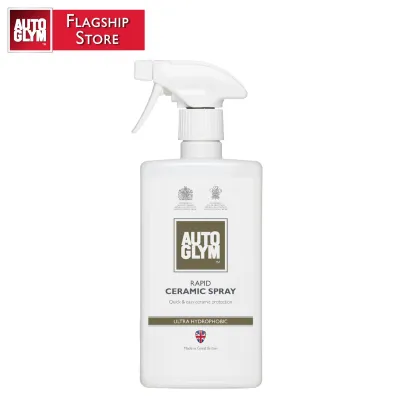
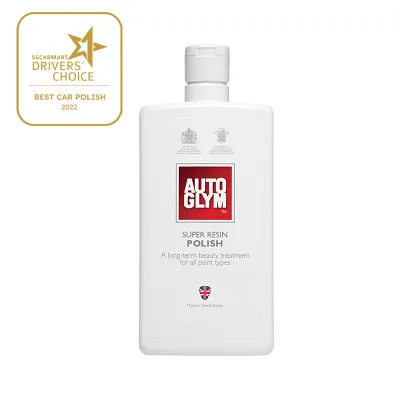
Prices are valid at publication and may change. Please refer to the product page for the latest price.
The environment in which you detail your car significantly impacts the behavior of Autoglym products. Always park the vehicle in a shaded, cool area out of direct sunlight and wind. Hot body panels cause shampoos, polishes, and waxes to dry or flash prematurely, making them incredibly difficult to buff off and increasing the risk of water spotting or chemical staining. Wind can also blow airborne dust onto wet panels, creating an abrasive layer that will scratch the paint during the contact wash or polishing phases.
Phase 1: Pre-Wash and Main Wash
The foundation of any safe detailing routine is the removal of loose grit and road grime without physically rubbing them against the clear coat. Begin by applying an Autoglym pre-wash or snow foam to the dry or pre-rinsed vehicle, depending on the specific product instructions. This step allows the active surfactants to cling to the surface, breaking down traffic film and softening stubborn dirt. Strictly follow the dwell times and dilution ratios specified on the product label, ensuring the foam does not dry on the paintwork before you rinse it thoroughly with a pressure washer from the bottom up.

Once the heavy grit is rinsed away, proceed to the main contact wash using the two-bucket method and a high-quality Autoglym car shampoo. Fill one bucket with clean water for rinsing your wash mitt, and the second bucket with water mixed with the shampoo according to the label’s recommended dilution. Dip your clean microfiber wash mitt into the shampoo bucket, wash a single panel or section of the vehicle at a time, and then rinse the mitt thoroughly in the rinse bucket to release trapped dirt before reloading it with fresh shampoo.
Always wash the vehicle from the top down, starting with the roof, hood, and trunk, and leaving the lower sills and rear bumper for last, as these areas accumulate the heaviest road grime. This sequence prevents you from transferring coarse debris from the lower panels back up to the cleaner upper sections. After completing the contact wash, perform a final, thorough rinse of the entire vehicle with a free-flowing stream of water to sheet away the remaining soap suds, checking carefully for any missed spots.
Phase 2: Decontamination and Drying
Even after a thorough wash, your paintwork may still feel rough to the touch due to bonded contaminants like tar, iron fallout, tree sap, and industrial pollution. To address these, apply a dedicated Autoglym tar remover or iron fallout cleaner to the affected areas. Ensure the product is explicitly labeled as safe for your vehicle’s specific paint finish, plastic trim, and metal accents. Allow the chemical to react according to the label instructions—often indicated by a color change as it dissolves iron particles—and rinse the surface completely before the product dries.
With the paint chemically decontaminated, dry the vehicle immediately to prevent mineral deposits and water spots from forming on the bare surface. Use clean, plush microfiber drying towels with a high GSM (grams per square meter) rating, which safely absorb water without scratching the paint. Gently glide the towel across the panels or pat the surface dry, paying close attention to door jambs, mirror housings, fuel filler caps, and trim crevices where trapped water tends to drip out later.
Once dry, conduct a physical and visual inspection of the bare paintwork under strong, focused lighting or bright, indirect daylight. Run the back of your clean hand gently over the panels; the surface should feel smooth and free of rough spots. If you detect remaining bonded grit, you may need to repeat the decontamination process or use a detailing clay bar system before proceeding, as any leftover debris will interfere with the polishing stage.
Phase 3: Polishing for Paint Correction
Polishing is the correction phase where you restore gloss, remove fine swirl marks, and eliminate light oxidation from the clear coat. Select the appropriate Autoglym polish, such as Super Resin Polish, based on your paint’s current condition, age, and whether you are applying it by hand or using a dual-action machine polisher. If your vehicle has extremely thin paint or a matte finish, verify the product’s suitability first, as standard polishes contain light abrasives or fillers designed specifically for gloss clear coats.
Work in small, manageable sections, typically no larger than 50 centimeters by 50 centimeters, to maintain control over the product’s work time. Apply a small amount of polish to a dedicated foam or microfiber applicator pad and spread it evenly across the section using light to moderate pressure. Work the polish in overlapping circular or cross-hatch motions, allowing the abrasives to break down and the cleaning agents to lift deep-seated dirt from the paint pores.
Before the polish residue dries completely hard on the panel, buff it off gently using a clean, dry microfiber towel. Inspect the section under good lighting to evaluate the level of correction and gloss restoration. If you observe hazing, severe scratching, or signs of clear coat failure during this step, stop polishing immediately and seek professional advice to avoid burning through the paint.
Phase 4: Waxing and Protection
Once your paint is polished and corrected, you must apply a protective layer to seal the finish and shield it from UV rays, acid rain, bird droppings, and road salt. Choose an Autoglym wax or sealant, such as Ultra High Definition Wax or Extra Gloss Protection, ensuring it is fully compatible with the polish you previously applied. Applying a sealant or wax over an incompatible base can cause the product to smear, haze, or fail to bond properly, drastically reducing its durability.
Apply the wax or sealant in an extremely thin, even layer using the recommended applicator pad. Applying too much product does not increase protection; instead, it makes the buffing process incredibly difficult and leads to unsightly white residue on plastic trim and rubber seals. Follow the curing or flashing times specified on the product label closely, as some sealants require a brief period to haze over, while others must be wiped off almost immediately.
To check if the wax is ready for removal, perform a quick “swipe test” by running a clean, dry fingertip across a small section of the applied product. If the paint beneath is revealed clean and smear-free, the wax is fully cured and ready to be buffed. Use a fresh, high-pile microfiber towel to buff the surface to a deep, reflective shine, turning the towel frequently to a clean side to prevent product buildup and smearing.
Post-Detailing Inspection and Upkeep
With the protection layer fully buffed, perform a final walk-around inspection of the vehicle under direct sunlight or a strong detailing light. Check the paint from multiple angles to ensure there are no high spots of uneven wax, cloudy patches, or leftover polish residue trapped in panel gaps, door handles, or trim edges. Use a clean, dry detailing brush or a fresh microfiber towel to gently clear away any stray dust or residue from these tight areas.
To prolong the life of your newly applied Autoglym protection, establish a safe and consistent maintenance routine. Future washes should be conducted using pH-neutral car shampoos that clean effectively without stripping away the wax or sealant layer. Avoid automatic car washes that use harsh chemicals or abrasive brushes, as these will quickly degrade the protective coating and reintroduce swirl marks to your polished paintwork.
Proper care of your detailing equipment is just as important as caring for your vehicle. Store all Autoglym products in a temperature-controlled environment, keeping them away from extreme heat, direct sunlight, and freezing temperatures, which can cause the chemical emulsions to separate and become unusable. Wash your microfiber towels separately from household laundry using a dedicated microfiber detergent, avoiding fabric softeners and high dryer heat, which clog and melt the delicate synthetic fibers.
Frequently Asked Questions (FAQ)
Can I apply Autoglym wax directly over a dirty car?
No, you must never apply Autoglym wax directly over a dirty or unwashed vehicle. Waxing over dirt, dust, and road grime traps these abrasive particles between the wax applicator and your paintwork, causing severe scratches and swirl marks as you rub the product onto the surface. Furthermore, the wax will bond to the layer of dirt rather than the paint itself, resulting in poor adhesion, zero protection, and a dull, smeared finish that will wash away almost immediately.
How long should I wait between polishing and waxing?
The waiting time between polishing and waxing depends entirely on the specific Autoglym products you are using. Some polishes, like Autoglym Super Resin Polish, contain light sealants that allow you to apply a compatible wax or sealant almost immediately after buffing off the polish residue. Always consult the product labels for both the polish and the wax to verify compatibility and recommended curing times, ensuring the polished surface is completely free of loose dust before applying your protective layer.
Community discussion
Share your experience or ask a question. Comments are reviewed before publication.