
Achieving a high-gloss, streak-free finish with a wash-and-wax product relies on correct dilution, proper application in the right environment, and using suitable drying tools. Unlike traditional car shampoos, these dual-action formulas deposit a thin protective layer of wax as you clean the vehicle. If applied incorrectly—such as in direct sunlight or with dirty towels—the wax can dry unevenly, leaving unsightly streaks and hazy patches. By following a systematic washing, rinsing, and buffing process, you can safely lift road grime while locking in a smooth, water-beading shine.
Preparation and Tools Needed for a Safe Wash
Before starting, always check the specific product label for recommended dilution ratios, surface compatibility, and safety instructions. Not all wash-and-wax products are formulated the same way; some are designed for standard clear coats, while others may not be suitable for matte finishes, vinyl wraps, or sensitive plastic trims. Verifying these details on the packaging ensures you do not inadvertently damage specialized surfaces.
Selecting the right tools is critical to minimizing the risk of swirl marks and scratches. Gather at least two clean buckets to implement the two-bucket wash method, which separates dirty rinse water from your clean soapy solution. Use high-quality microfiber wash mitts rather than traditional sponges, as microfiber is designed to trap dirt particles deep within its fibers away from the paint surface. For the drying phase, prepare several clean, plush microfiber drying towels with a high grams-per-square-meter (GSM) rating to ensure maximum water absorption without paint friction.
Products mentioned in this guide
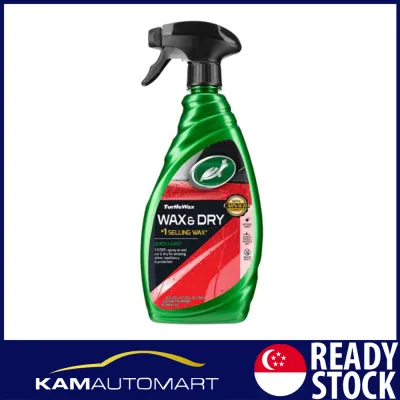
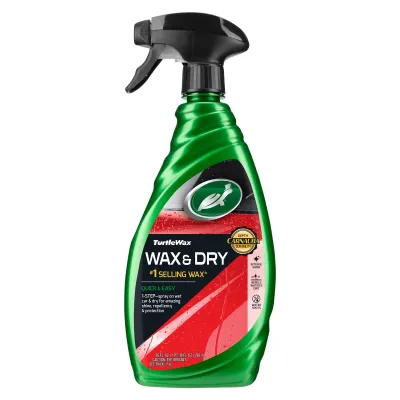
Prices are valid at publication and may change. Please refer to the product page for the latest price.
Environmental conditions play a major role in the success of your wash. Ensure the vehicle is parked in a shaded, cool area to prevent the soap and wax from drying prematurely on the paint. In warm tropical climates, such as in Singapore, car panels can heat up rapidly under direct sunlight. Washing a hot surface causes the water and wax emulsion to flash-dry, leaving stubborn water spots and wax residue that are incredibly difficult to buff out.
Step-by-Step Guide to Applying Turtle Wax Wash and Wax
Begin by pre-rinsing the vehicle thoroughly with a hose or pressure washer. Start from the roof and work your way down to remove loose, abrasive dirt, dust, and mud before making contact with the wash mitt. Skipping this step increases the likelihood of dragging grit across the clear coat, which causes fine scratches and swirl marks.

Next, mix the wash and wax product strictly according to the manufacturer’s instructions. Pour the specified amount of concentrate into your wash bucket, then fill it with a strong stream of water to generate a rich, lubricated foam. Avoid guessing the measurements; using too little product reduces lubrication and cleaning power, while using too much creates an excessive buildup of wax residue that leads to heavy streaking.
When washing, work from the top of the vehicle downward in sections. Dip your microfiber mitt into the soapy bucket, wash a panel using straight-line or overlapping motions, and then rinse the mitt in the clean-water bucket before reloading it with soap. Washing from top to bottom ensures that the dirtiest areas of the car, such as the lower rocker panels and wheels, are cleaned last, preventing the transfer of heavy road grime to cleaner upper panels.
Once the entire vehicle is washed, utilize a sheeting rinse technique to minimize standing water. Remove the spray nozzle from your hose and let a gentle, continuous stream of water flow over the panels from the top down. This allows the water to cling to itself and slide off the surface in a single sheet, leaving very little standing water behind and significantly reducing the chance of water spots forming before you can dry the car.
Proper Drying and Buffing Techniques to Prevent Streaks
The drying phase is where the wax protection is leveled and activated. If you are using a dedicated wash-and-dry spray wax—which is designed to be applied directly to a wet surface after rinsing—mist the product lightly over one panel at a time while the vehicle is still wet. If you are using a standard wash-and-wax soap, proceed directly to drying the remaining water droplets.
To dry the paint safely, pat or gently glide a clean microfiber drying towel across the surface rather than dragging it aggressively. Dragging a dry towel with heavy pressure can create friction and mar the paint. The plush microfiber will absorb both the water and any excess carrier liquids from the wax, leaving a thin, even layer of protection behind.
Once the bulk of the water is removed, buff the dried panels with a separate, clean, dry microfiber cloth to level the wax layer and bring out the final gloss. Fold the cloth into quarters to provide a cushioned, flat surface, and use light, circular motions to polish the paint. This step removes any remaining hazy residue and ensures the wax is distributed evenly across the clear coat.
Finally, inspect panel gaps, side mirrors, door jambs, and plastic trim for trapped water or excess wax residue. Water often collects in these crevices and slowly drips out later, carrying dissolved wax that dries into unsightly white streaks. Wipe these areas thoroughly with a clean corner of your microfiber towel to ensure a completely dry and clean finish.
Troubleshooting Common Wash and Wax Issues
If you notice streaking or hazing after the wash, it is usually caused by washing in direct sunlight, using too much product, or relying on dirty, saturated towels. When a towel becomes overloaded with water and wax, it can no longer absorb residue and instead smears it across the paint.
To correct hazy residue, do not rewash the entire vehicle. Instead, re-wipe the affected area with a clean, dry microfiber towel or a label-approved quick detailer. A light mist of quick detailer provides the necessary lubrication to reactivate and level the uneven wax layer, allowing you to buff it to a clear, high-gloss finish.
It is also important to understand the limitations of wash-and-wax products. These formulas are designed for convenient, light maintenance and deposit a relatively thin layer of protection. If your vehicle’s paint has heavy oxidation, deep scratches, or lacks gloss, a wash-and-wax product will not correct these issues. In such cases, a dedicated paste, liquid, or spray wax, preceded by proper paint decontamination and polishing, is required for deeper correction and longer-lasting protection.
Maintenance and Reapplication Guidelines
To maintain the protective wax layer without stripping it, establish a consistent washing routine. Depending on environmental exposure and vehicle usage, washing your car every one to two weeks is generally recommended to prevent road grime from bonding to the paint.
Always avoid using harsh dish detergents or abrasive automatic car washes. Dish soaps are highly alkaline and formulated to strip grease, which means they will quickly degrade and strip away the protective wax layer. Similarly, the stiff brushes used in many automatic car washes can scratch your paint and remove any wax protection you have applied.
Regularly inspect the water beading and sheeting behavior on your vehicle’s panels during rinses. If water beads tightly and sheets off rapidly, the wax layer is active and protecting the paint. When water begins to pool or flatten on the surface, it indicates that the wash-and-wax layer has worn off, signaling that a dedicated wax reapplication is needed to restore robust protection.

Community discussion
Share your experience or ask a question. Comments are reviewed before publication.