
Achieving a flawless, streak-free dry finish with Turtle Wax requires a systematic approach centered on meticulous surface preparation, thin application, and precise timing. Many car owners struggle with unsightly white residue or stubborn smears, which usually stem from applying too much product or buffing before the wax has fully cured. By mastering the transition from wet application to a dry haze and using the correct buffing techniques, you can protect your vehicle’s clear coat and reveal a deep, reflective shine.
Preparing the Paint Surface for Optimal Wax Adhesion
Before any wax touches the paintwork, the surface must be completely free of loose dirt, dust, and road grime. A thorough wash using a dedicated car shampoo is the essential first step. Any remaining dirt particles left on the panel will act as abrasives under your applicator pad, leading to fine swirl marks and micro-scratches during the application process.
Once washed, the vehicle must be dried completely. Water droplets left in crevices or on the panels can mix with the wax, altering its formulation and preventing it from bonding correctly to the clear coat. Pay close attention to door mirrors, trim lines, and emblems where water tends to linger long after the main panels are dry.
Products mentioned in this guide
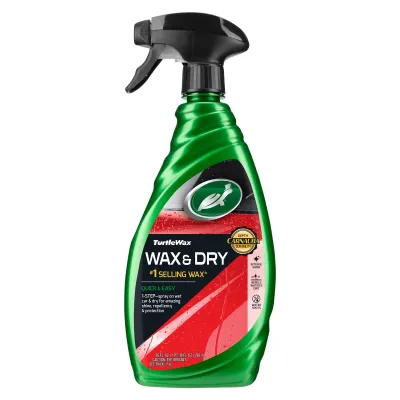
Prices are valid at publication and may change. Please refer to the product page for the latest price.
Surface temperature plays a critical role in how the wax behaves. Touch the panels with the back of your hand; they should feel cool to the touch. In warm tropical environments like Singapore, working under direct sunlight or on a hot bonnet causes the solvents in the wax to evaporate too rapidly, making the product dry prematurely and stick stubbornly to the paint.
Finally, inspect the paint for embedded contaminants such as tree sap, industrial fallout, or tar spots. Running your clean hand over the dry paint inside a thin plastic sandwich bag can help you feel these tiny imperfections. If the surface feels rough, consider using a clay bar or a dedicated paint cleaner before waxing, as applying wax over contaminants will seal them onto the clear coat.
Essential Tools and Materials for a Scratch-Free Application
Selecting the right tools is just as important as the application technique itself. Turtle Wax is available in various formulations, including traditional hard paste waxes and modern liquid waxes. Always consult the specific product label to understand its unique application requirements and compatibility with your vehicle’s paint type.

For the application process, soft foam applicator pads are highly recommended. These pads distribute pressure evenly across the panel and hold the product without absorbing excessive amounts, reducing waste and preventing accidental marring of the clear coat. Avoid using rough cloths or household sponges, which can introduce fine scratches.
Buffing requires a generous supply of high-quality, clean microfiber towels. A single towel will quickly become saturated with wax residue, which then gets smeared back onto the paint, causing streaks. Prepare at least three to four plush, high-density microfiber towels (typically rated at 300 GSM or higher) to ensure you always have a clean, dry surface to work with.
Additionally, verify the compatibility of your chosen wax with non-painted surfaces. Traditional waxes can leave stubborn white stains on black plastic trim, rubber seals, or matte finishes. Checking the product instructions beforehand helps you decide whether you need to mask off these sensitive areas with automotive detailing tape.
Applying the Wax: Techniques for Thin, Even Coverage
The golden rule of waxing is that less is always more. A common mistake is applying a thick layer of wax in the hope of achieving better protection. In reality, only an ultra-thin layer of wax can chemically bond to the clear coat; any excess product simply sits on top, making the buffing process incredibly difficult and prone to streaking.
Work in small, manageable sections rather than attempting to coat the entire vehicle at once. Focus on one panel at a time, such as half a bonnet, a single door, or a wing. This localized approach ensures you can monitor the drying process closely and buff the residue off before it hardens excessively.
Apply a small, coin-sized amount of liquid wax to your applicator pad, or lightly swipe the pad across the surface of a paste wax tin. Gently press the pad onto the paint and spread the product using overlapping circular motions or straight-line patterns, depending on the specific instructions on your product’s label. Straight-line motions are often preferred by detailers to minimize the visual impact of any accidental micro-marring.
Keep your pressure light and consistent. The applicator pad should glide smoothly over the surface. If you notice the pad dragging or leaving thick, uneven patches of product, you may need to clean the pad or adjust the amount of wax you are using.
The Drying Phase: Recognizing When the Wax is Ready to Buff
Once applied, the wax must be allowed to dry, a process often referred to as “hazing.” During this phase, the carrier solvents in the formula evaporate, leaving behind a solid, protective wax film. You will observe a distinct visual transition as the wet, glossy layer turns into a dull, chalky, and opaque haze.
The time required for this transition varies significantly based on environmental conditions. In Singapore’s high humidity and warm climate, the evaporation process can be slower or more unpredictable than in dry climates. Rather than relying on a strict timer, use physical cues to determine readiness.
The most reliable method to check if the wax is ready to buff is the “swipe test.” Lightly drag a clean, dry finger across the hazed panel. If the finger swipe leaves a perfectly clean, clear path of paint with no smearing or oily residue, the wax is ready to be buffed off.
If the swipe test leaves a smear or feels greasy, the solvents have not fully evaporated. Wait another minute or two and test a different spot. Conversely, if the wax has dried for too long and turned into a rock-hard crust, it will be difficult to remove, requiring immediate corrective steps.
Buffing to a High-Gloss, Streak-Free Shine
When the swipe test confirms the wax is ready, take a clean, dry microfiber towel and fold it into quarters. This folding technique gives you eight fresh, cushiony surfaces to work with and helps distribute the pressure of your hand evenly across the panel.
Begin buffing using light to moderate pressure, moving the towel in circular motions. The dried haze should lift off effortlessly, revealing a deep, reflective shine underneath. Avoid scrubbing or pressing too hard, as excessive friction can generate heat and cause the fresh wax layer to smear or mar.
As you work, the microfiber towel will collect the wax residue. Frequently flip the towel to a fresh, clean side to prevent the collected wax from re-depositing onto the paint. Once all sides of the towel are used, switch to a completely new, clean towel to finish the panel.
After buffing a section, inspect your work from multiple angles and under different lighting conditions. If you are working indoors, a handheld detailing light or a smartphone flashlight can help reveal faint streaks or missed spots. Outdoors, step back and look at the panel from a shallow angle to ensure a perfectly uniform, dry finish.
Troubleshooting Streaks, Smears, and Stubborn Residue
Even with careful application, environmental factors or slight timing errors can lead to streaks and stubborn residue. Streaks often occur if you attempt to buff the wax while it is still wet, spreading the active solvents across the panel instead of removing them. If this happens, stop buffing, allow the area to dry completely, and then buff with a fresh towel.
If the wax has dried for too long—perhaps because you worked on too large an area or got distracted—it can bake onto the paint, making it incredibly difficult to buff off. Do not attempt to scrape or scrub the hardened wax, as this will scratch your clear coat. Instead, apply a very thin layer of fresh wax directly over the hardened residue. The solvents in the fresh wax will temporarily re-liquefy the old, dried wax, allowing you to wipe both layers off immediately.
For light smearing or minor high spots that refuse to clear with dry buffing, a dedicated quick detailer spray can serve as an excellent lubricant. Lightly mist the affected area with the detailer and wipe it clean with a fresh microfiber towel. This safely lifts the excess residue without stripping the underlying protective wax layer.
Frequently Asked Questions (FAQ)
Is it safe to wax a car in direct sunlight?
Waxing a vehicle in direct sunlight is generally not recommended. High surface temperatures on the car’s panels cause the carrier solvents in the wax to flash off almost instantly. This rapid evaporation prevents the wax from spreading evenly and bonding correctly, resulting in severe streaking and a hardened residue that is exceptionally difficult to buff away. For the best results, always apply wax in a shaded area, inside a garage, or during the cooler hours of the early morning or late evening.
How can I tell when it is time to reapply the wax?
The most reliable way to determine if your wax coating has depleted is by observing how water behaves on the paint surface. When a fresh layer of wax is present, water will bead up into tight, round droplets and roll off the panels easily. As the wax wears away due to environmental exposure, washing, and road grime, the water will begin to pool or sheet flat across the surface instead of beading. Check your specific Turtle Wax product label for general longevity guidelines, and plan to reapply whenever you notice a significant decline in water-beading performance.

Community discussion
Share your experience or ask a question. Comments are reviewed before publication.