
To find the correct Jimove battery model for your motorcycle, you must match the physical dimensions, terminal layout, voltage, and cold cranking amps (CCA) of your original equipment manufacturer (OEM) battery to the specifications of the replacement unit. Because motorcycles rely on highly specific battery tray sizes and precise electrical tolerances, selecting a model based solely on brand name or a generic “motorcycle battery” label can lead to fitment failures or electrical system damage. By systematically cross-referencing your motorcycle’s manual, verifying the physical compartment clearance, and checking the terminal orientation, you can confidently select a Jimove battery that integrates seamlessly with your bike’s charging system and meets your daily riding demands.
Understanding Your Motorcycle's Original Battery Specifications
Before browsing replacement options, you must establish a clear baseline by identifying your motorcycle’s factory battery requirements. The most reliable source for this information is your motorcycle’s owner’s manual, which lists the exact technical specifications, including the standardized battery group size or part code. If the manual is unavailable, you can inspect the label on the battery currently installed in your vehicle. This label typically features an alphanumeric code (such as YTX7A-BS or YTX9-BS) that represents a standardized set of physical dimensions, terminal configurations, and electrical capacities recognized across the automotive industry.
The physical footprint, or group size, of the battery is a non-negotiable specification. Motorcycle battery compartments are designed with extremely tight tolerances, leaving virtually no room for oversized units. You must measure the length, width, and height of your existing battery tray to ensure the replacement Jimove model will sit flat and secure. A battery that is too large will not fit, while one that is too small may slide around during rides, leading to physical damage, disconnected cables, or internal cell failure from excessive movement.
Products mentioned in this guide
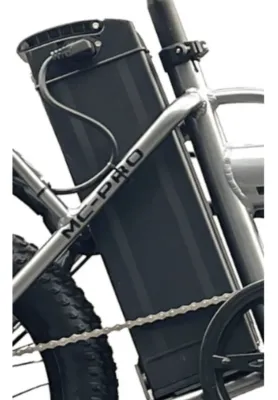
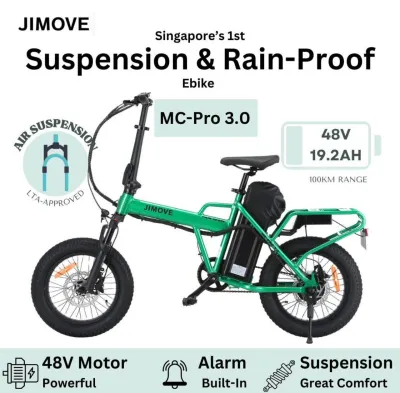
Prices are valid at publication and may change. Please refer to the product page for the latest price.
Equally critical is the terminal layout and polarity of the battery. You must verify whether the positive (+) terminal is on the left or the right side when the battery is facing you. If you purchase a battery with reversed polarity, the motorcycle’s positive and negative cables will likely not reach the terminals without being stretched to a dangerous degree. Attempting to force a connection with reversed polarity can cause immediate and catastrophic damage to your motorcycle’s electrical system, including blowing the main fuses, damaging the alternator, or frying the electronic control unit (ECU).
Finally, take note of the terminal post type on your original battery. Motorcycle batteries use various terminal designs, including flush-mount, top-mount, side-mount, or female-threaded posts. The replacement Jimove battery must feature a compatible post design that allows your motorcycle’s terminal eyelets to sit flat and make full contact. A mismatched post type can lead to loose connections, high electrical resistance, and intermittent starting issues that are difficult to diagnose.
Decoding Jimove Battery Labels and Technical Metrics
Once you have documented your motorcycle’s original specifications, you can begin evaluating the technical metrics printed on Jimove battery labels. The first and most fundamental metric to verify is the nominal voltage. Modern motorcycles almost universally operate on a 12-volt electrical system, and installing a battery with the incorrect voltage will either fail to power your system or cause severe electrical damage. Always double-check the label to confirm that the nominal voltage matches your motorcycle’s system requirements exactly.

The next key metric is the battery’s capacity, measured in Ampere-hours (Ah). This rating indicates how much electrical energy the battery can store and deliver over a specific period. For example, a 10 Ah battery can theoretically deliver 1 Ampere of current for 10 hours. If your motorcycle is equipped with aftermarket electrical accessories—such as auxiliary lighting, heated grips, GPS navigation systems, or USB chargers—you may want to consider a battery with a slightly higher Ah rating to handle the increased electrical load. However, you must ensure that any increase in capacity does not result in a battery that exceeds the physical dimensions of your battery tray.
Cranking power, often measured in Cold Cranking Amps (CCA) or an equivalent starting current rating, is another vital metric to consider. This rating measures the battery’s ability to deliver a high burst of current for a short duration to start the engine. High-compression engines, large-displacement cruisers, and single-cylinder adventure bikes require significantly more cranking power to turn over than small-displacement scooters. If you ride in cooler climates or own a high-compression motorcycle, selecting a Jimove battery with a robust CCA rating is essential for ensuring reliable, rapid engine starts.
Additionally, you should locate and interpret the manufacturing date code stamped onto the battery casing or printed on the label. Lead-acid and gel batteries naturally self-discharge over time when left on a shelf, and purchasing old stock that has sat idle for many months can result in a pre-degraded battery with a shortened lifespan. These codes are often alphanumeric, representing the month and year of production. Prioritize purchasing a recently manufactured battery to ensure you receive a unit with its full service life intact.
Choosing the Right Battery Chemistry for Your Riding Needs
Jimove offers batteries utilizing different internal chemistries, and selecting the right technology depends heavily on your motorcycle’s electrical demands and your maintenance preferences. Conventional flooded lead-acid batteries are the traditional choice; however, they require regular maintenance, including checking fluid levels and topping them up with distilled water. They are also prone to acid leaks if the motorcycle is tilted or involved in a tip-over, and they generally offer lower resistance to the intense vibrations common in motorcycle applications.
For most modern riders, sealed maintenance-free chemistries like Absorbent Glass Mat (AGM) or Gel batteries are highly recommended. These batteries are completely sealed at the factory, eliminating the need to monitor or replenish fluid levels. Because the electrolyte is absorbed in glass mats or suspended in a silica gel, these batteries are spill-proof and can be mounted at various angles without risk of leakage. This makes them exceptionally suited for sportbikes, off-road motorcycles, and adventure touring bikes that experience extreme lean angles and rough terrain.
Vibration resistance is a critical factor that directly impacts battery longevity. Motorcycles subject batteries to constant, high-frequency vibrations from the engine and road surface, which can cause the internal lead plates of conventional batteries to shed active material or short-circuit. AGM and Gel batteries feature tightly packed internal structures that provide superior resistance to vibration and physical shock. If you frequently ride on unpaved roads, commute over rough city streets, or ride a vibrating single-cylinder or V-twin motorcycle, investing in a vibration-resistant chemistry will significantly extend your battery’s operational life.
Finally, consider your motorcycle’s overall electrical demand when choosing a chemistry. Modern motorcycles with advanced digital dashboards, electronic suspension, traction control, and multiple rider modes place a continuous drain on the battery even when the engine is off. AGM and Gel batteries generally exhibit lower self-discharge rates and are better equipped to handle deep discharge cycles and rapid recharging than conventional flooded batteries. If your bike is packed with electronics or if you frequently take short trips that do not allow the charging system to fully replenish the battery, a sealed AGM or Gel model is the more reliable choice.
Pre-Purchase Compatibility and Fitment Checklist
Before finalizing your purchase of a Jimove battery, performing a thorough compatibility and fitment check is essential to prevent the inconvenience of returning an incompatible unit. Begin by measuring the exact clearance of your motorcycle’s battery compartment. Do not rely solely on the dimensions of the battery tray itself; check for any overhead obstructions such as seat brackets, frame rails, wiring harnesses, or electronic control units (ECUs) that sit directly above the battery. A replacement battery that is even slightly taller than the original can compress these sensitive components, leading to electrical shorts or physical damage to the seat and frame.
Next, confirm the compatibility of the terminal hardware. Ensure that the replacement battery includes the correct size bolts and nuts required to secure your motorcycle’s cable eyelets. Some motorcycle battery cables are designed to connect from the top, while others connect from the front or side. Verify that the terminal posts on the Jimove battery allow for the correct cable orientation without putting tension on the wires. If the cables are pulled too tight, engine vibrations can cause the terminals to crack or the cables to fray over time.
You must also cross-reference the specific Jimove part number with your motorcycle’s exact make, model, year, and engine displacement. Do not rely on generic online compatibility charts, as these can often contain errors or overlook mid-year production changes made by motorcycle manufacturers. Instead, consult the official Jimove fitment guide, contact an authorized dealer, or check your motorcycle manufacturer’s documentation to verify that the electrical characteristics and physical dimensions of the selected model are fully approved for your specific vehicle.
Lastly, inspect the mounting mechanism of your motorcycle’s battery box. Some motorcycles use rubber straps, metal brackets, or foam padding to hold the battery securely in place. If the replacement Jimove battery is slightly smaller in any dimension than the OEM unit, you must plan to use compatible, non-conductive foam spacers to fill the void and prevent the battery from moving. A loose battery can vibrate excessively, leading to premature internal failure or loose terminal connections during a ride.
Safe Installation and Essential Maintenance Practices
Installing a new motorcycle battery requires strict adherence to safety protocols to protect yourself and your vehicle’s electrical system. Before starting, put on appropriate protective gear, including safety glasses and heavy-duty gloves, to shield yourself from potential sparks or residual battery acid. Ensure the motorcycle’s ignition is turned completely off and the keys are removed from the switch to prevent any electrical draw or accidental short circuits during the installation process.
When disconnecting the old battery, always remove the negative (-) cable first, typically color-coded black or marked with a minus sign. This is a critical safety boundary: if your wrench accidentally touches the metal frame of the motorcycle while loosening the negative terminal, nothing will happen because the frame is already grounded. If you were to attempt to remove the positive (+) cable first and your tool touched the frame, it would create a direct electrical short, resulting in massive sparking, potential burns, and severe damage to the motorcycle’s wiring harness. Once the negative cable is safely isolated, you can proceed to disconnect the positive (+) cable.
Before dropping the new Jimove battery into the tray, take the opportunity to inspect and clean the motorcycle’s cable terminals. Use a wire brush to remove any white or green powdery corrosion, which can act as an insulator and prevent the battery from charging or delivering starting current. Apply a thin layer of dielectric grease or terminal protector spray to the clean metal surfaces. This grease prevents moisture and oxygen from reaching the metal, inhibiting future corrosion and ensuring a highly conductive, stable connection.
When installing the new battery, reverse the disconnection steps exactly: connect the positive (+) cable first, secure it tightly, and then connect the negative (-) cable. Ensure all terminal bolts are torqued to the manufacturer’s specifications; loose terminal bolts are one of the most common causes of intermittent electrical failure and starting issues. If you encounter complex electrical symptoms after installation—such as a rapidly draining battery, a dimming headlight, or a charging system warning light—stop operating the vehicle and consult a qualified professional mechanic to inspect your stator and regulator/rectifier.
Frequently Asked Questions (FAQ)
Can I use a Jimove battery with a higher Ah rating than my motorcycle's original specification?
Yes, you can use a Jimove battery with a higher Ampere-hour (Ah) rating, provided it physically fits within your motorcycle’s battery compartment and matches the required voltage and terminal layout. A higher Ah rating provides more reserve capacity, which is highly beneficial if you run multiple electrical accessories or leave your bike parked for extended periods. However, because higher-capacity batteries are typically larger and heavier, you must carefully verify that the physical dimensions do not exceed your battery tray’s limits. Additionally, ensure your motorcycle’s stator and regulator/rectifier are in good working order, as an extremely large battery can place additional demand on a weak charging system during the replenishment cycle.
How do I know if my new Jimove battery needs to be charged before the first ride?
To determine if your new Jimove battery requires charging before installation, you should measure its open-circuit voltage using a digital multimeter. A fully charged 12-volt motorcycle battery should read approximately 12.6 to 12.8 volts or higher. If your reading falls below 12.4 volts, the battery has experienced some self-discharge during transit or storage and should be charged before use. Connect the battery to a compatible smart charger or battery tender that matches the battery’s chemistry (such as AGM or Gel) and follow the charging parameters outlined in the Jimove product manual. Charging the battery fully before its first use ensures optimal chemical activation, prevents immediate starting strain, and maximizes the overall lifespan of the unit.
Community discussion
Share your experience or ask a question. Comments are reviewed before publication.