
Finding the best full-surround car mats for a Toyota Harrier depends on matching the specific generation of your vehicle with the correct manufacturing process—such as 3D-scanned injection-molded TPE or multi-layer stitched XPE—while ensuring absolute clearance for the pedals and seat tracks. Because the Harrier has undergone significant design changes across its generations, a universal mat will not provide a safe or precise fit. Instead, owners must evaluate mats based on their dimensional accuracy, material stability, and retention clip compatibility to secure a snug, slip-free fit.
Understanding Full-Surround Mat Fitment for Toyota Harrier
The Toyota Harrier is a popular mid-sized crossover known for its refined interior, but its floor pan geometry is highly specific and varies significantly between model generations. For instance, the third-generation Harrier (XU60, produced up to 2020) is built on a different platform than the fourth-generation Harrier (XU80, 2021 and newer), which utilizes the Toyota New Global Architecture (TNGA-K) platform. This platform shift resulted in a completely redesigned floor pan, altered seat rail spacing, and a modified center console base. Attempting to install a mat designed for an older generation into a newer model, or vice versa, will result in poor coverage, bunching, and potential safety hazards.
When selecting a full-surround mat, the most critical areas to inspect are the driver-side footwell clearances. The accelerator pedal in modern Harriers is floor-mounted (organ-style) or suspended depending on the specific model year and market variant, such as the hybrid or petrol editions. The mat must have a precise cutout or contour that allows the pedal to be fully depressed to the floor kick-down point without catching on the edge of the mat. Similarly, the brake pedal requires unobstructed travel; any thick or stiff mat edge that encroaches on this path can prevent complete braking force, posing a severe safety risk.
Products mentioned in this guide
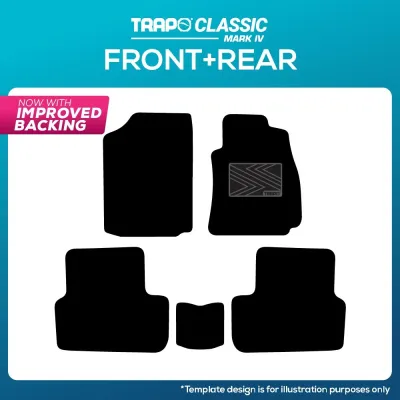
Prices are valid at publication and may change. Please refer to the product page for the latest price.
Furthermore, the Harrier’s floor carpet features factory-installed retention clips or twist-lock anchors designed to keep floor liners from sliding forward. A high-quality full-surround mat must feature matching anchor holes or integrated locking mechanisms that align perfectly with these factory points. If a mat relies solely on friction or generic clips, it can shift under foot pressure, potentially jamming the pedals or blocking the footrest area.
Key Dimensions to Compare Across Brands
To achieve a true “full-surround” or “3D” fit, manufacturers use different production methods that directly impact how well the mat conforms to the Harrier’s complex footwell walls. The edge height is a primary differentiator. Premium full-wrap mats extend several inches up the sides of the footwell, covering the transmission tunnel on one side and wrapping over the door sill scuff plates on the other. This high-walled design prevents dirt, liquid spills, and debris from slipping behind the mat and staining the original carpet. Additionally, the mat should fully cover the dead pedal (the left footrest) without sagging or pulling away from the wall over time, as this is a high-wear area prone to collecting dirt from the driver’s shoes.

The manufacturing process determines how well these high edges maintain their shape. Injection-molded mats, typically made from Thermoplastic Elastomer (TPE), are created using high-pressure molds based on precise 3D laser scans of the Harrier’s cabin. This process results in a highly rigid, consistent wall thickness that holds its shape even under heavy foot pressure. On the other hand, thermoformed or stitched multi-layer mats (often featuring an XPE foam core and a synthetic leather top layer) rely on heat-pressing or sewing multiple sheets together. While these stitched options offer a softer feel and can wrap even higher up the side panels, they are more prone to edge curling or collapsing if the internal support layers degrade.
Another critical dimension to compare is the design of the base layer. Because full-surround mats cover a larger surface area, they require robust anti-slip backing to prevent creeping. Many TPE mats utilize molded-in plastic nibs or a textured underside that grips the carpet fibers. Multi-layer leather-style mats often use a hook-and-loop (Velcro-compatible) backing or specialized plastic clips that slide under the plastic trim panels of the Harrier’s center console and door sills. When comparing brands, look for backing systems that do not damage the vehicle’s original carpet pile while still providing a secure, immovable foundation.
Evaluating Material Options for Contour Matching
The choice of material dictates not only the aesthetic appeal of your Toyota Harrier’s interior but also how the mat behaves when molded to complex floor geometries. Thermoplastic Elastomer (TPE) has become a popular choice for modern crossovers. It offers the durability of heavy-duty rubber but with significantly less weight and a much higher degree of molding precision. TPE is also an eco-friendly, non-toxic, and odorless material, which is a major advantage over cheap PVC or low-grade rubber mats that can release harmful volatile organic compounds (VOCs) when the car is parked under the hot sun. However, because TPE is relatively stiff, it can feel firm underfoot, and in exceptionally hot climates, low-quality TPE blends may emit a slight plastic odor or become slightly more pliable, though premium medical-grade TPE remains stable across temperature extremes.
For owners seeking a more luxurious aesthetic that matches the Harrier’s premium cabin styling, multi-layer synthetic leather (PU) or XPE (Cross-linked Polyethylene) foam mats are a common alternative. These mats feature a cushioned middle layer that provides excellent sound dampening and a soft feel underfoot. The cross-linked structure of the XPE foam also provides thermal insulation, helping to keep the cabin temperature more stable. The top leather layer is often stitched in a diamond or hexagonal pattern, giving the cabin an upscale, customized look. The primary drawback of these multi-layer constructions is their long-term durability. Over years of exposure to wet shoes, humidity, and cabin heat, the adhesive layers can delaminate, leading to edge curling, creasing, and sliding.
Heavy-duty natural or synthetic rubber mats represent a third option, valued primarily for their extreme durability and weight. While rubber is highly effective at trapping water and dirt within deep channels, it is rarely used for true full-surround designs. Because rubber is heavy and lacks structural rigidity when molded into thin, vertical walls, it cannot easily wrap high up the sides of the transmission tunnel or footwells without sagging. Consequently, rubber mats are typically limited to flat, traditional floor coverage rather than a complete 3D wrap.
How to Verify Fitment Before and After Purchase
Before purchasing any full-surround mat set, it is essential to conduct a thorough compatibility check. The Toyota Harrier is sold in various trims and regional specifications, including petrol, hybrid, and turbo variants, which can have subtle differences in floor pan layouts. For example, hybrid models (such as the AXUH80) often house the high-voltage battery pack under the rear seats, which can alter the shape of the rear footwell and the clearance around the rear air conditioning vents located at the base of the center console. Crucially, the hybrid model features a battery cooling vent under the rear seat cushion that must never be blocked by the rear mat. Blocking this vent can cause the hybrid battery to overheat, triggering warning lights and reducing fuel efficiency. Always verify the exact model year, chassis code, and drivetrain configuration with the manufacturer’s or seller’s compatibility list.
Once your new mats arrive, perform a rigorous post-installation safety check before driving. Begin on the driver’s side by aligning the mat perfectly with the factory floor anchors and locking them in place. With the engine off, manually depress the accelerator, brake, and clutch pedals (if applicable) slowly to their absolute limits. Ensure there is at least a few centimeters of clearance between the pedal arms, pads, and the edges of the mat. The pedals must return to their resting positions smoothly without catching, rubbing, or clicking against the mat material.
Next, perform a functionality check on the front and rear seats. Slide both the driver and front passenger seats through their entire range of motion, from fully forward to fully backward. The seat rails and any under-seat electrical wiring harnesses must move freely without catching on the high edges of the full-surround mats. In the rear, ensure the center hump coverage lies completely flat and does not block the sliding mechanism of the front seats or obstruct the lower air vents. If any part of the mat bunches up, buckles, or slides during these tests, do not drive the vehicle; contact the manufacturer for adjustment or return options.
Decision Framework: Choosing the Right Mat Type for Your Needs
To make the right choice for your Toyota Harrier, you must balance your daily usage patterns against the structural characteristics of each mat type. If your primary concerns are absolute safety, precise fitment, and effortless maintenance, injection-molded TPE mats are generally the most reliable option. Their rigid, 3D-scanned walls ensure they stay locked in place, and they can be easily hosed down and dried in minutes. This makes them ideal for drivers who frequently deal with wet weather, muddy shoes, or outdoor activities where dirt is constantly tracked into the cabin.
Conversely, if you prioritize a premium cabin aesthetic, enhanced sound insulation, and a softer feel underfoot, a multi-layer synthetic leather or XPE full-wrap mat may be more suitable. These mats complement the Harrier’s leather-trimmed dashboard and door panels, creating a cohesive, luxury-car atmosphere. However, choosing this style requires a commitment to regular maintenance. You must periodically inspect the edges to ensure they have not begun to sag or curl, and verify that the side clips remain securely fastened to prevent the mat from shifting toward the pedal area.
Finally, always consider any existing modifications in your Harrier before finalizing your decision. If you have installed aftermarket under-seat subwoofers, custom seat covers with low-hanging straps, or additional soundproofing layers beneath the carpet, these will alter the factory floor dimensions. In such cases, rigid TPE mats may not sit flat, whereas more flexible multi-layer mats might accommodate the slight dimensional variances better. Always consult the manufacturer’s guidelines if your vehicle deviates from standard factory specifications.
Frequently Asked Questions (FAQ)
Do full-surround mats interfere with the Toyota Harrier's airbag deployment?
No, properly designed full-surround floor mats do not interfere with the Toyota Harrier’s side curtain airbags, as these deploy from the roof pillars and side roof rails. However, poorly fitted mats that extend too high up the seat bases could theoretically interfere with seat-mounted side airbags if they bunch up or block the deployment path near the lower outer edges of the front seats. To prevent this, ensure that the mat’s side walls do not press tightly against or cover any part of the seat plastic trim where airbag sensors or deployment seams are located.
How do I clean full-surround mats without removing them from the car?
For quick maintenance, you can clean full-surround mats while they remain in the vehicle by first vacuuming up loose dirt, sand, and debris from the crevices and edges. For TPE mats, wipe down the surface with a damp microfiber cloth and a mild, pH-neutral interior cleaner or dedicated plastic restorer, ensuring you do not leave a slippery residue on the pedal areas. For synthetic leather or XPE mats, use a specialized leather cleaner or a damp cloth with mild soapy water, taking care not to saturate the stitched seams, and dry the surface thoroughly with a clean towel to prevent moisture from seeping into the foam layers and causing mold.
Community discussion
Share your experience or ask a question. Comments are reviewed before publication.