
Selecting the right bicycle light is a critical decision that directly impacts your safety, riding confidence, and overall cycling experience. A light designed for a well-lit city commute will fail on a dark mountain trail, while an ultra-bright off-road beacon might blind pedestrians on a shared urban path. To find the right Rockbros light, you must match the specific optical design, mounting system, and battery capacity of the device to your primary riding environment. By evaluating your typical routes, speeds, and local weather conditions, you can select a model that provides the exact balance of visibility and runtime you need.
Identifying Your Primary Riding Scene and Lighting Needs
Before browsing specific models, distinguish between the need to “see” the road and the need to “be seen” by other road users. Active illumination is essential on unlit paths, rural roads, or forest trails where you must spot potholes, debris, and sudden terrain changes. Passive visibility relies on flashing modes and side-illumination windows to ensure motorists, pedestrians, and other cyclists notice your presence from a distance.
Your typical riding speed also dictates how much light you require to travel safely. Higher speeds demand a longer beam reach, giving your eyes enough time to register obstacles and allowing your brakes to bring you to a safe stop. For instance, a cyclist traveling at 30 km/h on a dark road requires significantly more forward illumination than a casual commuter navigating a well-lit park connector at 15 km/h.
Products mentioned in this guide
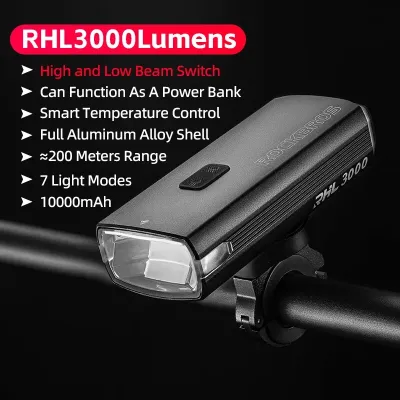
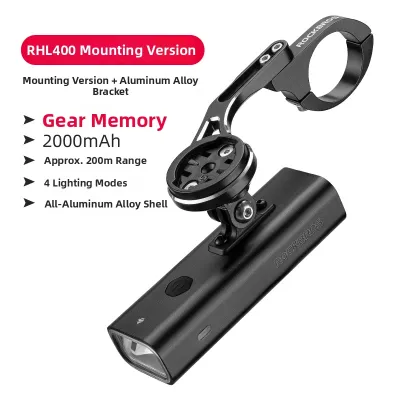
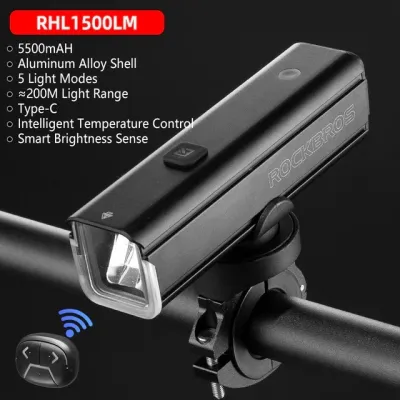
![[SG Stock] ROCKBROS 400 Lumens USB Rechargeable Bikes Bicycles MTB LED Headlight](https://img.lazcdn.com/g/p/ce328cf22e52ed8d0e2bba287847096e.jpg_400x400q80.jpg_.webp)
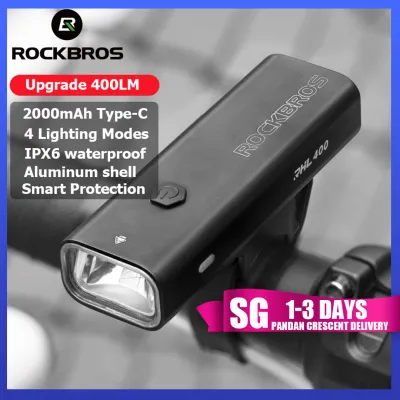
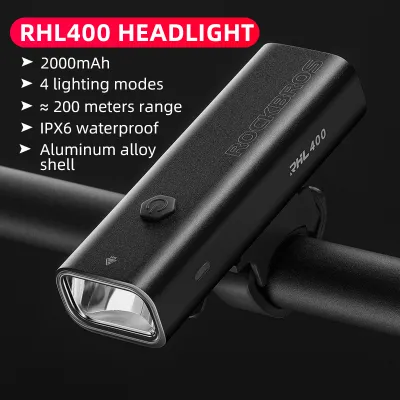
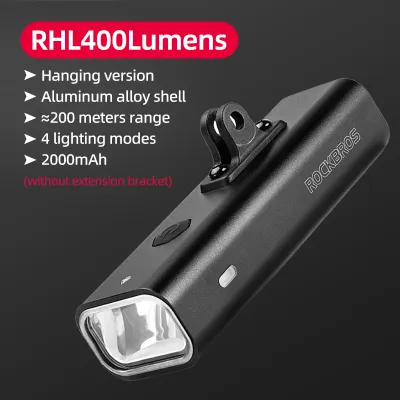
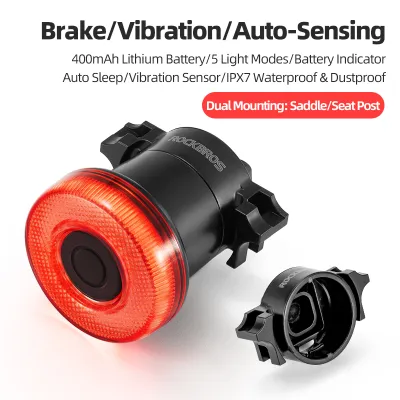
Prices are valid at publication and may change. Please refer to the product page for the latest price.
Ambient light levels along your route should guide your final choice. If your journey consists entirely of brightly lit urban corridors, a compact light focused on passive visibility is often sufficient. However, if your route transitions into dark coastal paths or unlit secondary roads, you will need a high-output headlight capable of throwing a wide, consistent beam across the path ahead.
Matching Light Features to Your Cycling Discipline
Every cycling discipline places unique demands on your equipment, meaning a single light design cannot excel in all conditions. The beam pattern, mounting stability, and power delivery of your light must align closely with your riding surface and traffic environment. Understanding these distinct requirements allows you to filter through the extensive Rockbros lineup to find the exact match for your bike.

Commuter Cycling: Urban Visibility and Safety
Urban commuting requires a light that prioritizes safety in high-traffic environments without causing discomfort to oncoming road users. When riding on shared paths or busy city streets, look for lights featuring a cut-off beam design, often referred to as an anti-glare or StVZO-compliant pattern. This optical design shapes the light beam to project downward onto the pavement, preventing the bright glare from shining directly into the eyes of oncoming drivers, cyclists, and pedestrians.
Side visibility is another crucial safety feature for city riders navigating busy intersections. Many commuter-focused lights incorporate small side cutouts or amber windows in the housing that allow light to escape laterally, making you visible to vehicles approaching from the side. This simple design detail significantly reduces the risk of side-impact collisions in low-light urban settings.
Convenience is key for daily riders, making integrated charging options and quick-release mounts highly desirable. Look for models with built-in USB-C ports or integrated USB plugs that allow you to top up the battery easily at your office desk or home computer. A secure, tool-free mounting bracket enables you to detach the light in seconds, allowing you to slip it into your pocket or bag when parking your bicycle in public spaces.
Road Cycling: Beam Distance and Endurance
Road cyclists traveling at higher speeds on tarmac require a light that projects a focused beam far down the road. This long-distance projection is essential for spotting road hazards, such as glass, gravel, or sudden asphalt transitions, well in advance. A narrow, highly focused spotlight pattern allows you to maintain your pace confidently even when streetlights are absent.
Battery management is critical for extended weekend training rides that may stretch into the twilight hours. When evaluating road lights, check the manufacturer’s specifications for battery capacity indicators and multi-mode runtime estimates. A reliable light should feature a clear power display—such as color-coded LED indicators—so you can monitor remaining battery life and adjust the brightness mode to ensure the light outlasts your ride.
The mounting system for a road bike must be secure, lightweight, and aerodynamic to withstand high-frequency road vibrations without slipping. Many road cyclists prefer out-front mounts that position the light directly beneath their cycling computer. This setup keeps the handlebars clean, maintains an aerodynamic profile, and ensures the light remains centered and stable at high speeds.
Off-Road Riding: Durability and Wide Illumination
Off-road riding on gravel paths or technical mountain bike trails demands a robust lighting system capable of handling harsh environmental conditions. Before purchasing, verify the manufacturer’s stated IPX water and dust resistance rating on the product packaging. A rating of IPX6 or higher is recommended to ensure the internal electronics remain protected against heavy rain, mud splatters, and dust accumulation during trail rides.
Trail vibrations and sudden impacts require heavy-duty mounting brackets and reinforced housings. Look for lights constructed with high-strength aluminum alloy bodies and secure, bolt-on handlebar clamps rather than simple rubber straps. This structural durability prevents the light from shifting or rattling loose when navigating rocky descents, tree roots, or uneven gravel paths.
Navigating technical terrain in the dark requires a wide flood beam pattern combined with high maximum lumen output. A wide beam illuminates the trail edges, helping you anticipate sharp corners, low-hanging branches, and sudden obstacles. Many off-road riders use a dual-light setup, combining a wide-angle handlebar light to illuminate the immediate path with a focused helmet-mounted light that points wherever they look.
Evaluating Cross-Scenario Compatibility
If your cycling routine spans multiple disciplines—such as commuting during the week and exploring gravel trails on the weekend—you might wonder if a single light can handle both tasks. A versatile, multi-mode light with adjustable optics can bridge this gap effectively. Look for models that allow you to toggle between a wide flood beam for trail riding and a focused, lower-intensity beam for urban commuting.
Some advanced lighting systems offer modular battery designs or external power bank compatibility. This feature allows you to run a lightweight, compact setup for short daily commutes, while giving you the option to connect a larger external battery pack for long-distance road trips or overnight trail adventures. This modularity ensures you do not carry unnecessary weight on short rides while retaining the capacity for extended runtimes when needed.
To maximize the utility of a single light across a fleet of bicycles, pay close attention to the mounting hardware. Quick-release brackets that use standardized mounting interfaces allow you to swap the light unit between your commuter, road, and mountain bikes in seconds without using tools. Purchasing extra mounting brackets for each of your bikes is a cost-effective way to maintain a highly versatile, single-light setup.
Essential Specification Checks Before Purchase
To ensure you get a light that performs reliably, always verify the technical specifications on the product packaging or official manual rather than relying on generic marketing descriptions. Look for certified lumen and lux measurements. While lumens measure the total light output from the source, lux measures the intensity of light projected onto a specific surface area, giving you a more accurate picture of real-world brightness.
Confirm the exact battery chemistry and expected charge cycles of the device. Lithium-ion batteries are standard, but their performance can vary based on quality and environmental temperatures. If you plan to ride in colder conditions, check the manufacturer’s guidelines regarding battery runtime degradation in low temperatures to avoid unexpected power loss during your ride.
Finally, verify the physical dimensions, weight, and mounting clearance of the light to ensure compatibility with your bicycle’s cockpit. Modern handlebars are often crowded with cycling computers, phone mounts, bells, and brake cables. Measuring your available handlebar space beforehand prevents installation conflicts and ensures the light can be mounted in a central, unobstructed position for optimal beam alignment.
Frequently Asked Questions (FAQ)
Do I need both a front and rear light for my rides?
Yes, a complete lighting system requires both a front and rear light to ensure comprehensive safety. The front light is designed primarily to illuminate your path and make you visible to oncoming traffic, while the rear light—typically a red LED—is essential for preventing rear-end collisions by alerting motorists approaching from behind. In Singapore, local traffic regulations mandate the use of proper front and rear lights during hours of darkness on public roads, making a dual-light setup a legal requirement as well as a safety necessity.
How should I clean and maintain the waterproof seals?
To preserve the water resistance of your bike light, rinse off mud, grit, and road grime using low-pressure water after dirty rides, and wipe the housing dry with a soft microfiber cloth. Avoid using high-pressure jet washes, as the intense pressure can force water past the rubber seals and damage the internal circuitry. Periodically inspect the rubber O-rings and charging port covers for signs of cracking, wear, or trapped debris, ensuring the port cover is pressed firmly and completely flush before every ride.
Community discussion
Share your experience or ask a question. Comments are reviewed before publication.