
Upgrading your car’s infotainment system with a Pioneer Android Auto head unit can transform your daily drive, bringing modern navigation, hands-free communication, and seamless media streaming directly to your dashboard. To make the right choice, you must evaluate your vehicle’s physical dashboard constraints, determine your connectivity preferences, and understand the integration requirements of your specific car model. Selecting the ideal receiver is not just about choosing the largest screen; it requires a systematic approach to compatibility, audio features, and professional installation planning.
By focusing on how a new receiver physically fits your dashboard and interfaces with your vehicle’s existing electronics, you can avoid common installation pitfalls. Whether you are looking to revitalize an older vehicle or enhance the audio capabilities of a modern car, understanding the technical specifications and installation steps is essential for a successful upgrade.
Understanding Pioneer's Android Auto Form Factors
Choosing the correct physical design is the first step in your car audio upgrade journey. Pioneer offers several head unit configurations, and selecting the wrong one can lead to physical installation failures or an awkward dashboard appearance.
Products mentioned in this guide
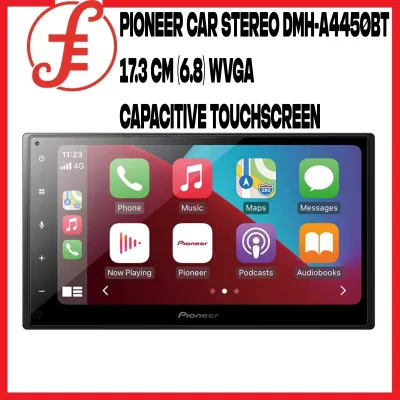
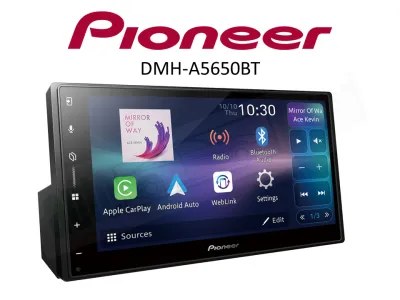
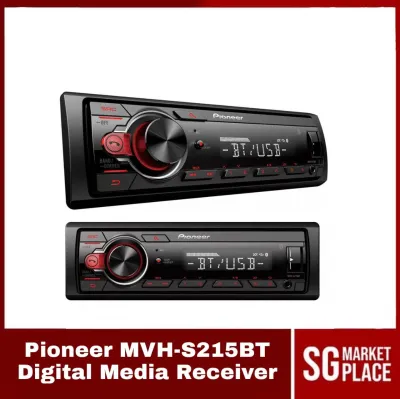
Prices are valid at publication and may change. Please refer to the product page for the latest price.
The standard double-DIN (2-DIN) configuration is the most common form factor for modern aftermarket upgrades. These units measure approximately 100 mm tall by 178 mm wide, fitting flush into dashboards that originally housed a large factory radio. A flush-mounted 2-DIN unit provides a clean, original equipment manufacturer (OEM) look, keeping the screen integrated directly into the console without protruding.
For older vehicles or cars with restricted dashboard space, a single-DIN (1-DIN) unit measuring 50 mm tall by 178 mm wide is the traditional choice. While standard 1-DIN units typically feature basic digital displays, some specialty models include motorized flip-out screens that extend upward when the vehicle starts. This design allows drivers with smaller dashboard slots to enjoy full touchscreen navigation without modifying their console.
Floating-display head units represent the latest evolution in car infotainment design. These systems feature a 1-DIN or 2-DIN chassis that mounts securely inside the dashboard cavity, coupled with a large, adjustable screen that hovers in front of the dashboard. Floating screens often range from 9 to 10 inches or larger, offering superior visibility and a modern, high-tech aesthetic.
Before purchasing a floating-display unit, you must carefully evaluate your dashboard’s layout. Because the screen sits proud of the dash, it can physically block air conditioning vents, hazard light buttons, glove compartments, or gear shifters. In Singapore, ensuring that hazard buttons and critical controls remain completely unobstructed is also important for vehicle safety inspections.
To determine physical compatibility, do not rely solely on online vehicle compatibility databases, as trim levels and regional variations can alter dashboard configurations. Use a precise measuring tool to measure the height, width, and depth of your current radio cavity. Remember to account for the depth of the wiring bundle, steering wheel control modules, and antenna adapters that will sit behind the new head unit.
Key Features to Evaluate for Your Infotainment Upgrade
Once you have identified the physical form factor that fits your vehicle, you must prioritize the technical specifications that impact daily usability and audio performance.

The choice between wired and wireless Android Auto connectivity is one of the most significant decisions affecting your daily driving convenience. Wired Android Auto requires you to connect your smartphone to the head unit via a USB cable every time you enter the vehicle. This connection ensures stable data transmission, minimal audio latency, and continuous device charging during long drives.
Wireless Android Auto offers the convenience of automatic connection. The head unit establishes a quick Bluetooth handshake before transitioning to a high-bandwidth Wi-Fi connection to stream navigation and audio data. While wireless connectivity eliminates cable clutter, it increases your phone’s battery consumption and heat generation. If you frequently take short trips, wireless convenience is highly beneficial, but for longer journeys, you will still need to connect a charger.
Screen technology directly affects your visibility and interaction with the head unit, especially under challenging lighting conditions. Capacitive touchscreens, similar to those on modern smartphones, offer excellent clarity, vibrant colors, and multi-touch gesture support. They respond to light finger contact and are highly durable.
Resistive touchscreens are pressure-sensitive and typically found on entry-level models. While they are highly reliable and can be operated while wearing gloves, they generally lack the sharpness and rapid response times of capacitive displays. Regardless of the screen type, look for models featuring anti-glare or anti-reflection coatings, which are essential for maintaining visibility under the bright, direct sunlight common in Singapore.
For car audio enthusiasts, the head unit’s audio processing capabilities and output options are critical for future system expansions. If you plan to upgrade your factory speakers, add external amplifiers, or install a dedicated subwoofer, pay close attention to the preamp outputs (pre-outs). High-voltage pre-outs deliver a cleaner, stronger audio signal to external amplifiers, reducing background noise and distortion.
Built-in audio customization tools, such as graphic equalizers, time alignment, and active crossovers, allow you to fine-tune the soundstage inside your cabin. Time alignment delay ensures that audio signals from speakers at varying distances reach your ears simultaneously, creating a balanced and immersive listening experience.
Vehicle Compatibility and Installation Requirements
Integrating an aftermarket Pioneer head unit into a modern vehicle requires careful planning to preserve factory safety features and convenience controls.
Most modern vehicles feature steering wheel controls (SWC) that allow you to adjust volume, change tracks, and activate voice commands without taking your hands off the wheel. To retain these functions with an aftermarket Pioneer unit, you will almost certainly need a vehicle-specific steering wheel control interface module. This module translates your car’s digital communication signals into commands the Pioneer unit can interpret.
Beyond steering wheel controls, you must evaluate how the new head unit will interface with existing vehicle hardware, such as factory backup cameras, parking sensors, and console USB ports. Factory backup cameras often operate on lower voltages compared to the standard 12V aftermarket systems, and they use proprietary wiring connectors. Retaining these features requires specific adapter harnesses or step-down voltage converters to prevent electrical damage to the camera.
Modern vehicles often route climate control data, tire pressure monitoring, and vehicle settings through the factory screen. If your vehicle integrates these systems into the radio, you must verify if a compatible CAN-bus integration module is available. This module allows the Pioneer head unit to display and control these factory settings, preventing the loss of critical vehicle functions.
Working on your vehicle’s electrical system carries inherent safety risks. Upgrading a head unit involves disassembling portions of the dashboard, which often sit in close proximity to passenger airbags, sensitive climate control sensors, and factory immobilizer wiring.
Before beginning any disassembly or electrical work, always disconnect the vehicle’s negative battery terminal to prevent accidental short circuits or airbag deployment. Refer to your original vehicle manufacturer’s instructions for safe panel removal and wiring schematics. Because improper wiring can cause electrical shorts, parasitic battery drain, or damage to your car’s electronic control units, seeking a qualified professional installer is highly recommended to preserve both your vehicle’s safety systems and your product warranty.
Setting Your Budget and Finding Authorized Retailers
Aligning your feature expectations with a realistic budget and sourcing your equipment from authorized channels will ensure a successful upgrade and long-term peace of mind.
When planning your budget, it is helpful to understand the general price tiers for aftermarket head units in Singapore. Entry-level Pioneer Android Auto units typically range from S$350 to S$500, offering reliable wired connectivity and standard resistive screens. Mid-range models, priced between S$600 and S$900, introduce wireless connectivity, capacitive touchscreens, and enhanced audio tuning capabilities. Premium models, including large floating-display units with high-definition screens and advanced audio processing, can range from S$1,000 to S$1,500 or more.
To protect your investment, always purchase your Pioneer head unit from an authorized dealer in Singapore. Authorized dealers provide genuine products designed for the local market, ensuring compatibility with local radio frequencies and access to official firmware updates. Crucially, purchasing from authorized channels secures a valid local warranty, protecting you against manufacturing defects or hardware failures that unauthorized online marketplace listings or gray-market imports do not cover.
When calculating the total cost of your upgrade, remember to factor in the necessary installation accessories and labor fees. A complete installation rarely consists of just the head unit itself. You will likely need a vehicle-specific dash fascia kit to fill the gaps around the new receiver, wiring harness adapters, antenna adapters, and integration modules for steering wheel controls or factory cameras. These accessories can add an additional S$100 to S$300 to your total expenses, alongside professional installation labor costs.
Frequently Asked Questions (FAQ)
Can I use my existing car microphone with a new Pioneer head unit?
Pioneer head units generally require the use of the external microphone included in the box. Factory microphones are typically integrated into the car’s wiring harness and optimized for the original system’s voltage and impedance. While some specialized aftermarket interface modules claim to retain factory microphones, using the included Pioneer microphone mounted on the steering column or near the rearview mirror ensures the clearest voice recognition and call quality.
Does wireless Android Auto drain my phone battery faster than wired?
Yes, wireless Android Auto drains your phone’s battery significantly faster because it utilizes both Wi-Fi and Bluetooth simultaneously to transmit high-bandwidth navigation and audio data. To prevent your phone from running out of power on longer drives, look for a Pioneer head unit with a high-amperage USB port (such as 1.5A or higher) to charge your device, or consider installing a compatible wireless charging pad in your vehicle.
Will a Pioneer Android Auto unit support my car's factory backup camera?
Yes, but it is rarely a direct plug-and-play connection. Factory backup cameras often operate on lower voltages (such as 6V) compared to the standard 12V aftermarket systems, and they use proprietary wiring connectors. To retain your factory camera, you will need to verify the camera’s voltage requirements and video signal type, then purchase a compatible step-down voltage converter and camera retention harness to safely bridge the connection to the Pioneer unit’s RCA camera input.
Community discussion
Share your experience or ask a question. Comments are reviewed before publication.