
Selecting the right Newboler bike light for your daily commute in Singapore requires matching the light’s technical specifications—such as lumen output, beam pattern, battery capacity, and weatherproofing—to the specific conditions of your route. Whether you ride along unlit park connectors (PCNs) or navigate busy arterial roads alongside heavy traffic, your safety depends on choosing a model that provides sufficient visibility and runtime. By evaluating your typical riding environment, commute duration, and local weather patterns, you can identify the exact specifications needed to keep your journey secure and compliant with local road safety guidelines.
Matching Light Output to Route Darkness and Traffic Density
Understanding how to interpret lumen ratings and beam patterns is the first step in selecting an appropriate bicycle headlight. Lumens measure the total amount of visible light emitted by a source, but how that light is distributed on the road is equally critical. When reviewing Newboler product specifications, look closely at the beam spread, which is typically categorized as a flood beam, a spot beam, or a hybrid pattern.
For commuters who primarily use unlit or poorly lit paths, such as certain stretches of the park connector network, a light with a higher lumen output and a wide flood beam is highly recommended. A flood beam distributes light evenly across a broad area, allowing you to spot low-hanging branches, pedestrians, or sudden path hazards in your peripheral vision. Conversely, if your commute consists of well-lit urban roads, a lower lumen setting with a focused spot beam may be sufficient to make you visible to others without wasting battery power.
Products mentioned in this guide
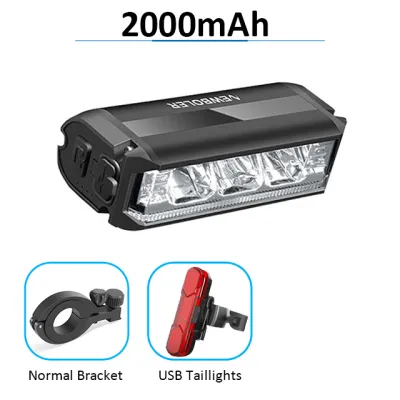
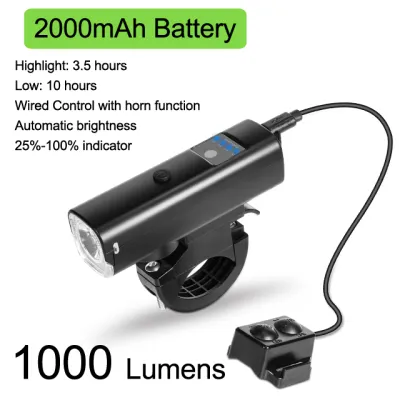
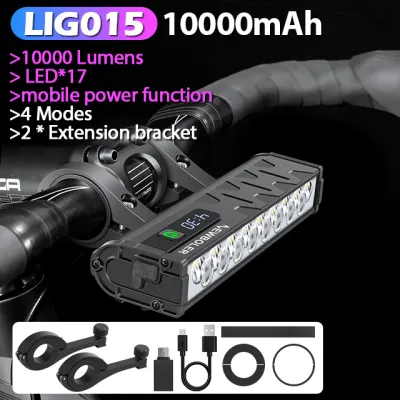
Prices are valid at publication and may change. Please refer to the product page for the latest price.
When riding in high-traffic areas, side visibility becomes a crucial safety factor. Many urban cycling accidents occur at intersections where cross-traffic fails to notice a cyclist approaching from the side. To mitigate this risk, inspect the physical design of the light casing on the manufacturer’s product page or packaging. Look for models that feature side-visibility cutouts, wide-angle lenses, or dedicated amber side LEDs that project light laterally, ensuring you are visible from multiple angles.
Conspicuity during daylight hours is another important consideration for daily commuters. Many modern bike lights include a daytime running light (DRL) function or distinct flashing modes designed specifically to stand out against bright sunlight. When browsing available models, check the product packaging or online specification sheets for these dedicated modes, as they use rapid, irregular flash patterns that are highly effective at catching the attention of distracted motorists during daytime rides.
Evaluating Battery Capacity for Your Ride Duration
To ensure your light remains functional throughout your entire journey, you must carefully calculate your battery requirements based on your daily commute length. Start by estimating the total time you spend riding each day, including both your morning and evening trips, as well as any regular detours or potential delays. Once you have a clear understanding of your total daily ride time, you can cross-reference this figure with the manufacturer’s stated runtimes for your preferred brightness settings.

It is important to recognize that a light’s maximum lumen output will drain the battery significantly faster than its lower-intensity modes. For instance, a light that can run for several hours on a medium setting might only last for an hour or less when operated at its highest brightness level. Therefore, you should plan to use the maximum setting only when absolutely necessary, such as on completely unlit paths, and switch to lower, more energy-efficient modes when riding under streetlights.
When evaluating the technical specifications of a Newboler light, check the battery type and charging interface listed on the product label. Most modern commuter lights utilize built-in rechargeable lithium-ion batteries, which offer convenience and consistent performance. Ensure the charging interface, such as a USB-C port, is compatible with your existing charging cables and power adapters at home or at your workplace, allowing for easy recharging between commutes.
Over time, all rechargeable batteries experience natural degradation, which gradually reduces their overall capacity and runtime. To account for this inevitable wear, as well as unexpected delays caused by traffic or weather, it is wise to select a model that offers a runtime buffer. Choosing a light with a stated battery life that exceeds your daily commute time by at least fifty percent helps ensure that you will not be left in the dark as the battery ages.
For exceptionally long commutes or situations where recharging is not immediately possible, preparing a backup power source is an excellent safety strategy. Some bike lights support pass-through charging, allowing them to be powered by an external power bank while in use. Alternatively, carrying a secondary, compact backup light in your commuter bag ensures you always have a reliable source of illumination if your primary light runs out of power unexpectedly.
Verifying Weather Resistance and Mounting Security
Singapore’s tropical climate is characterized by high humidity and sudden, intense downpours, making weather resistance a non-negotiable feature for any commuting accessory. To determine how well a bike light can withstand these harsh environmental conditions, locate the Ingress Protection (IP) rating on the product packaging or specification sheet. This rating consists of two numbers, with the second digit indicating the level of liquid protection.
For reliable performance during heavy rain, look for a light with an IP rating of at least IPX6, which indicates protection against powerful water jets from any direction. A lower rating, such as IPX4, only protects against light splashes and may fail during a severe tropical thunderstorm. Ensuring your light has adequate water resistance prevents moisture from penetrating the casing and damaging the internal circuitry, which could lead to sudden failure during a wet ride.
In addition to weatherproofing, the security of the mounting mechanism is vital for preventing the light from shifting or falling off during your commute. Bike lights commonly use silicone straps, rigid plastic bracket clamps, or GoPro-style adapters to attach to the handlebars. Inspect the mounting hardware included with the light to ensure it is compatible with the specific shape and diameter of your bicycle’s handlebars.
Before purchasing, measure your handlebar diameter and compare it to the compatibility range specified by the manufacturer. A mount that is too loose will cause the light to vibrate or slip downward when riding over uneven surfaces, directing the beam away from the road and reducing your visibility. Conversely, a mount that is too tight or improperly designed can scratch your handlebars or damage delicate carbon fiber components.
When installing your new light, always review the manufacturer’s mounting instructions to ensure a secure and damage-free fit. Position the light so that it does not interfere with your bicycle’s brake levers, gear shifters, or steering cables. Additionally, make sure the light is angled slightly downward to illuminate the road ahead without blinding oncoming cyclists, pedestrians, or motorists, which is a common hazard on shared paths.
Purchasing and Pre-Ride Safety Checks
To ensure you receive a genuine product with accurate specifications and a valid warranty, always purchase your bike light from authorized online retailers or official brand stores. Purchasing from unverified third-party sellers on online marketplaces can expose you to counterfeit goods that may not meet safety standards or deliver the advertised lumen output and battery life. Official channels also provide reliable customer support if you encounter any issues.
While comparing prices across different ecommerce platforms, keep in mind that high-quality bike lights vary in cost depending on their features and output capacity. Be cautious of listings that are priced significantly below the average market rate or those that lack detailed technical specification sheets and official branding. Investing in a legitimate, well-documented product ensures better long-term reliability and safety for your daily commute.
Once your light arrives, perform a thorough physical inspection before mounting it on your bicycle. Check the integrity of the outer casing, ensuring there are no visible cracks, gaps, or loose components. Pay close attention to the rubber cover that seals the charging port, verifying that it fits snugly and creates a tight seal to prevent water ingress during rainy rides.
Finally, conduct a stationary test of the light in a safe, controlled environment before heading out into traffic. Turn the light on and cycle through all the available brightness and flashing modes to confirm they function correctly. Check the battery indicator to ensure it displays the charge level accurately, and verify that the mounting bracket holds the light firmly in place when you apply gentle pressure, ensuring a safe and trouble-free commute.
Frequently Asked Questions (FAQ)
Can I use a Newboler front light as a rear light?
No, you should not use a front light as a rear light due to safety conventions and local traffic regulations. Bicycle lighting standards require a white light at the front to illuminate your path and signal your approach, while a red light must be used at the rear to alert trailing traffic of your presence. Using a white light at the rear can confuse other road users, leading them to believe you are riding toward them, which significantly increases the risk of a collision. In Singapore, the Land Transport Authority (LTA) mandates the use of a front white light and a rear red light or reflector during hours of darkness, and non-compliance can result in regulatory penalties.
How should I maintain the charging port to prevent corrosion?
To prevent corrosion and extend the lifespan of your bike light, always ensure the rubber or silicone charging port cover is fully sealed and free of debris after every charge. If you ride through rain or highly humid conditions, wipe the exterior of the light completely dry with a clean, soft cloth before opening the port cover to plug in the charger. Additionally, store your bike light in a cool, dry, and well-ventilated indoor environment when it is not in use, as leaving a damp light in a sealed bag or a humid storage area can cause moisture to accumulate and corrode the internal electrical contacts over time.
Community discussion
Share your experience or ask a question. Comments are reviewed before publication.