
Quick Answer: Identifying Your Exact CB400 Model and Fairing Needs
Finding the correct fairing for your Honda CB400 requires a clear understanding of your motorcycle’s specific generation and production year. The CB400 Super Four has a rich history spanning several decades, resulting in numerous structural updates that directly affect bodywork compatibility. Before purchasing any replacement panels, you must identify your bike’s exact sub-model to avoid costly fitment errors.
To locate your motorcycle’s precise identity, inspect the vehicle identification number (VIN) or frame number stamped on the steering head tube. Cross-referencing this number with your registration documents or the manufacturer’s official database will reveal the exact model year and generation, such as the early Project Big-1 models, the VTEC Spec I, II, or III, or the later fuel-injected Revo models.
Cross-year compatibility is exceptionally rare for the CB400 platform due to subtle chassis, fuel tank, and mounting point modifications made by the manufacturer over the years. A fairing designed for a 2010 Revo will not align with the mounting tabs of a 1995 Super Four.
Products mentioned in this guide
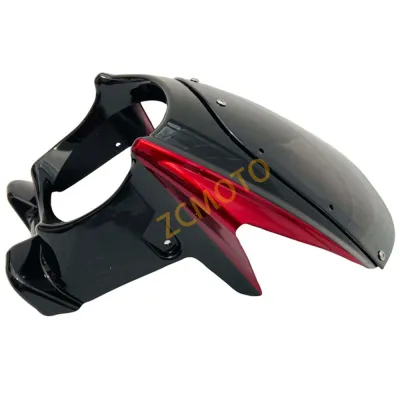
![[PfiSo.] [The-Best] Motorcycle Fairing Modified Cover Cover Accessories ABS Material Motorcycle Headgear Smooth Suitable For Honda CB400](https://img.lazcdn.com/g/p/1c7d7ecc96936ec03bf16c4736df2dec.jpg_webp_400x400q80.jpg_.webp)
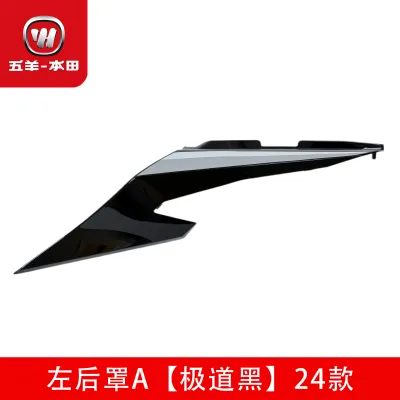
Prices are valid at publication and may change. Please refer to the product page for the latest price.
Your purchasing decision should also align with your primary goal for the motorcycle. Whether you are executing a complete factory-spec restoration, upgrading to a sporty track-day aesthetic, or simply replacing a single damaged panel from a minor tip-over, knowing your objective helps narrow down the fairing style and material that best suits your needs.
CB400 Fairing Configurations: Matching Style to Your Riding Needs
The Honda CB400 can accommodate several distinct fairing configurations, each offering a unique balance of wind protection, weight, and visual appeal. Choosing the right setup depends heavily on your daily riding habits, whether you commute through congested city streets or travel long distances on open expressways.

Full fairings provide the highest level of wind protection and aerodynamic efficiency, making them ideal for riders who frequently travel at highway speeds. These comprehensive kits cover the front, sides, and lower sections of the motorcycle, shielding the engine and the rider’s legs from wind blast and road debris. However, installing a full fairing kit on a traditionally naked CB400 typically requires extensive aftermarket mounting brackets, specialized stay bars, and careful routing of cooling hoses to ensure the engine receives adequate airflow.
Half fairings and bikini cowls offer a minimalist alternative that preserves the classic naked bike silhouette while providing targeted wind deflection. A bikini cowl wraps tightly around the round headlight and instrument cluster, redirecting high-speed air over the rider’s helmet to reduce neck fatigue during long commutes. These smaller fairings are significantly lighter than full body kits, require simpler mounting hardware, and do not interfere with the motorcycle’s natural engine cooling characteristics.
Tail sections and seat cowls focus entirely on the rear aesthetic of the CB400, transforming the dual-seat configuration into a sleek, race-inspired single-seater profile. These components do not affect front-end aerodynamics or engine cooling, making them popular cosmetic upgrades. When selecting a rear cowl, ensure it matches the lock mechanism and grab-rail mounting points of your specific model year, as rear subframe designs changed significantly between the early carbureted models and the later VTEC generations.
Verifying Fitment: Ensuring Compatibility with Your Model Year
Ensuring a replacement fairing physically fits your CB400 requires a methodical verification process before you finalize any purchase. Relying solely on visual similarity or generic online listings is one of the most common mistakes riders make, often resulting in misaligned panels that cannot be safely secured.
The most reliable method to guarantee compatibility is to cross-reference the Original Equipment Manufacturer (OEM) part numbers. Locate the color label typically found under the motorcycle’s seat or on the frame rail, which lists the exact model code and paint code. Use this information to consult official parts catalogs, matching the OEM part numbers of your original bodywork with the replacement panels you intend to buy.
Physical dimensions and mounting interfaces must be verified with extreme precision. Pay close attention to the location of the mounting tabs, screw holes, and the specific bracket requirements for your model year. For instance, the instrument cluster shape and size evolved across the VTEC generations, meaning a front cowl must have the correct inner clearance to accommodate your specific dashboard without pinching electrical wiring or binding the steering column.
Generic aftermarket listings often use broad terms like “fits CB400 all years,” which is highly misleading. These universal claims ignore the structural differences between carbureted and fuel-injected models, such as fuel tank shapes and side cover mounting points. Always request detailed technical drawings or physical measurements from the seller, and compare them directly to your motorcycle’s existing mounting points before committing to a purchase.
Evaluating Materials, Paint Finish, and Build Quality
The durability, appearance, and longevity of your CB400 fairings depend heavily on the materials used in their construction and the quality of their surface finish. Understanding the differences between common manufacturing materials allows you to balance cost against long-term performance.
Acrylonitrile Butadiene Styrene (ABS) plastic is the industry standard for road-going motorcycle fairings due to its excellent balance of flexibility, impact resistance, and moderate weight. High-quality ABS fairings are typically produced using injection molding, which ensures consistent wall thickness and precise tab placement. In contrast, compression-molded ABS or fiberglass fairings tend to be more rigid, brittle, and prone to cracking under the vibration of a high-revving inline-four engine. Carbon fiber options offer the ultimate weight reduction and structural rigidity, but they carry a premium price tag and are generally reserved for high-end custom builds or track applications.
When assessing the paint finish, determine whether the panels are pre-painted or supplied raw and unpainted. Pre-painted aftermarket fairings should feature multiple layers of color-matched paint topped with a thick, UV-resistant clear coat to prevent fading under intense tropical sunlight. Inspect product descriptions for indicators of paint quality, such as the use of polyurethane-based paints, which offer superior chemical resistance against fuel spills and cleaning solvents.
Build quality can also be evaluated by examining the structural reinforcements of the panels. Look for fairings that feature reinforced mounting holes, integrated brass threads, or double-thickness plastic around high-stress areas like mounting tabs. Consistent panel gaps and clean edges in product photos are strong indicators of high-quality manufacturing molds, reducing the likelihood of rattling or warping once installed on your motorcycle.
Pre-Purchase Checklist and Safe Installation Boundaries
Before completing your purchase, go through a comprehensive checklist to ensure you have all the necessary components for a successful and safe installation. A complete fairing replacement often requires more than just the plastic panels themselves.
Verify whether the fairing kit includes all essential mounting hardware, such as model-specific brackets, bolts, washers, and rubber grommets. Rubber grommets are critical because they isolate the plastic panels from engine vibrations, preventing the mounting tabs from cracking over time. If the kit does not include these hardware pieces, you must purchase them separately or verify that your original OEM hardware can be safely reused.
Keep in mind that you will likely need to transfer several internal components from your old bodywork to the new fairings. This includes heat shields, foam dampening pads, headlight mounting brackets, and wiring harnesses for the turn signals. Carefully inspect your existing components to ensure they are in good condition; brittle plastic clips or degraded heat shielding should be replaced during the installation process.
While basic panel replacement can be a rewarding DIY project, you must recognize the safety boundaries of home maintenance. If your new fairing installation requires modifying the motorcycle’s structural stay brackets, altering the headlight mounting system, or splicing into the main electrical wiring harness, stop and consult a qualified professional mechanic. Improperly routed wiring can lead to short circuits or electrical fires, while poorly secured brackets can fail at high speeds, creating an immediate safety hazard on the road. Always prioritize professional installation when dealing with critical structural or electrical components.
Frequently Asked Questions (FAQ)
Can I use a CB400 VTEC fairing on a standard Super Four model?
Directly swapping a VTEC fairing onto an older, standard CB400 Super Four is generally not possible without extensive custom fabrication. The VTEC models feature a redesigned chassis, a different fuel tank shape, and modified mounting points for both the side covers and the rear cowl. Additionally, the instrument clusters and headlight brackets differ significantly between generations. To avoid alignment issues and structural instability, it is highly recommended to purchase fairings specifically designed and certified for your motorcycle’s exact model year.
Do aftermarket fairings come with pre-drilled holes for mirrors and turn signals?
Many high-quality aftermarket fairing kits designed for the CB400 come with pre-drilled mounting holes for mirrors, turn signals, and main mounting bolts. However, the precision of these holes can vary significantly between manufacturers. It is crucial to verify the product specifications before purchasing. If you receive a panel without pre-drilled holes, or if the alignment is slightly off, you must carefully measure and drill the holes yourself, ensuring you use specialized plastic-drilling bits to prevent the ABS material from cracking or chipping.
How should I clean and maintain painted ABS fairings?
To maintain the paint finish and structural integrity of your ABS fairings, wash them regularly using a mild, pH-neutral motorcycle soap and a soft microfiber wash mitt. Avoid using high-pressure washers directly on the panel seams, decals, or mounting points, as the intense water pressure can peel graphics and force moisture into electrical connections. Never use abrasive cleaners, harsh chemical solvents, or household detergents, as these can degrade the plastic and strip the protective clear coat. Apply a high-quality motorcycle wax or sealant to protect the paint from UV damage and road grime.
Community discussion
Share your experience or ask a question. Comments are reviewed before publication.