
Selecting the ideal aesthetic upgrade for your X254 requires a careful balance between sporty styling and the vehicle’s sophisticated factory design. An OEM+ (Original Equipment Manufacturer Plus) approach focuses on subtle, integrated enhancements that look as though they were designed alongside the vehicle in the factory studio. A well-chosen trunk lip spoiler elevates the rear profile of the X254, adding a touch of dynamic character without crossing into the territory of overly aggressive, distracting aftermarket modifications.
To achieve this seamless look, you must evaluate several critical factors before making a purchase. The ideal spoiler should complement the existing aerodynamics and body lines of your SUV, use high-grade materials that withstand local environmental conditions, and install securely without risking damage to your paintwork. By focusing on precise fitment, factory-matched finishes, and non-destructive mounting methods, you can confidently select an accessory that enhances your vehicle’s premium character.
What Defines a True OEM+ Spoiler Design?
An OEM+ design philosophy is rooted in restraint and visual harmony. Unlike high-rise wings or aggressive GT-style spoilers that disrupt the clean silhouette of a luxury SUV, an OEM+ trunk lip spoiler acts as a natural extension of the existing bodywork. It should follow the precise curvature of the upper trailing edge of the rear hatch, creating a subtle shadow line that makes the rear of the vehicle look wider and more planted. The goal is to enhance the vehicle’s stance rather than drawing singular attention to the accessory itself.
Products mentioned in this guide
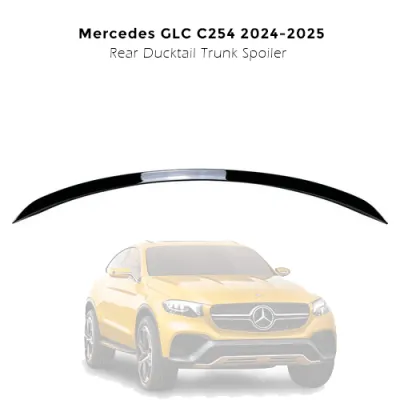
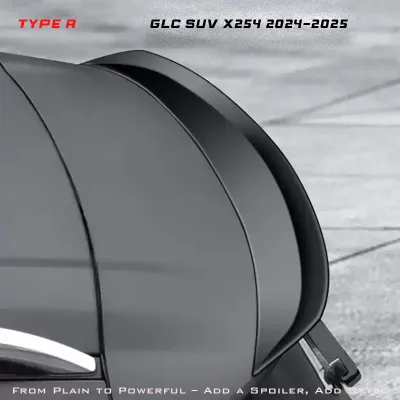
Prices are valid at publication and may change. Please refer to the product page for the latest price.
When evaluating options for the X254, pay close attention to how the spoiler integrates with the rear hatch geometry and the roofline. The X254 features a gently sloping roof that transitions into an integrated rear spoiler area above the rear glass, flanked by black plastic side wind deflectors. A true OEM+ spoiler must align perfectly with these existing components, maintaining a continuous flow from the roof rails down to the rear window. If the spoiler features an overly aggressive upward kick or extends too far past the sides of the hatch, it can clash with these factory lines and disrupt the vehicle’s aerodynamic balance.
Visual weight and proportion are equally critical when selecting a design. The X254 possesses a substantial road presence with a balanced front-to-rear visual weight. A spoiler that is too bulky adds artificial height to the rear, making the SUV look top-heavy and detracting from its sleek profile. Conversely, a design that is too thin might get lost in the overall scale of the vehicle. The ideal OEM+ spoiler maintains a low-profile silhouette, extending backward slightly more than it extends upward, preserving the elegant proportions of the original design.
Material and Finish Selection for a Factory Match
Choosing the right material is essential for ensuring long-term durability and a factory-quality appearance. ABS plastic and polyurethane (PU) are the industry standards for high-quality exterior accessories. ABS plastic is highly rigid, impact-resistant, and holds its shape exceptionally well under high temperatures—a crucial consideration in Singapore’s tropical climate, where intense sunlight and heat can cause cheaper, low-grade plastics to warp or sag. Polyurethane offers slightly more flexibility, making it highly resistant to minor impacts and easier to manipulate slightly during the installation process for a perfectly flush fit.

Achieving a seamless OEM+ look also depends heavily on the finish of the spoiler. If you prefer a body-colored match, you must locate your X254’s exact factory paint code, which is typically found on the driver’s side door pillar placard. Common factory finishes like Polar White, Obsidian Black, or Selenite Grey require professional-grade paint application with a high-solid clear coat to match the depth, gloss, and orange-peel texture of the original paint. While some manufacturers offer pre-painted options, you must verify that they use official paint codes and UV-resistant clear coats to prevent premature fading or yellowing under constant sun exposure.
For those seeking a contrasting aesthetic, gloss black and carbon fiber are excellent OEM+ choices. A gloss black spoiler is particularly effective if your X254 features the factory Night Package, as it seamlessly ties in with the gloss black window surrounds, roof rails, and bumper trim. If you opt for carbon fiber, ensure the product features a high-quality, UV-inhibited clear coat. This protective layer is vital for preventing the carbon fiber resin from yellowing, hazing, or delaminating when exposed to harsh environmental elements over time.
Fitment, Adhesion, and Installation Checks
Before purchasing any exterior accessory, it is vital to understand the mounting requirements and physical compatibility with your vehicle. For a luxury SUV like the X254, drilling into the steel or aluminum rear hatch is highly discouraged. Drilling permanently alters the vehicle, invites rust, and can compromise structural integrity. High-quality OEM+ spoilers are designed to be mounted using double-sided automotive acrylic foam tape, such as 3M VHB (Very High Bond). When applied correctly, this tape creates a semi-permanent, weather-resistant bond that can withstand high-pressure car washes and highway speeds while remaining completely reversible.
You must also perform thorough clearance and interference checks before finalizing your selection. Verify that the spoiler’s dimensions do not interfere with the sweep arc of the rear windshield wiper. The inner edge of the spoiler must clear the wiper blade at its highest point of travel to prevent damage to the wiper motor or the spoiler itself. Additionally, ensure the spoiler does not overhang or cast a shadow over the reverse camera lens or obstruct the field of view of any rear-facing parking sensors or driver assistance cameras mounted near the top of the glass.
Proper surface preparation is the single most important factor in ensuring a secure, long-lasting adhesive bond. The mounting surface on the rear hatch must be entirely free of wax, ceramic coatings, road grime, and oils. Begin by washing the area with a wax-free car shampoo, followed by a thorough wipe-down with a 50/50 mixture of isopropyl alcohol and water. Applying an automotive adhesion promoter to the tape contact zone on the vehicle can significantly enhance the initial tack and long-term bond strength. Always perform the installation in a shaded, dust-free environment with ambient temperatures between 21°C and 32°C to ensure the adhesive cures correctly.
Because an improperly installed spoiler can detach at high speeds, posing a severe hazard to trailing motorists, always follow the manufacturer’s precise curing times—typically 24 to 48 hours before exposing the vehicle to moisture or highway speeds. If you are uncomfortable with the alignment or adhesive application process, seek the assistance of a qualified professional body shop to ensure a secure and level fitment. Always consult your vehicle’s documentation to verify compatibility with your specific model year and trim level, as AMG Line and standard exterior packages may feature slightly different hatch contours.
Building Your Shortlist: Evaluation Criteria
When compiling your shortlist of potential spoilers, establish a clear evaluation framework to compare options objectively. Start by verifying manufacturer claims of “perfect OEM fitment.” Because you cannot physically test the part before purchasing, rely on independent user reviews, automotive forums, and owner groups to gauge real-world fitment. Look for customer-submitted photos that show close-up angles of the panel gaps and edges. A high-quality spoiler should sit completely flush against the hatch contour without any visible gaps or tension points that could cause the adhesive to lift over time.
Warranty coverage and return policies are also critical considerations, especially when ordering painted or custom-finished parts. Prioritize manufacturers or retailers who offer robust shipping protection and secure packaging, such as custom-molded foam inserts, to prevent damage during transit. A reputable seller should provide a clear return policy in case of fitment discrepancies and offer a warranty against paint fading, clear coat peeling, or material warping under normal operating conditions.
Finally, compare price points in S$ against the completeness of the installation kit. A lower-priced spoiler might seem like a bargain initially, but it may require you to purchase high-grade automotive tape, adhesion promoters, or alignment templates separately. Some premium kits include custom alignment jigs or plastic guides that clip onto the edges of the hatch, ensuring the spoiler is perfectly centered during installation. Factor the cost of these essential installation aids and high-grade adhesives into your overall budget to determine the true value of the product.
Frequently Asked Questions (FAQ)
Will adding a trunk lip spoiler affect the X254's rear wiper or camera?
A properly designed OEM+ trunk lip spoiler for the X254 is engineered to sit flush on the upper trailing edge of the rear hatch, well clear of the rear wiper assembly. However, you should always verify the clearance by manually lifting the wiper arm or observing its full sweep arc before permanently mounting the spoiler. Because the reverse camera on the X254 is typically housed lower down near the license plate recess or integrated into the Mercedes-Benz star emblem, a low-profile roof-level lip spoiler will not obstruct its field of view or interfere with the ultrasonic parking sensors.
Can I remove an adhesive-mounted spoiler without damaging the X254's paint?
Yes, adhesive-mounted spoilers can be safely removed without damaging the factory clear coat if you use the correct technique. Begin by using a heat gun or a high-powered hair dryer on a medium setting to gently warm the spoiler and soften the underlying double-sided tape; avoid overheating any single spot to prevent paint blistering. Once the adhesive is pliable, slide a length of high-strength monofilament fishing line or dental floss underneath one end of the spoiler, using a sawing motion to slice through the softened foam tape. After removing the spoiler, clean away any remaining adhesive residue using a dedicated, clear-coat-safe automotive adhesive remover used strictly according to the manufacturer’s instructions, followed by a fresh coat of wax or sealant to protect the paint.
Community discussion
Share your experience or ask a question. Comments are reviewed before publication.