
Deciding between a drilled and a no-drill rear spoiler for your Toyota Harrier comes down to how much you value permanent mechanical security versus keeping your boot lid completely unmodified. The Toyota Harrier’s sleek, coupe-like SUV silhouette is highly receptive to styling upgrades, but the mounting method you choose impacts structural integrity, resale value, and maintenance. Before undertaking any exterior modifications, consult your vehicle’s manual and verify local road safety regulations regarding exterior attachments. If you are uncomfortable handling power tools or working near electrical wiring, always seek qualified professional installation.
A drilled spoiler offers maximum physical attachment by securing directly to the tailgate frame. Conversely, a no-drill spoiler relies entirely on high-strength, automotive-grade double-sided adhesive tape. By evaluating these structural differences, installation requirements, and environmental factors, you can choose the right mounting method for your driving needs and aesthetic preferences.
Understanding the Core Differences: Drilled vs. Adhesive Mounting
The fundamental difference between these two mounting styles lies in how they distribute and resist aerodynamic forces. Drilled spoilers are secured using threaded bolts that pass through pre-drilled holes in the boot lid, fastened from the inside with locking nuts. This mechanical connection ensures the spoiler remains anchored to the vehicle body regardless of wind resistance or high speeds. The hardware is hidden beneath the inner trim panel of the tailgate, maintaining a clean exterior appearance.
Products mentioned in this guide
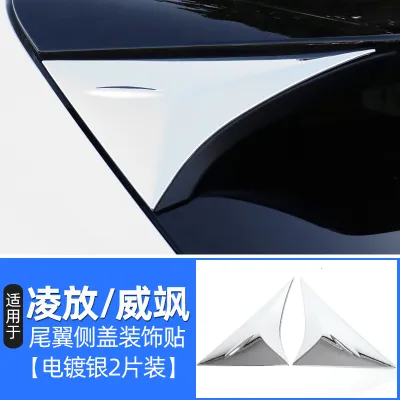
Prices are valid at publication and may change. Please refer to the product page for the latest price.
No-drill spoilers utilize advanced acrylic foam adhesive tapes designed specifically for automotive exterior trim. These tapes create a continuous bond along the contact interface between the spoiler base and the boot lid. Because there are no physical fasteners, the installation is completely non-invasive, leaving the factory paint and metal underneath untouched. While this offers a seamless finish, the strength of the bond relies entirely on surface adhesion rather than mechanical shear strength.
Evaluating the Drilled Spoiler Option
Opting for a drilled rear spoiler provides unparalleled structural stability, making it the preferred choice for larger, heavier, or aerodynamically aggressive wing designs. If you frequently drive at highway speeds, a mechanical connection ensures the spoiler will not lift or vibrate. This method distributes aerodynamic downforce directly to the tailgate chassis, preventing localized flexing of the outer body panels.

However, drilling into your Toyota Harrier’s boot lid is an irreversible modification. Removing the spoiler later requires extensive bodywork, including welding the holes shut, applying body filler, and repainting the entire tailgate. This permanent alteration can negatively affect your vehicle’s resale value, as many buyers prefer unmodified factory bodywork.
Furthermore, drilling introduces potential pathways for water intrusion and corrosion. If the drilled holes are not meticulously sealed, moisture can seep into the inner tailgate cavity, leading to rust and potential electrical damage to the rear wiper motor or camera wiring. Installers must apply rust-inhibiting primers to the bare metal edges and use high-quality rubber gaskets or automotive-grade silicone sealants during assembly.
Assessing the No-Drill (Adhesive) Spoiler Option
No-drill spoilers offer a highly appealing, reversible alternative that preserves your Harrier’s factory paintwork. This method is ideal for low-profile lip spoilers or lightweight cosmetic wings that do not generate significant aerodynamic drag. Because the installation requires no permanent modifications, you can easily return the vehicle to its stock appearance before selling it.
The success of an adhesive installation depends entirely on meticulous surface preparation. The mounting area must be completely free of dirt, wax, grease, and ceramic coatings, which compromise the tape’s ability to bond. Installers typically clean the area with a dedicated automotive degreaser or isopropyl alcohol as authorized by the product label, ensuring the paint is chemically clean. Always test any cleaning agents on an inconspicuous area first to verify paint compatibility.
Environmental conditions during application also play a critical role. In warm, humid climates, high humidity can interfere with the curing process if the surface is not kept dry. The adhesive typically requires a curing period of 24 to 72 hours, during which the vehicle should not be washed. Over time, exposure to intense UV radiation and heavy rain can gradually degrade the adhesive, requiring periodic inspection and eventual re-taping.
Pre-Installation Checks and Compatibility Verification
Before purchasing any rear spoiler for your Toyota Harrier, you must verify its compatibility with your specific vehicle generation and model year. The Harrier has evolved through several generations—such as the XU30, XU60, and XU80—each featuring distinct tailgate curvatures and spoiler profiles. A spoiler designed for an older generation will not sit flush on a newer model, leading to poor adhesion or misaligned bolt holes.
Additionally, inspect the underside of the boot lid for potential internal obstructions. Modern Harriers are equipped with complex electronic components housed within the tailgate, including high-mount stop lamps, rear-view cameras, parking sensors, and power tailgate wiring harnesses. If you choose a drilled spoiler, ensure that the drilling path does not intersect with any electrical looms or structural reinforcement beams inside the tailgate.
Always review the spoiler manufacturer’s detailed instructions and template guides before starting. Verify that the kit includes all necessary hardware, templates, and specified adhesives. If the instructions call for specific tools or surface prep agents, acquire them beforehand.
DIY vs. Professional Installation: Making the Right Choice
Deciding whether to install the spoiler yourself or hire a professional workshop depends on the mounting method and your comfort level with automotive modifications. A no-drill adhesive spoiler is a highly viable DIY project, provided you have a clean, dust-free environment, the correct cleaning agents, and the patience to align the spoiler precisely. Because the tape bonds instantly, using alignment guides or painter’s tape to mark the exact position is crucial.
For a drilled spoiler installation, professional assistance is highly recommended. Drilling into a vehicle’s bodywork requires specialized tools, precise measurements, and a steady hand. A professional workshop has the experience to use drilling templates accurately, apply rust-prevention coatings to raw metal edges, and properly route any integrated brake light wiring.
When selecting an automotive accessory shop in Singapore, look for established businesses with specific experience in handling Toyota Harrier body kits. Ask about their waterproofing practices for drilled installations and whether they offer a warranty on their workmanship. A reputable installer will gladly explain their sealing process and demonstrate how they protect your vehicle’s electrical systems.
Post-Installation Inspection and Maintenance
Once your new rear spoiler is installed, regular inspections and proper maintenance will ensure it remains secure. Immediately after installation, inspect the perimeter of the spoiler for any uneven panel gaps, lifting edges, or visible adhesive tape. If you opted for a drilled installation, check the interior of the boot after the first heavy rain or car wash to ensure there are no signs of water leakage around the mounting bolts.
When washing your Harrier, avoid directing high-pressure water sprayers directly at the edges of an adhesive-mounted spoiler, as the intense pressure can force water under the tape and initiate peeling. Use a pH-neutral car shampoo and a soft microfiber mitt to clean the spoiler, taking care not to scratch painted or carbon-fiber finishes.
Periodically check the physical stability of the spoiler by gently wiggling it. If you notice any play, rattling noises, or lifting at the corners of an adhesive mount, take immediate action to re-secure or professionally re-tape it before driving.
Frequently Asked Questions (FAQ)
Will a no-drill spoiler detach at highway speeds?
A high-quality, properly installed no-drill spoiler will not detach at highway speeds. The holding power depends heavily on meticulous surface preparation, the use of genuine automotive-grade acrylic foam tape, and the aerodynamic profile of the spoiler itself. Low-profile lip spoilers experience minimal drag and are highly secure with adhesive tape. However, for larger, high-drag wing designs, you should consult the manufacturer’s specifications or opt for a drilled installation to ensure absolute safety at high velocities.
Does installing a drilled spoiler void my car's warranty?
Installing a drilled spoiler can void the warranty on the specific body panels and electrical components affected by the installation. If drilling causes rust, paint bubbling, or water leaks that damage the rear wiper motor, camera, or power tailgate electronics, the manufacturer will likely deny warranty coverage for those repairs. The overall vehicle warranty remains intact, but any issues directly caused by the aftermarket modification will not be covered. Always check with your authorized dealer before making permanent structural changes.
Community discussion
Share your experience or ask a question. Comments are reviewed before publication.