
Upgrading your vehicle’s sound system involves much more than simply choosing high-performance speakers, powerful amplifiers, or a feature-rich head unit. To ensure these new components perform at their best and remain physically secure during daily driving, you must match them with the correct bracket holder. The mounting bracket serves as the critical interface between aftermarket audio gear and your vehicle’s factory mounting points, preventing unwanted movement, structural damage, and electrical issues. Selecting the right bracket requires analyzing the physical dimensions, weight, and thermal requirements of your new equipment, then verifying how those factors align with your vehicle’s specific make, model, and interior layout.
Understanding Car Audio Bracket Types
Car audio mounting hardware generally falls into two main categories: vehicle-specific mounting kits and universal adapters. Vehicle-specific brackets are engineered to match the exact bolt patterns, contours, and clearances of a particular vehicle model and year. These kits offer a seamless, bolt-on installation experience that minimizes the need for drilling or modifying the vehicle’s original structure. In contrast, universal adapters feature multiple pre-drilled slots, adjustable tabs, or customizable shapes designed to fit a wide range of vehicles. While universal options offer flexibility, they often require careful alignment, trimming, or minor modifications to achieve a secure fit.
The material composition of a bracket holder directly impacts its durability, resonant properties, and suitability for different areas of the vehicle. Molded ABS plastic is highly popular for speaker adapters and dashboard kits because it is lightweight, impervious to moisture, and easy to trim if minor adjustments are needed. In humid climates, where moisture can accumulate inside door panels, ABS plastic is highly resistant to rot and corrosion. Stamped steel and aluminum brackets provide the structural rigidity required for heavier components, such as large amplifiers or heavy-magnet subwoofers. For highly customized installations, fiberglass or medium-density fiberboard (MDF) brackets are sometimes fabricated, though MDF must be thoroughly sealed against moisture to prevent swelling and degradation over time.
Products mentioned in this guide

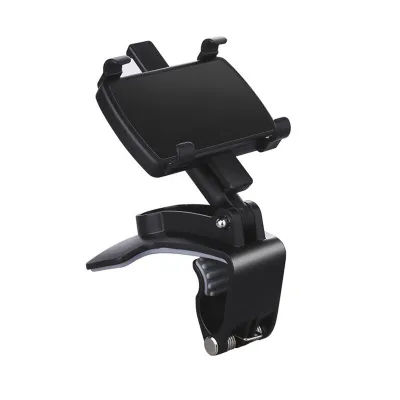

Prices are valid at publication and may change. Please refer to the product page for the latest price.
Attachment methods also vary depending on the component and its location. Most brackets rely on mechanical screw mounting to ensure a rigid connection to the vehicle’s metal chassis or plastic inner door panels. Some dashboard kits utilize snap-in plastic clips that mimic factory trim attachments, allowing for a clean, screwless exterior appearance. For lightweight accessories or secondary modules, high-strength adhesive pads may be used, though these should generally be avoided for primary audio components due to the risk of adhesive failure under high cabin temperatures.
Matching Brackets to Specific Audio Components
A common mistake during an audio upgrade is assuming that a single style of mounting hardware can be adapted for all components. Speakers, amplifiers, and head units have vastly different physical characteristics, operational demands, and environmental exposures. A bracket that works perfectly for holding a lightweight dashboard tweeter will fail completely if used to support a heavy amplifier under a seat or a vibrating mid-bass driver inside a door panel.

Speaker Brackets and Adapter Rings
Aftermarket speakers rarely share the exact mounting dimensions or screw hole configurations of factory-installed drivers. Speaker brackets, often referred to as adapter rings, are designed to bridge this gap, allowing you to mount a standard-sized aftermarket speaker (such as a 6.5-inch round driver) into a factory opening designed for an oval 6×9-inch speaker. These adapters ensure a tight acoustic seal, which is vital for maintaining mid-bass response and preventing sound waves from the rear of the speaker from canceling out those from the front.
When selecting speaker brackets, physical clearance is a primary concern. You must verify the mounting depth of the new speaker’s magnet assembly to ensure it does not extend too far into the door cavity. If the bracket is too thin, the speaker magnet may obstruct the downward travel of the window glass or interfere with the window regulator mechanism. Conversely, if the bracket is too thick, the front surround of the speaker may press against the factory door panel grille, causing physical damage to the speaker cone during high-volume playback.
Before finalizing your speaker bracket selection, always perform a dry fit with the door panel removed. Manually roll the window completely down to verify that the glass, tracks, and door lock rods clear the speaker magnet and bracket assembly. Additionally, ensure that the bracket does not block any water drainage holes at the bottom of the door panel, as trapped moisture can lead to rust and electrical short circuits.
Amplifier Mounting Solutions
Amplifiers are heavy, heat-generating components that require robust mounting solutions to prevent physical damage and ensure safe operation. Common mounting locations include the trunk floor, cargo side panels, or underneath the front seats. The bracket holder chosen for an amplifier must be strong enough to secure the unit’s weight during sudden braking or cornering, preventing it from becoming a dangerous projectile inside the cabin.
Thermal management is a critical factor when mounting an amplifier. Amplifiers rely on heat sinks to dissipate thermal energy generated during operation. If an amplifier is mounted flat against a carpeted floor without a bracket, airflow is severely restricted, which can lead to rapid thermal shutdown or permanent internal damage. Amplifier brackets should elevate the chassis slightly off the mounting surface, creating an air gap that promotes natural convection and heat dissipation.
Vibration isolation and electrical grounding are also essential considerations for amplifier brackets. Road vibrations can stress internal solder joints and electronic components over time. Utilizing rubber isolation grommets or dampening pads at the bracket’s mounting points helps absorb these shocks. Furthermore, if the bracket is secured directly to the vehicle’s metal chassis, ensure that the mounting screws do not compromise the vehicle’s electrical grounding paths. The amplifier’s main ground wire should always be connected directly to a clean, paint-free section of the vehicle chassis rather than relying on the mounting bracket itself for an electrical ground.
Head Unit and DIN Brackets
Replacing a factory radio with an aftermarket head unit requires a bracket system that secures the new chassis within the dashboard while maintaining a clean, integrated appearance. Aftermarket head units generally follow standard sizes: Single DIN (approximately 2 inches tall) or Double DIN (approximately 4 inches tall). The bracket kit must match the DIN size of the new receiver and provide the necessary side-mounting plates or metal sleeves to lock the unit firmly into the dashboard subframe.
Because factory dashboards feature unique shapes, curves, and textures, a vehicle-specific dash kit is required to fill the gaps around the rectangular aftermarket head unit. These kits include plastic fascia panels that snap or screw into place, matching the color and contour of the surrounding dashboard trim. When selecting a dash kit, verify that it is compatible with your vehicle’s specific trim level, as some models feature integrated climate controls or display screens that require specialized integration brackets.
Depth clearance behind the head unit bracket is another critical factor to check before installation. Aftermarket installations often involve bulky wiring harnesses, steering wheel control modules, antenna adapters, and RCA cables. The bracket must hold the head unit securely while leaving sufficient space behind the chassis to prevent these wires from being pinched, bent at extreme angles, or crushed against the vehicle’s metal subframe, which could cause electrical shorts or signal degradation.
Step-by-Step Guide to Selecting and Installing Your Brackets
To ensure a successful installation, follow a structured workflow that prioritizes measurement, compatibility verification, and safety. Begin by consulting your vehicle’s factory service manual or documentation to identify the exact locations of original mounting points and any hidden components behind them. Measure the physical dimensions, mounting depth, and screw hole spacing of your new audio components, and compare these specifications against the available space in your vehicle.
Once you have selected the appropriate bracket holder, perform a test fit before making any permanent modifications. Hold the bracket against the vehicle’s mounting surface to verify that the bolt holes align perfectly and that the bracket sits flat without rocking. Next, temporarily mount the audio component to the bracket to check for physical interference with surrounding panels, wiring, or mechanical linkages.
During the final installation, use high-quality fasteners and pay close attention to torque. When securing metal brackets to the vehicle chassis, use appropriate machine screws or bolts, and consider applying a thread-locking compound to prevent them from loosening due to road vibrations. When fastening components to plastic brackets, tighten the screws by hand rather than using a power drill; excessive torque can easily strip the plastic threads or crack the bracket, ruining the mount.
Safety must always be your top priority during any automotive modification. Before beginning any electrical work or removing interior panels, disconnect the vehicle’s negative battery terminal to prevent accidental short circuits or airbag deployment. If your installation requires routing wires near side-curtain airbags, steering wheel airbag modules, or structural safety beams, stop immediately. If you are unsure about how to safely route wiring or if the installation requires cutting into the vehicle’s metal structure, consult a qualified professional installer to ensure your vehicle’s safety systems remain fully functional.
Common Installation Mistakes and How to Avoid Them
One of the most common and hazardous mistakes during bracket installation is using overly long mounting screws. When securing a bracket to a door panel, dashboard subframe, or trunk floor, always verify what lies directly behind the mounting surface. Using a screw that is even slightly too long can pierce hidden factory wiring harnesses, fuel lines, brake lines, or airbag modules, leading to expensive damage or severe safety hazards. Always measure the thickness of the bracket and the mounting surface, and select fasteners that extend only as far as necessary to achieve a secure hold.
Another frequent error is failing to address vibration and panel resonance. When a speaker is mounted directly to a plastic or metal bracket without any dampening material, the physical energy from the speaker cone transfers into the bracket and the vehicle body. This results in annoying rattles, buzzes, and a significant loss of sound quality. To prevent this, apply a layer of foam tape, silicone gaskets, or butyl rubber dampening material between the bracket and the vehicle chassis, as well as between the speaker and the bracket.
Finally, ignoring manufacturer guidelines regarding airflow and component orientation can lead to premature equipment failure. Mounting an amplifier upside down under a rear deck or flat against a carpeted surface traps heat inside the unit. Always ensure that the mounting bracket positions the amplifier in an orientation that allows heat to rise naturally away from the chassis, and maintain the minimum clearance distances specified in the product manual to prevent thermal shutdown during extended use.
Frequently Asked Questions (FAQ)
Can I use universal brackets for all car audio components?
Universal brackets are highly versatile and can work well for securing standard-sized components in areas with ample space, such as mounting an amplifier on a flat trunk board or installing a simple single-DIN radio in an older vehicle. However, they are rarely suitable for modern, highly integrated dashboards or tight door panel locations. Vehicle-specific brackets are highly recommended for speakers and modern head units, as they ensure precise alignment with factory grilles, window mechanisms, and dashboard contours, saving significant installation time and reducing the risk of physical interference.
Do I need special tools to install car audio brackets?
Most standard bracket installations can be completed using basic hand tools, including a socket set, screwdrivers, and wire cutters. However, to prevent damage to your vehicle’s interior, you should use plastic panel removal pry tools to safely pop off delicate dashboard and door trim pieces without scratching them. A digital multimeter is also highly useful for verifying clean electrical ground connections when mounting amplifiers. If you are fabricating custom brackets or modifying existing ones, specialized tools such as a jigsaw, router, or plastic cutting shears may be required, in which case professional assistance is often the safest option.
Community discussion
Share your experience or ask a question. Comments are reviewed before publication.