
The best bracket holder types for car organization depend on the specific mounting location and the weight of the items you intend to secure. For seat back organization, rigid headrest post mounts and adjustable strap-and-bracket systems offer the most stable support for tablets, bags, and lightweight passenger gear. For trunk organization, heavy-duty tie-down anchor brackets and adjustable divider brackets provide the structural integrity needed to prevent cargo from shifting during transit. Selecting the right system requires matching the bracket’s mounting mechanism to your vehicle’s existing interior interfaces, such as headrest poles, seat rails, or factory cargo tie-down points.
An organized vehicle cabin improves both comfort and safety. Loose items can become dangerous projectiles during sudden braking, while cluttered seats reduce passenger legroom and comfort. By understanding the mechanical designs of various bracket holders, you can select a configuration that integrates seamlessly with your vehicle’s interior layout without causing wear to your upholstery or trim.
Key Mounting Styles and Bracket Designs
Vehicle bracket holders utilize several distinct mounting mechanisms, each engineered for specific locations and load capacities. Headrest post mounts are among the most common designs, clamping directly onto the exposed metal rods of the front seats. These brackets typically feature dual-clamp or spring-loaded tension designs that grip the poles securely, providing a stable foundation for mounting entertainment screens, utility hooks, or small storage bins. Because they position items at eye level for rear passengers, they are highly effective for passenger-facing organization.
Products mentioned in this guide
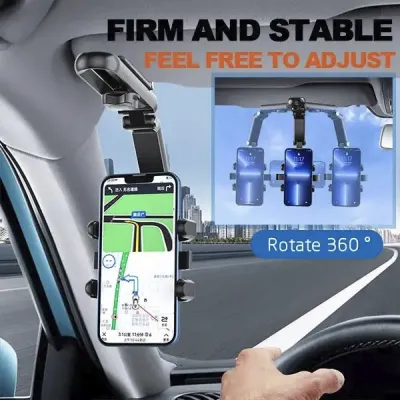
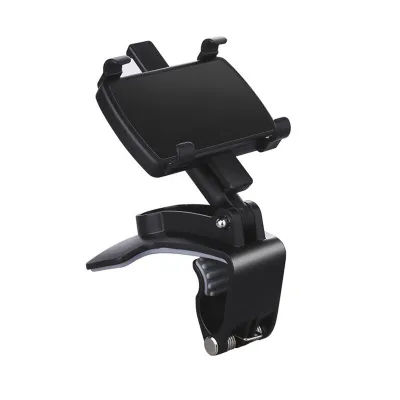
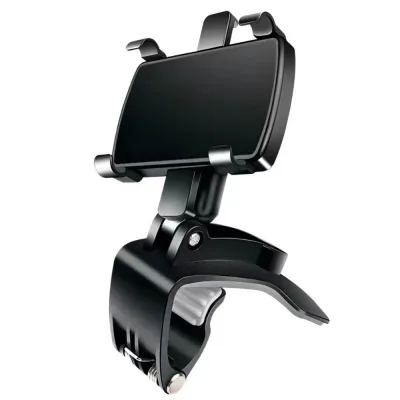
Prices are valid at publication and may change. Please refer to the product page for the latest price.
Seat rail clamps offer a more heavy-duty alternative for the front cabin or mid-row areas. These brackets attach directly to the metal tracks on the vehicle floor where the seats slide forward and backward. Often featuring rigid metal arms or flexible goosenecks, seat rail clamps are designed to support heavier equipment, such as tablets, navigation units, or professional mounting brackets. While highly stable, they require careful installation to ensure they do not obstruct the manual or electronic adjustment of the seat.
In the rear of the vehicle, trunk tie-down anchors serve as the primary mounting points for cargo organization. These brackets hook, bolt, or clamp directly into the factory-installed D-rings or cargo loops integrated into the vehicle’s trunk floor or side panels. Utilizing these pre-existing structural points allows you to mount heavy-duty cargo dividers, tool brackets, or luggage barriers that can withstand significant lateral forces during cornering.
Adhesive and suction-based bracket holders represent the most temporary and light-duty mounting options. These designs rely on vacuum suction cups or automotive-grade double-sided adhesives to adhere to smooth plastic panels, glass, or metal surfaces. While they require zero tools to install and can be repositioned easily, their weight capacity is limited, and their adhesive bond can degrade when exposed to high cabin temperatures. Consequently, they are best reserved for lightweight accessories and temporary storage needs.
Before purchasing any mounting style, it is essential to inspect your vehicle’s specific interior layout. Modern car designs vary widely, and features such as integrated headrests without exposed metal poles, covered seat rails, or carpeted trunk walls without factory tie-down points will immediately rule out certain bracket designs. Taking precise measurements of these interior interfaces beforehand prevents compatibility issues and ensures a secure installation.
Organizing the Seat Back: Passenger and Child Gear
When selecting a bracket holder for seat back organization, passenger comfort and cabin clearance must be your primary considerations. A poorly positioned bracket can restrict the reclining range of the front seats or severely limit the legroom of rear passengers, particularly in compact vehicles. To maintain a comfortable cabin environment, choose low-profile brackets that hold items flush against the seat back rather than protruding into the rear passenger space.

Material durability is another critical factor for seat back organizers, especially when carrying gear for children. Rear-facing brackets are frequently subjected to kicking, bumping, and the general wear of daily use. Brackets constructed from high-impact ABS plastic, fiber-reinforced polymers, or anodized aluminum alloys offer the necessary impact resistance. Additionally, look for designs with rounded edges and soft-molded outer shells to prevent scratches to your vehicle’s interior trim and reduce the risk of injury in the event of a sudden stop.
To accommodate the wide variation in vehicle seat designs, many manufacturers offer adjustable strap-and-bracket combinations. These systems combine a flexible, heavy-duty strap that wraps around the seat body with a rigid plastic or metal bracket holder. This hybrid design allows you to mount organizers on seats with non-standard headrest configurations or wider seat backs where traditional rigid clamps cannot reach. The strap provides vertical support, while the integrated bracket keeps the storage compartments open and accessible.
When mounting brackets to headrest poles, verify the distance between the two metal rods and their outer diameter. Standard headrest poles typically range from 10 to 14 millimeters in diameter, but spacing can vary significantly between vehicle manufacturers. Opt for bracket holders that include rubber sizing inserts or adjustable clamping arms, which allow you to achieve a tight, vibration-free fit on various pole dimensions without damaging the metal finish.
Managing the Trunk: Cargo and Utility Brackets
Trunk organization requires brackets capable of managing heavier loads and resisting the physical forces generated by vehicle movement. Adjustable divider brackets are highly effective for customizing your trunk space. These systems typically consist of vertical panels held in place by brackets that grip the trunk floor, allowing you to partition the cargo area to fit groceries, sports equipment, or luggage. Because they can be slid along a track or repositioned entirely, they offer excellent flexibility for changing cargo needs.
For securing heavy or bulky items, fixed tie-down anchor brackets are generally superior to adjustable dividers. These brackets provide a permanent, rigid point of attachment for heavy-duty straps, bungee cords, or cargo nets. By anchoring directly to the vehicle’s chassis or factory cargo loops, fixed brackets ensure that heavy toolboxes, emergency gear, or spare parts remain completely stationary, even during sudden maneuvers or emergency stops.
The material of your trunk floor dictates which bracket mounting style is compatible. Carpeted trunk floors are well-suited for brackets equipped with heavy-duty hook-and-loop (Velcro) backing, which grips the carpet fibers to prevent sliding without requiring permanent fasteners. However, if your vehicle is equipped with a hard plastic cargo liner or a rubberized all-weather mat, hook-and-loop brackets will not adhere. In these cases, you must select brackets that utilize mechanical clamps, weighted non-slip bases, or those designed to bolt directly into factory mounting holes.
Regardless of the design you choose, always verify the load-bearing limits printed on the product packaging before loading the bracket. Overloading a trunk bracket can lead to mechanical failure, causing the bracket to snap or detach under load. This can result in damaged cargo, broken interior trim, or loose items sliding freely in the trunk. For heavy utility items, prioritize metal brackets over plastic alternatives, and ensure the load is distributed evenly across multiple anchor points.
Safety, Compatibility, and Installation Boundaries
Safety must be the top priority when installing any aftermarket accessory inside a vehicle cabin. Rigid bracket holders must never be installed within the deployment zones of side-curtain airbags or seat-mounted side airbags. Consult your vehicle’s owner’s manual to locate the exact positions of all airbag modules. Placing a hard plastic or metal bracket in the path of a deploying airbag can prevent the safety system from functioning correctly or turn the bracket itself into a high-velocity projectile.
Furthermore, pay close attention to the design of your vehicle’s headrests before installing post-mounted brackets. Many modern vehicles are equipped with active headrest systems, which are designed to move forward automatically during a rear-end collision to minimize whiplash injuries. Clamping rigid brackets tightly around the poles of an active headrest can jam the internal mechanism, preventing it from deploying when needed. If your vehicle features active headrests, look for specialized, lightweight brackets approved by the manufacturer, or opt for seat back organizers that secure via straps around the seat body instead.
Before installing seat rail clamps, inspect the mounting area carefully. The metal tracks beneath your seats often house sensitive electrical wiring harnesses for seatbelt pretensioners, side airbags, occupancy sensors, and power seat motors. Ensure that any clamp you install does not pinch, rub, or strain these wires. If the installation of a heavy-duty bracket requires loosening or removing the structural bolts that secure the seat rails to the vehicle floor, consult a qualified professional to ensure the bolts are retorqued to the exact specifications outlined in your vehicle’s service manual.
For adhesive-based brackets, proper surface preparation is critical to prevent damage to your vehicle’s interior. Avoid applying strong adhesives to delicate materials such as genuine leather, soft-touch vinyl, or painted plastic trim, as the adhesive can cause permanent staining, peeling, or tearing when removed. Always clean the mounting surface with a mild, manufacturer-approved interior cleaner to remove dust and oils before application, and allow the adhesive to cure fully according to the product instructions before subjecting the bracket to any weight.
Building Your Bracket Holder Shortlist
To select the most effective bracket holder system for your vehicle, begin by mapping the specific items you need to organize to the most appropriate mounting style. For passenger entertainment and lightweight storage, a dual-pole headrest bracket holder with an adjustable ball-and-socket joint provides the versatility needed to hold tablets or small bags securely. For heavy utility gear, tools, or emergency equipment in the trunk, prioritize metal brackets that interface directly with your vehicle’s factory D-ring tie-down points.
When comparing different bracket designs, prioritize models that offer adjustable arms, modular attachments, or quick-release mechanisms. A modular bracket system allows you to swap out a tablet holder for a utility hook or a storage bin as your daily needs change, providing better long-term value. Quick-release designs are also highly beneficial, allowing you to remove the bracket quickly when you need to fold the seats down or maximize cargo space for larger loads.
Because vehicle interior dimensions, seat contours, and trim materials vary significantly across different makes and model years, there is no single bracket design that fits every car perfectly. Before finalizing your purchase, verify the retailer’s return policy and fitment guarantees. When your new bracket holder arrives, perform a gentle test fit to ensure it clears all seat adjustment paths, does not interfere with passenger comfort, and mounts securely without scratching your vehicle’s upholstery.
Frequently Asked Questions (FAQ)
Can bracket holders damage leather car seats?
Yes, bracket holders can damage leather car seats if they are installed incorrectly or lack proper protective padding. Hard plastic or metal clamps tightened directly against leather upholstery can create permanent pressure marks, creases, or tears in the material. Additionally, the natural vibration of the vehicle during travel can cause unpadded brackets to rub against the leather, wearing away the protective topcoat and color.
To prevent this damage, select bracket holders that feature integrated silicone padding, rubber sleeves, or soft foam contact points. If a bracket does not include padding, you can place a small piece of microfiber cloth or a felt adhesive pad between the bracket and the leather surface. Periodically removing the bracket to clean the area is also recommended, as dust and road grit can accumulate beneath the clamp and act as an abrasive when the vehicle is in motion.
How do I clean and maintain trunk bracket anchors?
Maintaining trunk bracket anchors is straightforward but essential for ensuring their long-term reliability and safety. Over time, dust, dirt, and moisture can accumulate in the moving joints of adjustable brackets or around the factory tie-down points. To clean these components, wipe them down with a damp microfiber cloth using a mild, pH-neutral interior cleaner. Avoid using harsh chemical solvents or abrasive scrubbers, which can degrade plastic coatings or strip protective paint from metal brackets.
In humid climates, metal brackets and factory tie-down loops should be inspected periodically for signs of rust or corrosion. If you notice any surface rust, clean the area gently and apply a thin layer of silicone lubricant to protect the metal. Finally, regularly inspect all plastic components of your trunk brackets for stress cracks, discoloration, or warping, especially after hauling heavy loads or exposing the vehicle to high summer temperatures. Replace any bracket that shows signs of structural fatigue immediately to prevent failure while driving.
Community discussion
Share your experience or ask a question. Comments are reviewed before publication.