
Selecting the right obu bracket is essential for ensuring your vehicle’s On-Board Unit remains securely mounted and fully functional throughout your daily commutes. In Singapore, where extreme cabin temperatures and varying road conditions test the limits of interior accessories, a poorly matched mount can quickly lead to a detached device, driver distractions, or even permanent damage to your dashboard. The ideal mounting style—whether an adhesive pad, a suction cup, or a mechanical clip-on—depends entirely on the specific material, texture, and physical curvature of your dashboard surface.
Before purchasing any aftermarket mounting solution, it is vital to understand how these different bracket designs interact with your car’s interior materials. Dashboards are not uniform; they are engineered from a wide range of plastics, composites, and soft coverings, each reacting differently to physical pressure, chemical cleaners, and thermal stress. By taking the time to analyze your vehicle’s specific layout and material composition, you can select an option that guarantees both structural stability and long-term protection for your cabin.
Assessing Your Dashboard Material and Curvature
To make an informed decision, you must first identify the exact material covering your dashboard. Modern vehicles typically feature one of three primary surface types: hard injection-molded plastics, soft-touch slush-molded polyurethane, or premium wraps made of natural leather or synthetic vinyl. Hard plastics, commonly found in budget-friendly vehicles or lower dashboard sections, offer a rigid, non-porous surface that provides excellent structural support for various mounts. Soft-touch materials, designed to mimic the premium feel of leather, are more delicate and can easily stretch, discolor, or tear under localized stress. Natural leather and vinyl wraps are the most sensitive, requiring specialized care to avoid permanent indentation or chemical stripping of their protective topcoats.
Products mentioned in this guide
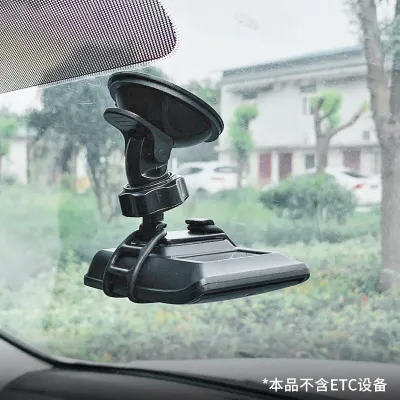
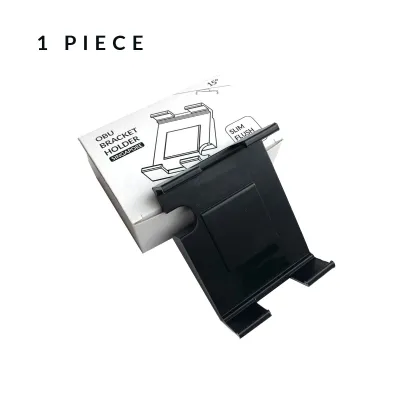
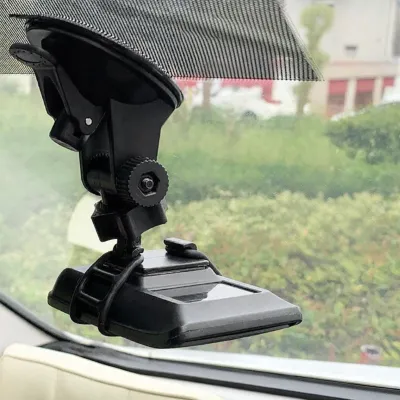
![[SG] YAMAHA Motorcycle OBU Fuel Tank Mount Bracket](https://img.lazcdn.com/g/p/45082a07801a979ba9f5d5fb81243fb6.jpg_400x400q80.jpg_.webp)
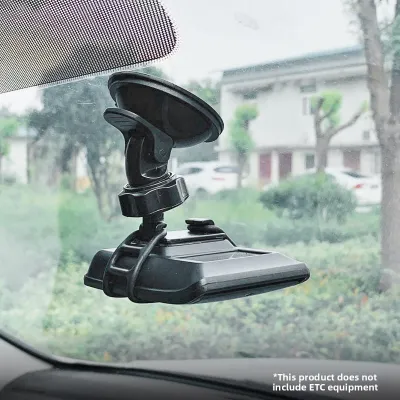
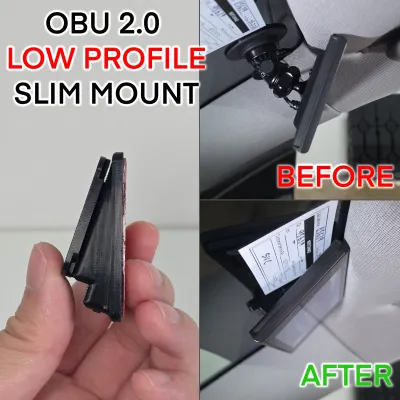
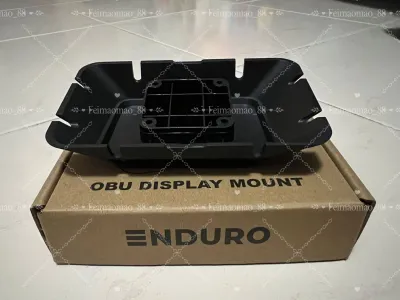
Prices are valid at publication and may change. Please refer to the product page for the latest price.
Next, evaluate the physical texture of the surface by both sight and touch. Run your fingertips across the intended mounting zone to determine whether it is perfectly smooth, matte, or heavily grained. Textured surfaces, such as those with a pebbled or leather-like grain, contain microscopic valleys and ridges. While these textures reduce glare and improve aesthetics, they significantly reduce the effective contact area for adhesives and prevent suction cups from forming an airtight seal. If your dashboard has a pronounced grain, standard flat mounts will struggle to maintain a secure hold.
Curvature is another critical factor that dictates the footprint of your mounting base. Dashboards are rarely perfectly flat; they consist of complex geometries, including gentle slopes, steep curves, and localized flat zones. A rigid, flat mounting plate placed on a curved surface will only make contact at its outer edges or center point, creating high-stress concentration areas and leaving gaps that invite peeling. You must measure the available flat surface area and compare it to the base dimensions of the bracket to ensure a flush, uniform fit.
Finally, consider the harsh environmental conditions inside a car parked in Singapore. The tropical climate means vehicles left in open-air car parks are subjected to intense solar radiation, pushing cabin temperatures well above 60 degrees Celsius. This extreme heat causes materials to expand at different rates and can cause the chemical bonds in adhesives to soften and fail. Understanding how your dashboard material and mounting adhesive respond to these thermal cycles is key to preventing your device from falling mid-journey. Always refer to your vehicle’s owner manual for specific warnings regarding dashboard weight limits and material care.
Adhesive Pad Mounts: Best OBU Bracket for Flat, Hard Surfaces
For many drivers, an adhesive pad obu bracket represents the most stable and low-profile mounting solution available. These brackets rely on high-performance double-sided tapes, such as acrylic-based Very High Bond (VHB) adhesives, which are engineered to distribute stress evenly across the entire contact surface. When applied correctly to a compatible surface, these adhesives flow into the microscopic pores of the material, creating a powerful viscoelastic bond that resists vibrations, bumps, and sudden braking.

The ideal surface for an adhesive mount is a flat, hard, untextured plastic panel. These areas do not flex under the weight of the OBU, ensuring that the adhesive tape remains under uniform tension. Furthermore, hard plastics are generally free of the plasticizers often found in soft-touch materials, which can migrate over time and degrade the adhesive bond. Avoid applying adhesive mounts to areas treated with anti-glare coatings, aftermarket dashboard polishes, or silicone-based protectants, as these substances form a barrier that prevents the adhesive from wetting the surface properly.
Despite their strength, adhesive mounts face significant challenges in high-temperature environments. Under the intense Singapore sun, the acrylic polymers within the adhesive tape can soften, reducing their shear strength and causing the mount to sag, slide, or detach completely. Additionally, if applied to delicate soft-touch plastics or leather wraps, the strong bond can cause severe issues. Upon removal, the adhesive can pull away the topcoat, tear the vinyl, or leave deeply embedded chemical residues that are nearly impossible to clean without damaging the underlying material.
To ensure a successful and durable installation, always follow a strict pre-installation checklist. First, consult your vehicle’s care guidelines to verify which cleaning agents are safe for your dashboard. Clean the targeted area thoroughly with a mild soap solution, followed by a light wipe with isopropyl alcohol to remove oils and grease, ensuring you test a hidden area first to check for discoloration. Once the surface is completely dry, peel the adhesive backing, position the bracket precisely, and apply firm, even pressure across the entire base for at least 30 seconds. For the strongest bond, allow the adhesive to cure undisturbed for 24 to 72 hours before attaching the weight of the OBU.
Suction Cup Mounts: Best for Glass and Smooth Panels
Suction cup brackets offer a highly flexible, non-permanent mounting option that can be easily adjusted or transferred between vehicles. These mounts operate on the physical principle of atmospheric pressure: when the cup is pressed against a surface and the locking lever is engaged, a partial vacuum is created inside the chamber, allowing the external air pressure to hold the mount firmly in place. This mechanism makes them incredibly convenient for drivers who prefer not to commit to a fixed adhesive position.
The primary requirement for a suction cup mount is an exceptionally smooth, non-porous surface. Windshields are the most common and reliable mounting locations, as glass provides a perfect, impermeable barrier that maintains the vacuum seal indefinitely. Some vehicles also feature highly polished, glossy acrylic or carbon-fiber trim panels on the dashboard that can support a suction cup. However, standard rigid suction cups will fail almost immediately on any surface with even a minor curve or texture, as air will slowly seep into the vacuum chamber and cause the mount to drop.
To overcome minor surface imperfections and gentle dashboard curves, some manufacturers offer gel-based suction cups. These mounts feature a soft, sticky polyurethane gel layer on the rim of the suction cup, which physically conforms to shallow textures and slight curves to seal out air. While gel cups are far more versatile than rigid rubber ones, they are still highly vulnerable to the extreme heat common in Singapore. As the air trapped inside the small vacuum chamber heats up, it expands, increasing the internal pressure and neutralizing the vacuum effect, which often leads to sudden detachment during hot afternoons.
When using a suction cup mount on your windshield, you must carefully consider local safety and legal regulations. The Land Transport Authority (LTA) in Singapore mandates that any device mounted on the windshield must not obstruct the driver’s clear view of the road or interfere with the operation of safety equipment. Ensure the bracket and OBU are positioned away from your direct line of sight and completely clear of the deployment zones for your vehicle’s front and side-curtain airbags. Always consult your vehicle’s manual to locate these safety zones before finalizing your mount position.
Clip-On and Visor Mounts: Best for Textured or Soft Dashboards
When your vehicle’s dashboard is heavily textured, wrapped in delicate leather, or features complex curves that rule out adhesives and suction cups, mechanical clip-on mounts provide an excellent alternative. These brackets do not rely on surface adhesion or vacuum seals; instead, they use physical tension to clamp onto existing interior structures, such as the sun visor or air vent louvers. This design completely eliminates the risk of surface discoloration, adhesive residue, or material tearing.
Visor-mounted brackets are a highly popular choice for securing the OBU without cluttering the dashboard. These clips slide firmly over the passenger-side or driver-side sun visor, holding the unit securely against the headliner. When installing a visor mount, ensure the clip is robust and fits snugly around the visor’s thickness to prevent it from sliding or vibrating loose. It is also important to position the bracket so that it does not block the vanity mirror or its integrated lighting, and to verify that the visor can still be fully deployed without the OBU striking the windshield or becoming a physical hazard in the event of a sudden stop.
Air vent clip-on mounts represent another mechanical alternative, utilizing spring-loaded clamps to grip the horizontal or vertical slats of your vehicle’s climate control vents. While convenient, vent mounts require careful evaluation of your vehicle’s vent design. The weight of the OBU, combined with the leverage of the bracket, can place significant mechanical stress on fragile plastic louvers, potentially causing them to crack or sag over time. Additionally, mounting the unit directly in front of a vent will partially block cabin airflow and expose the OBU’s sensitive internal electronics to constant streams of cold air, which can lead to localized condensation in humid climates.
Regardless of which mechanical option you choose, you must verify that the alternative mounting position does not interfere with signal reception. The OBU must maintain an unobstructed path to communicate reliably with overhead ERP gantries. Visor mounts, in particular, must be positioned so that the unit’s antenna is oriented correctly through the windshield. Testing the unit’s signal strength and ensuring it is not shielded by the vehicle’s metal roof frame or heavy windshield tinting is crucial to avoid missed transactions and subsequent fines.
Quick Comparison: Matching Bracket Types to Dashboard Profiles
To help you quickly identify the most suitable mounting mechanism for your car’s interior, the following table summarizes how each bracket type performs across various dashboard materials, shapes, and environmental conditions.
| Bracket Type | Best Dashboard Material | Curvature Tolerance | Heat Resistance | Key Limitation |
|---|---|---|---|---|
| Adhesive Pad | Hard, untextured plastics | Very low (requires flat surface) | Moderate (adhesive can soften in high heat) | Can damage leather or soft-touch coatings upon removal |
| Suction Cup (Standard) | Windshield glass, glossy acrylic | None (requires perfectly flat, smooth surface) | Low (air expansion breaks vacuum seal) | Cannot adhere to textured or curved dashboard panels |
| Suction Cup (Gel-Based) | Smooth to lightly textured plastics | Low to moderate (conforms to gentle curves) | Moderate (gel can degrade or leave oily residue) | Vulnerable to sudden failure under direct, intense sunlight |
| Clip-On (Sun Visor) | Fabric or leather-wrapped sun visors | High (independent of dashboard shape) | High (not reliant on chemical adhesives) | May block vanity mirrors; requires correct antenna orientation |
| Clip-On (Air Vent) | Rigid plastic vent louvers | High (independent of dashboard shape) | High (not reliant on chemical adhesives) | Can strain fragile vent slats and block cabin climate control airflow |
Installation and Maintenance Tips for Secure OBU Mounting
Achieving a secure and damage-free installation requires careful attention to detail during both the initial setup and long-term maintenance. Proper surface preparation is the foundation of any successful mount. Before applying any adhesive or suction cup, clean the dashboard surface using a mild, automotive-safe detergent and warm water to remove dust and surface oils. Avoid using aggressive household cleaners, glass sprays containing ammonia, or heavy-duty degreasers, as these chemicals can strip the dashboard’s built-in UV-protective coatings or dry out leather conditioners. If you use isopropyl alcohol for a final prep step, dilute it to a 70% concentration, apply it sparingly to a microfiber cloth rather than directly to the dashboard, and always test it on an inconspicuous area first.
When positioning your bracket, pay close attention to weight distribution and the physical leverage exerted by the OBU. The surface area of the bracket’s base must be fully proportional to the weight and center of gravity of the device. If the mount features an adjustable arm or extension, keeping the arm as short and vertical as possible will minimize the rotational force (torque) acting on the adhesive or suction pad. A long, horizontal extension increases vibration during travel, which accelerates adhesive fatigue and can cause the mount to peel away prematurely.
Given Singapore’s intense daily heat, routine maintenance checks are essential to prevent unexpected equipment failure. Make it a habit to inspect your OBU bracket every few weeks, particularly after your car has been parked in direct sunlight for an extended period. Gently wiggle the bracket to check for any play, sliding, or lifting at the edges of the adhesive or suction pad. If you notice any softening of the adhesive gel or a loss of suction pressure, remove the mount immediately to clean and re-secure it before it detaches completely while you are driving.
When the time comes to remove or replace an adhesive mount, rushing the process can easily tear soft-touch plastics or lift leather wraps. To safely release the bond, slide a piece of high-strength dental floss or thin fishing line beneath the adhesive pad, using a gentle sawing motion to slice through the foam core of the tape. You can apply mild, localized heat using a handheld hairdryer on its lowest setting to soften the adhesive, but exercise extreme caution to avoid overheating and warping delicate plastic panels. Once the bracket is free, clean any remaining residue using an automotive-safe adhesive remover, following the product’s instructions precisely, or consult a professional automotive detailer if the surface feels compromised or delicate.
Frequently Asked Questions (FAQ)
Can I mount the OBU directly on a leather or soft-touch dashboard?
Using strong adhesive mounts directly on natural leather, synthetic leather, or soft-touch slush-molded dashboards is highly discouraged. The high-performance adhesives required to hold the weight of an OBU form an incredibly tight bond that can chemically fuse with the delicate topcoats of these materials. Upon removal, the adhesive will almost certainly peel away the outer layer of leather, tear the vinyl wrap, or leave permanent, unsightly indentations. For these premium interiors, mechanical solutions like sun visor clips or specialized vent mounts are highly recommended to preserve the value and appearance of your cabin.
Will mounting the OBU on the sun visor affect its signal reception?
Mounting your OBU on the sun visor can be highly effective, but it requires careful positioning to ensure uninterrupted communication with ERP gantries. The unit’s internal antenna must have a clear, unobstructed line of sight through the windshield to transmit and receive signals properly. When placing the OBU on the visor, ensure the antenna side faces forward and is not shielded by the metallic frame of your car’s roof, heavy upper-windshield tinting strips, or metallic solar films. It is highly recommended to test the signal reliability at a low-speed ERP gantry or refer to official guidelines before relying on a visor-mounted setup for daily travel.
How do I safely remove adhesive residue from my dashboard?
To remove stubborn adhesive residue without damaging your vehicle’s interior, always start with the gentlest method possible. Soak a clean microfiber cloth in warm, soapy water and hold it against the residue for several minutes to soften the adhesive, then gently rub the area in a circular motion. If the residue persists, apply a small amount of a specialized, automotive-safe adhesive remover that is explicitly labeled as safe for interior plastics and vinyl. Never use harsh household solvents such as acetone, nail polish remover, paint thinners, or mineral spirits, as these aggressive chemicals will instantly melt plastics, dissolve protective UV coatings, and cause permanent discoloration.
Community discussion
Share your experience or ask a question. Comments are reviewed before publication.