
A car scratch can be incredibly frustrating, but you do not always need to visit a professional paint shop to fix it. Adding a high-quality car scratch remover to your home detailing kit allows you to address minor paint defects, swirl marks, and surface scuffs right in your driveway or multi-story car park. The key to success lies in matching the correct abrasive grade to the specific depth of the damage while protecting your vehicle’s clear coat.
Selecting the right product requires understanding how automotive paint works and how different formulations interact with your car’s exterior. By evaluating your paint’s condition and choosing a compatible compound, you can safely restore your vehicle’s gloss and prevent long-term environmental damage. Always consult your vehicle’s care guidelines and the product label before starting any paint correction work.
Understanding Car Scratches: What Can a Remover Actually Fix?
Before applying any product to your car’s paintwork, you must understand the structure of modern automotive finishes. Most modern vehicles feature a multi-stage paint system consisting of a primer coat applied directly to the metal panel, a base coat that provides the color, and a protective clear coat on top. The clear coat is a transparent layer designed to shield the paint from ultraviolet rays, oxidation, and minor physical impacts. Scratch removers are engineered to work exclusively within this clear coat layer.
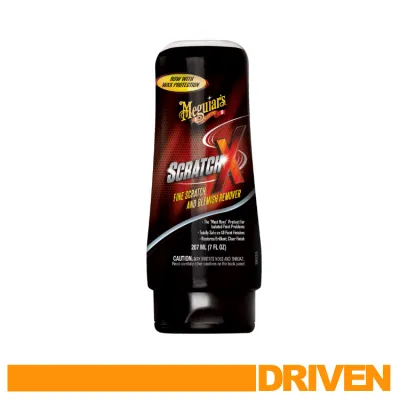
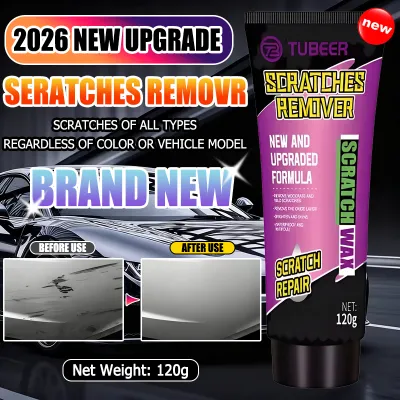
Products mentioned in this guide
![[✅SG Ready Stock]Scratch Repair Agent Car Scratch Repair Kits Auto Body Compound Polishing Grinding Paste Paint Care Set](https://img.lazcdn.com/g/p/5057f9aaa5d5393846945cd553d44d3d.png_400x400q80.png_.webp)
Prices are valid at publication and may change. Please refer to the product page for the latest price.
The Fingernail Test
The most reliable DIY method to assess scratch depth is the fingernail test. Gently run your fingernail across the scratch at a 90-degree angle. If your nail glides smoothly over the defect without catching, the scratch is shallow and confined to the upper clear coat. If your fingernail catches, drops into a groove, or feels a distinct ridge, the scratch has penetrated deeper into the base coat or primer.
Clear Coat Scratches
Shallow imperfections that do not catch your fingernail are prime candidates for home correction. These include swirl marks, which are microscopic circular scratches typically caused by improper washing techniques or automatic car washes. Light scuffs from brushed foliage, fingernail marks around door handles, and etched water spots from dried mineral deposits can also be safely leveled and polished out using consumer-grade abrasive removers.
Deep Scratches
When a scratch exposes the base coat, primer, or bare metal, standard scratch removers cannot fix the issue. Polishing these areas will only thin the surrounding clear coat without resolving the underlying paint loss. Deep scratches require touch-up paint, clear coat reconstruction, or professional respraying to prevent moisture from reaching the metal panel and causing rust. Attempting to buff out a deep scratch with aggressive abrasives will inevitably lead to clear coat failure.
Expectation Management
It is vital to understand that scratch removers do not act as filler materials that plug a scratch. Instead, these products contain fine abrasives that act like liquid sandpaper, microscopically leveling the surrounding clear coat until it matches the depth of the lowest point of the scratch. This process removes a tiny fraction of your clear coat to restore a flat, highly reflective surface that allows light to bounce off evenly, making the scratch disappear.
Key Criteria for Choosing a Scratch Remover for Home Use
Building an effective home detailing kit requires selecting products that balance corrective power with safety. Because clear coat is thin—often measuring only 35 to 50 microns—using the wrong product can easily cause irreversible damage. Consider these primary technical dimensions when evaluating scratch removers for your toolkit.

Abrasiveness Level
Scratch removers span a wide spectrum of abrasiveness, from heavy-cut rubbing compounds to ultra-fine finishing polishes. Heavy-cut compounds are designed to rapidly level deep clear coat defects and severe oxidation, but they leave behind a hazy finish that requires secondary polishing. Fine polishes use milder abrasives to gently sweep away light swirls and restore maximum gloss. For a home kit, having at least one medium-cut compound and one fine polish provides the versatility needed to tackle various paint defects safely.
Ease of Application
Professional detailers rely on high-speed rotary or dual-action machine polishers to work compounds into the paint. However, most home enthusiasts work by hand. When choosing a scratch remover, verify that the formulation is explicitly optimized for hand application. Hand-applied formulas are engineered to break down and perform effectively under the lower friction and heat generated by manual pressure, ensuring you can achieve a clear finish without specialized power tools.
Clear Coat Safety
Modern scratch removers often utilize diminishing abrasive technology. Diminishing abrasives are microscopic particles that start as sharp, aggressive cutting agents but break down into progressively smaller, rounded polishing agents as you work them into the paint. This technology is highly recommended for home detailing because it naturally limits the aggressiveness of the product, reducing the risk of accidentally burning through the clear coat or leaving heavy buffer trails on your paintwork.
Climate and Storage Considerations
In Singapore’s hot and humid tropical climate, chemical behavior changes rapidly. High ambient temperatures cause the solvents in scratch removers to dry out or “flash” too quickly when applied to a car’s body panels. This rapid drying leads to heavy dusting, loss of lubrication, and an increased risk of scratching the paint during buffing. Look for formulations with extended working times or those labeled as low-dusting. Additionally, store your detailing products in a cool, dry place away from direct sunlight; extreme heat in storage can cause the chemical emulsions to separate, rendering the product useless.
Best Types of Scratch Removers to Include in Your Kit
A versatile home detailing kit should not rely on a single product. Different paint defects require different chemical and mechanical properties. Equipping your kit with a few distinct types of scratch removers ensures you are prepared for any minor paint correction task.
Rubbing Compounds (Heavy Cut)
Rubbing compounds are the most aggressive liquid abrasives in a detailer’s arsenal. They are formulated to address deep clear coat scratches, heavy oxidation, and severe surface etching.
- When to Use: Use rubbing compounds only when a scratch is clearly visible but passes the fingernail test, or when paint has become dull and oxidized from prolonged sun exposure.
- Risks: Because they cut quickly, overusing a rubbing compound can easily strip away too much clear coat, especially on modern vehicles with thin factory paint.
- Mandatory Step: A rubbing compound will always leave a slightly hazy or dull finish. You must follow up with a fine polishing compound to restore the paint's deep gloss and clarity.
Polishing Compounds (Fine Cut / Swirl Removers)
Polishing compounds are milder abrasives designed to refine the paint surface and remove minor imperfections.
- When to Use: These are the safest and most frequently used products for routine paint maintenance. They are ideal for removing light swirl marks, holograms, and micro-marring left behind after claying or washing.
- Benefits: Fine polishes are highly forgiving, making them perfect for beginners. They remove a negligible amount of clear coat while maximizing light reflection and depth of color.
- Application: Can be used periodically across the entire vehicle to maintain a mirror-like finish without compromising the integrity of the clear coat.
Scratch Repair Pens and Clear Coat Pens
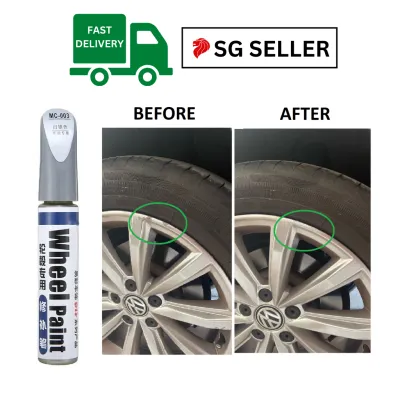
Scratch repair pens take a completely different approach to paint correction. Instead of leveling the surrounding paint, they deposit a wet, clear acrylic resin directly into the scratch valley.
- How They Work: The clear resin fills the void, bonding with the existing clear coat and curing to create a flat surface. This helps seal the paint and protect the underlying layers from moisture.
- Limitations: These pens are designed for very narrow, isolated scratches or tiny rock chips. They do not work on broad scuffs or swirl marks.
- Application Tips: Precision is critical. Overfilling the scratch can leave an unsightly, raised ridge of cured resin that requires wet sanding to flatten. Always apply in thin, controlled layers.
- Safety Check: Ensure the pen is compatible with your vehicle's paint type. Matte or satin finishes must never be treated with gloss-inducing resin pens.
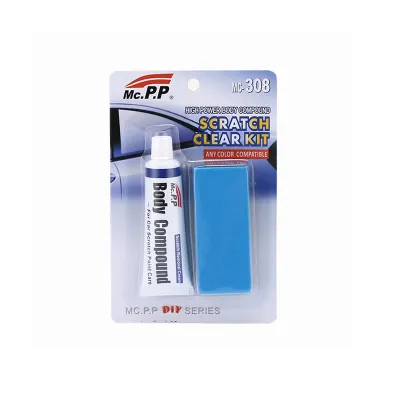
All-in-One Scratch and Swirl Kits
For beginners who do not want to source individual components, all-in-one scratch removal kits offer a convenient and cost-effective entry point.
- What They Contain: These retail kits typically package a bottle of medium-cut scratch remover compound with a specialized foam applicator pad and a microfiber buffing towel.
- Pros: They eliminate guesswork by pairing the chemical compound with an applicator of compatible density, ensuring optimal cutting power for hand use.
- Cons: While highly convenient, they may lack the specialized performance of standalone, professional-grade liquids and are generally designed for localized spot correction rather than full-vehicle refinement.
Step-by-Step: How to Safely Apply Scratch Removers at Home
Paint correction is a mechanical process that requires patience, clean tools, and a structured workflow. Rushing the process or skipping preparation steps can easily introduce new, deeper scratches to your vehicle’s finish. Follow this safe, step-by-step guide for hand application.
1. Preparation and Decontamination
Never attempt to polish a dirty car. Even microscopic dust particles trapped under your applicator pad will act like coarse sandpaper, grinding deep swirls into your clear coat. Wash the vehicle thoroughly using a dedicated car shampoo and the two-bucket method. Dry the panel completely with a clean microfiber drying towel. For the best results, use a detailing clay bar with a dedicated clay lubricant over the scratched area to pull out embedded metallic fallout, road tar, and tree sap, leaving the surface perfectly smooth.
2. Testing and Label Verification
Before applying the product to a prominent area, read the manufacturer’s label carefully. Check for specific warnings regarding paint types, dwell times, and application temperatures. Always perform a test spot on an inconspicuous area of the vehicle, such as the lower bumper or inside the door jamb. This test confirms that the compound is compatible with your paint and allows you to gauge how much pressure is required to achieve the desired correction.
3. Application Technique
Apply a small, nickel-sized drop of the scratch remover onto a clean foam applicator pad or a high-quality microfiber towel. Do not apply the product directly to the car’s paint. Work in small, manageable sections of about 2×2 feet at a time. Pressing firmly but evenly, work the product into the paint using an overlapping cross-hatch pattern—moving first in straight vertical lines, then in horizontal lines. Avoid rubbing in circular motions, as this can create uneven pressure points and circular marring.
4. Inspection
Once the compound begins to turn translucent or thin out, stop rubbing. Use a clean, dry microfiber towel to gently buff away the remaining residue. Inspect the results carefully. Because ambient garage lighting can hide defects, use a bright LED inspection light or a smartphone flashlight angled at 45 degrees to examine the paint. View the panel from multiple angles to ensure the scratch has been successfully leveled.
5. Post-Application Protection
Abrasive scratch removers are designed to strip away everything on the paint surface, including existing waxes, polymer sealants, and ceramic coatings. This leaves the freshly polished clear coat completely exposed to environmental hazards. Once you are satisfied with the scratch removal, you must apply a fresh layer of protection. Apply a high-quality carnauba wax, synthetic paint sealant, or ceramic spray coating to seal the surface, lock in the gloss, and protect the paint from UV damage and contaminants.
Common Mistakes to Avoid When Fixing Scratches
DIY paint correction is highly rewarding, but minor mistakes can quickly escalate into expensive body shop repairs. Avoid these common pitfalls to keep your vehicle’s paint safe.
- Using Overly Aggressive Compounds First: Always practice the rule of least aggressive method first. Start with a fine polish. If that fails to remove the scratch, only then step up to a heavier rubbing compound. Starting with a heavy-cut compound on a light swirl mark unnecessarily strips away precious clear coat.
- Working in Direct Sunlight: Applying scratch removers on hot body panels under intense sunlight causes the solvents to evaporate instantly. The product will bake onto the paint, making it extremely difficult to buff off and increasing the risk of paint marring. Always work in a shaded area, a garage, or during the cooler early morning or evening hours.
- Skipping Decontamination: Skipping the clay bar step leaves bonded contaminants on the paint. As you polish, these hard particles detach and get trapped under your applicator, creating a web of fresh scratches across the panel.
- Chasing Deep Scratches: Accept the physical limits of your clear coat. If a scratch remains visible after two or three moderate passes with a compound, do not keep polishing. Continuing to grind down the paint will eventually wear through the clear coat entirely, exposing the base coat and requiring a professional respray.
Frequently Asked Questions (FAQ)
Can I use toothpaste to remove car scratches?
No, you should avoid using toothpaste to remove car scratches. While toothpaste contains mild abrasives designed to clean teeth, it is not formulated for automotive paint systems. Toothpaste lacks the specialized lubricants, carrier solvents, and diminishing abrasive technology found in dedicated car polishes. Using it on your car’s clear coat can easily leave behind uneven micro-marring, dull spots, and a hazy finish. Furthermore, toothpaste residues can dry hard inside panel gaps and trim crevices, making them difficult to clean. For safe and predictable results, always use purpose-built automotive scratch removers.
Community discussion
Share your experience or ask a question. Comments are reviewed before publication.